
How to setup Whisper on Windows with WSL
This guide demonstrates how to set up a local Whisper speech recognition server on Windows using the Windows Subsystem for Linux (WSL). You will learn how to install Ubuntu on WSL, set up the required dependencies, start the Whisper server, to use it for speech-to-text transcription.

Why do we need WSL for running Whisper on Windows?
Some Whisper backends and GPU acceleration tools are built and tested against Linux first, so installing them directly on Windows can mean missing packages, broken CUDA support, or workarounds that don't quite match the official instructions. WSL solves this by running a real Ubuntu environment directly inside Windows, so you get native Linux package availability and GPU passthrough for NVIDIA cards, without needing a separate physical machine or a full virtual machine to manage. You still get all the benefits of running Whisper locally, just with a Linux environment that behaves the way the underlying tools expect.

What is Whisper?
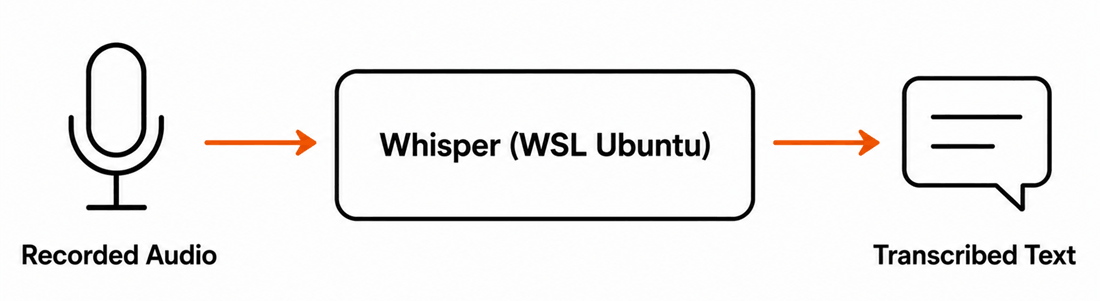
Whisper is an open-source speech recognition model developed by OpenAI, trained to convert spoken audio into written text. In this setup, it runs inside a WSL Ubuntu environment using the faster-whisper backend via agent-cli, which exposes an OpenAI-compatible endpoint from within that Linux environment, reachable from the Windows side of the same machine. This lets you send audio to the local server and receive transcribed text in response, with the Linux-native tooling faster-whisper expects and the convenience of never leaving your Windows desktop.
How does Whisper on Windows WSL work?
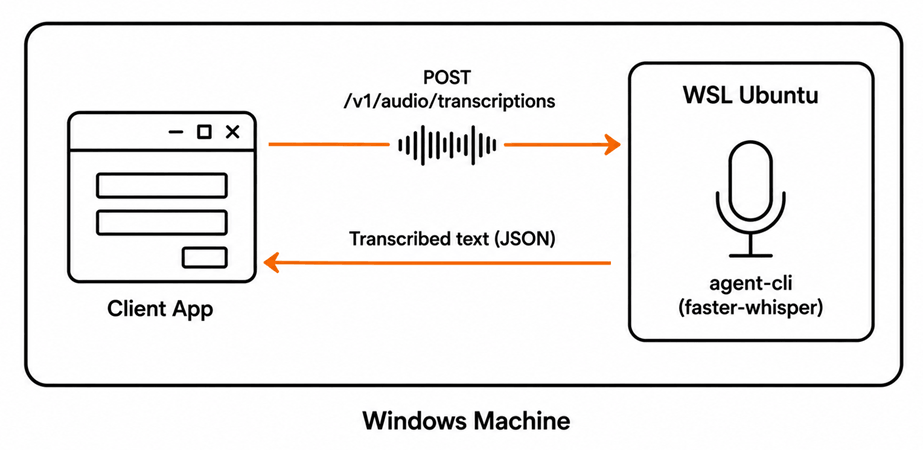
WSL runs an Ubuntu Linux kernel and filesystem alongside Windows on the same
machine, sharing its networking so services started inside WSL are reachable from
Windows. Inside the Ubuntu environment, agent-cli starts a server that loads
faster-whisper into memory and exposes a /v1/audio/transcriptions
endpoint, the same request shape OpenAI's own transcription API expects. A client on
the Windows side sends a POST request with an audio file attached as multipart
form-data to that endpoint, and agent-cli returns the resulting transcription as a
JSON response.
Steps to follow
Before proceeding, make sure WSL is enabled on your system. Python, FFmpeg, and pip will be installed inside the WSL Ubuntu environment during the setup process.
- Open a terminal window
- Install WSL with Ubuntu
- Update Ubuntu packages
- Install required packages
- Set up the Python virtual environment
- Install agent-cli with faster-whisper
- Start the Whisper server
- Send audio to Whisper from Postman
Quick reference commands
# Install WSL with Ubuntu
wsl --install -d Ubuntu

# Update and upgrade Ubuntu packages
sudo apt update && sudo apt upgrade -y

# Install Python, FFmpeg, venv and CUDA toolkit for Nvidia GPUs
sudo apt install python3 python3-pip ffmpeg python3.12-venv nvidia-cuda-toolkit -y

# Create a Python virtual environment
python3 -m venv whisper-env

# Activate the virtual environment
source whisper-env/bin/activate

# Install agent-cli with the faster-whisper backend
pip install "agent-cli[faster-whisper]"

# Start the Whisper server using the small model
agent-cli server whisper --model small
How to set up and run Whisper on Windows WSL (video)
The following video shows how to set up and run the Whisper speech recognition server on Windows using WSL step-by-step. The video covers installing Ubuntu on WSL, setting up the Python environment, installing agent-cli, and starting the server.
Step 1 - Open a terminal window
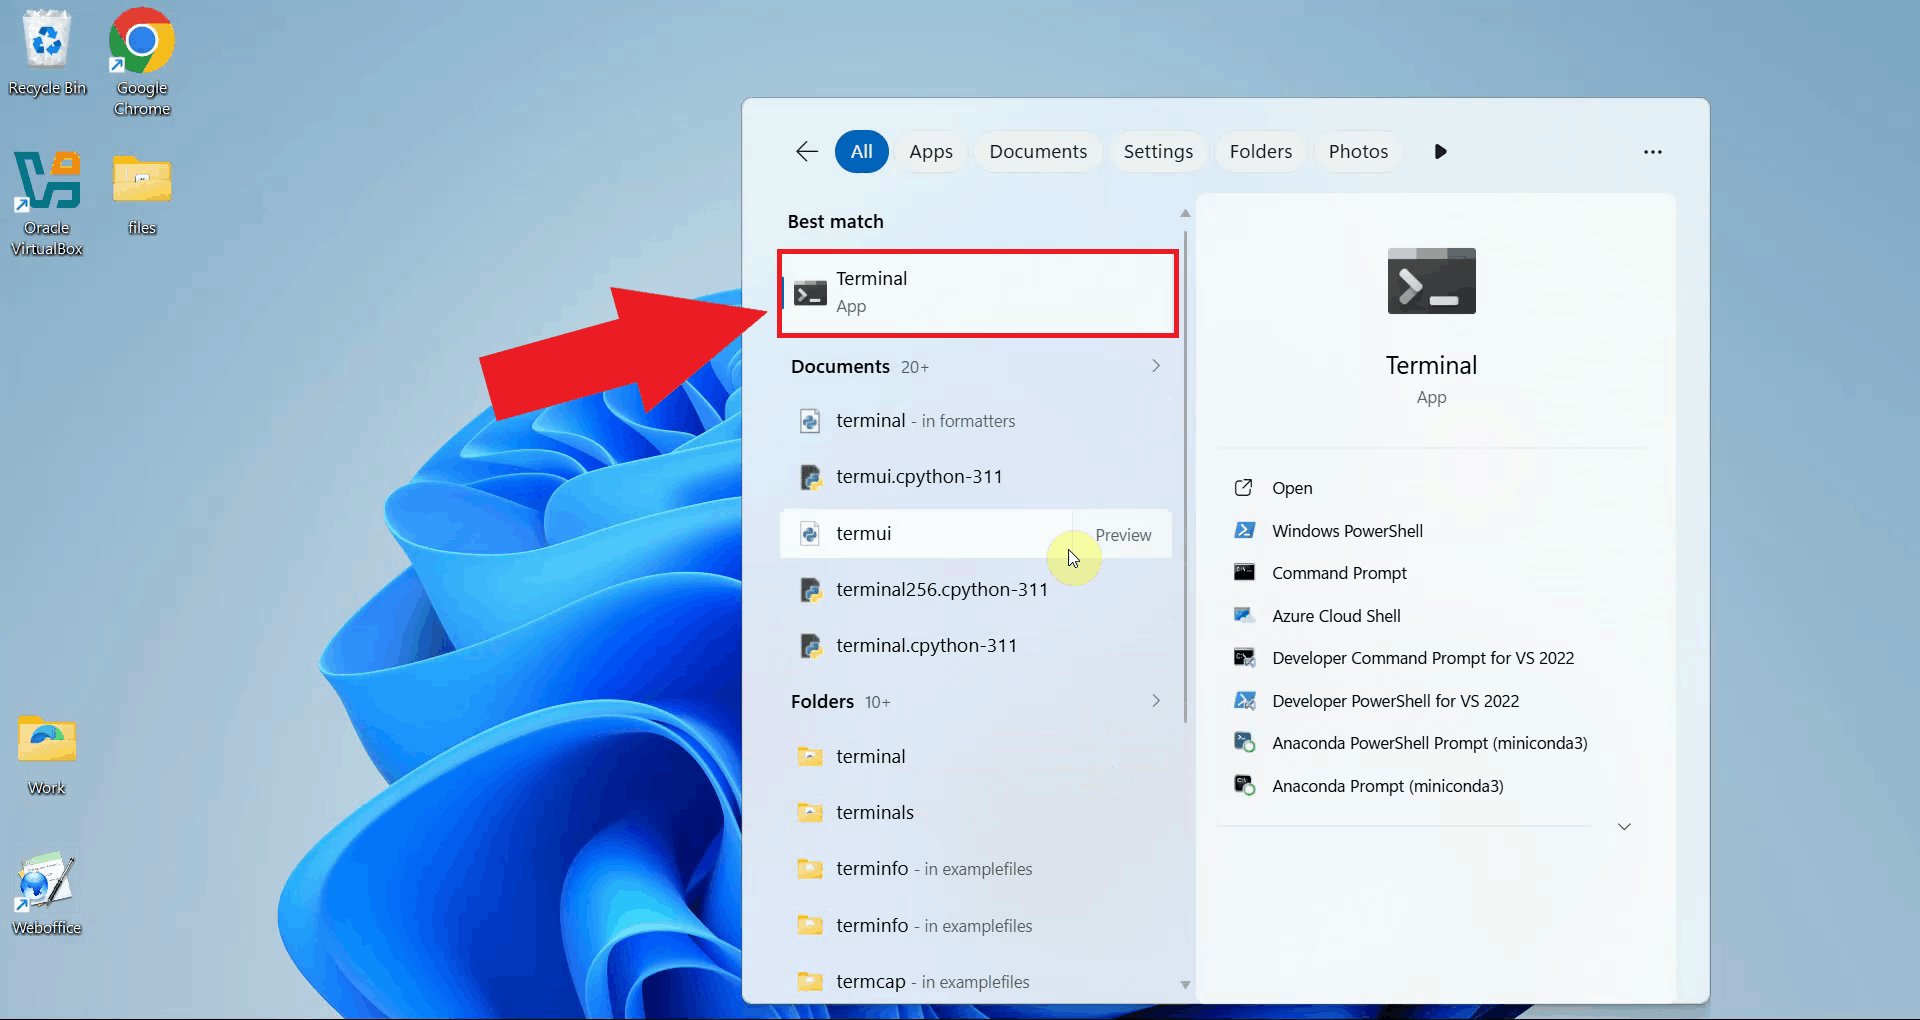
Open a terminal window on your Windows system. All setup commands in this guide are run from the terminal (Figure 1).
Step 2 - Install WSL with Ubuntu
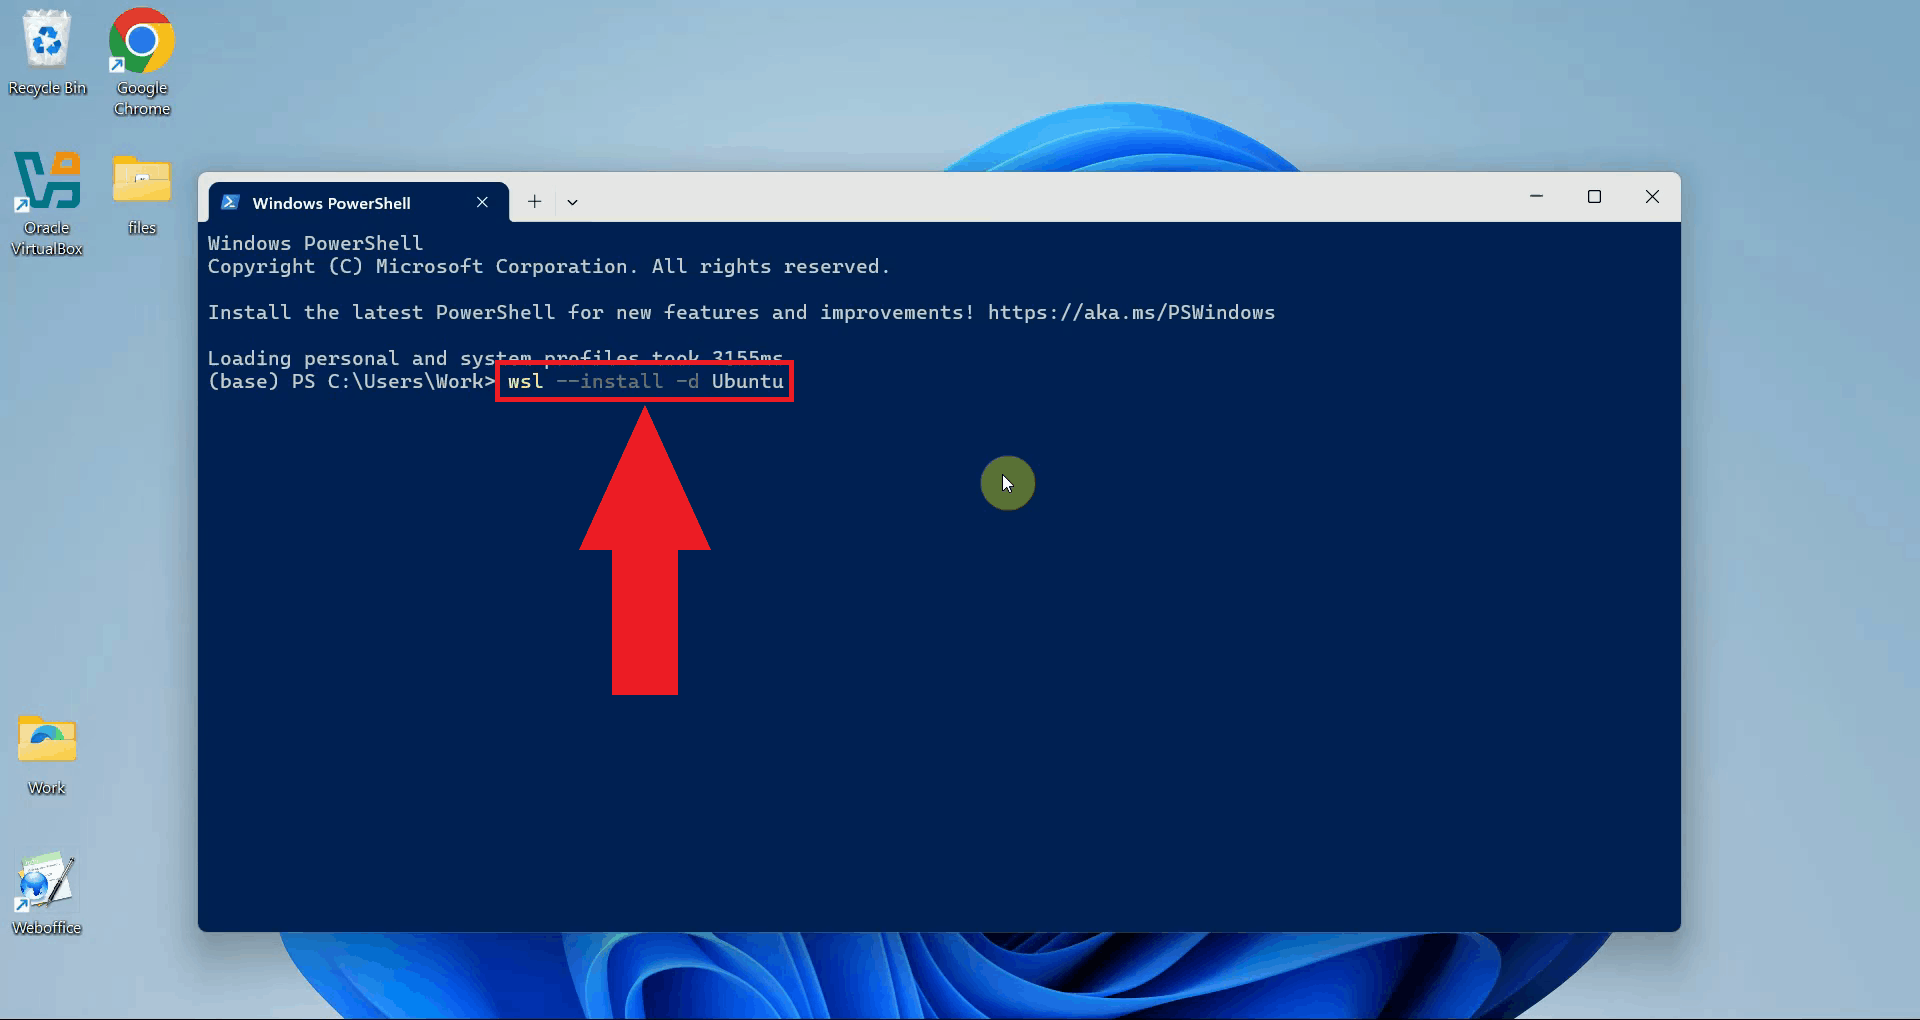
Run the following command to install WSL with the Ubuntu distribution. This will download and set up a full Ubuntu Linux environment that runs directly inside Windows without requiring a separate virtual machine (Figure 2).
wsl --install -d Ubuntu
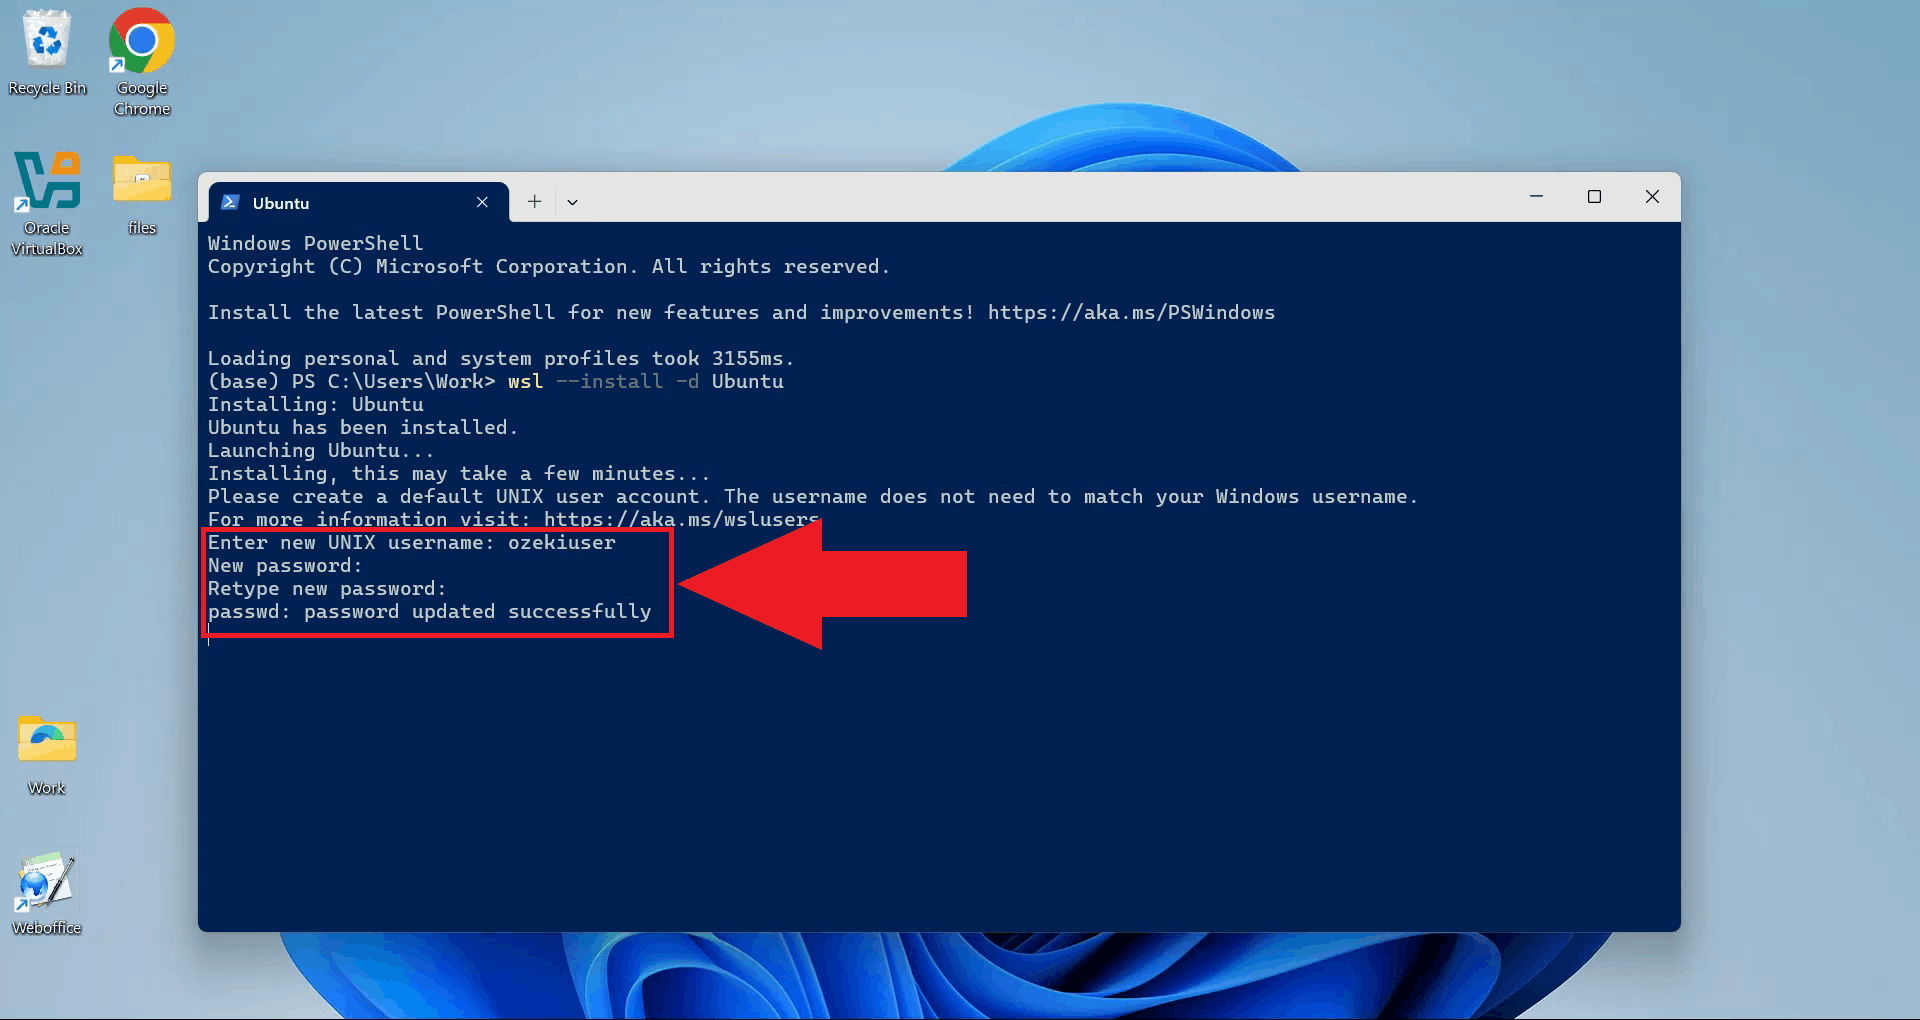
Once the installation completes, you will be prompted to create a Unix user account. Enter a username and password for your Ubuntu environment (Figure 3).
Step 3 - Update Ubuntu packages
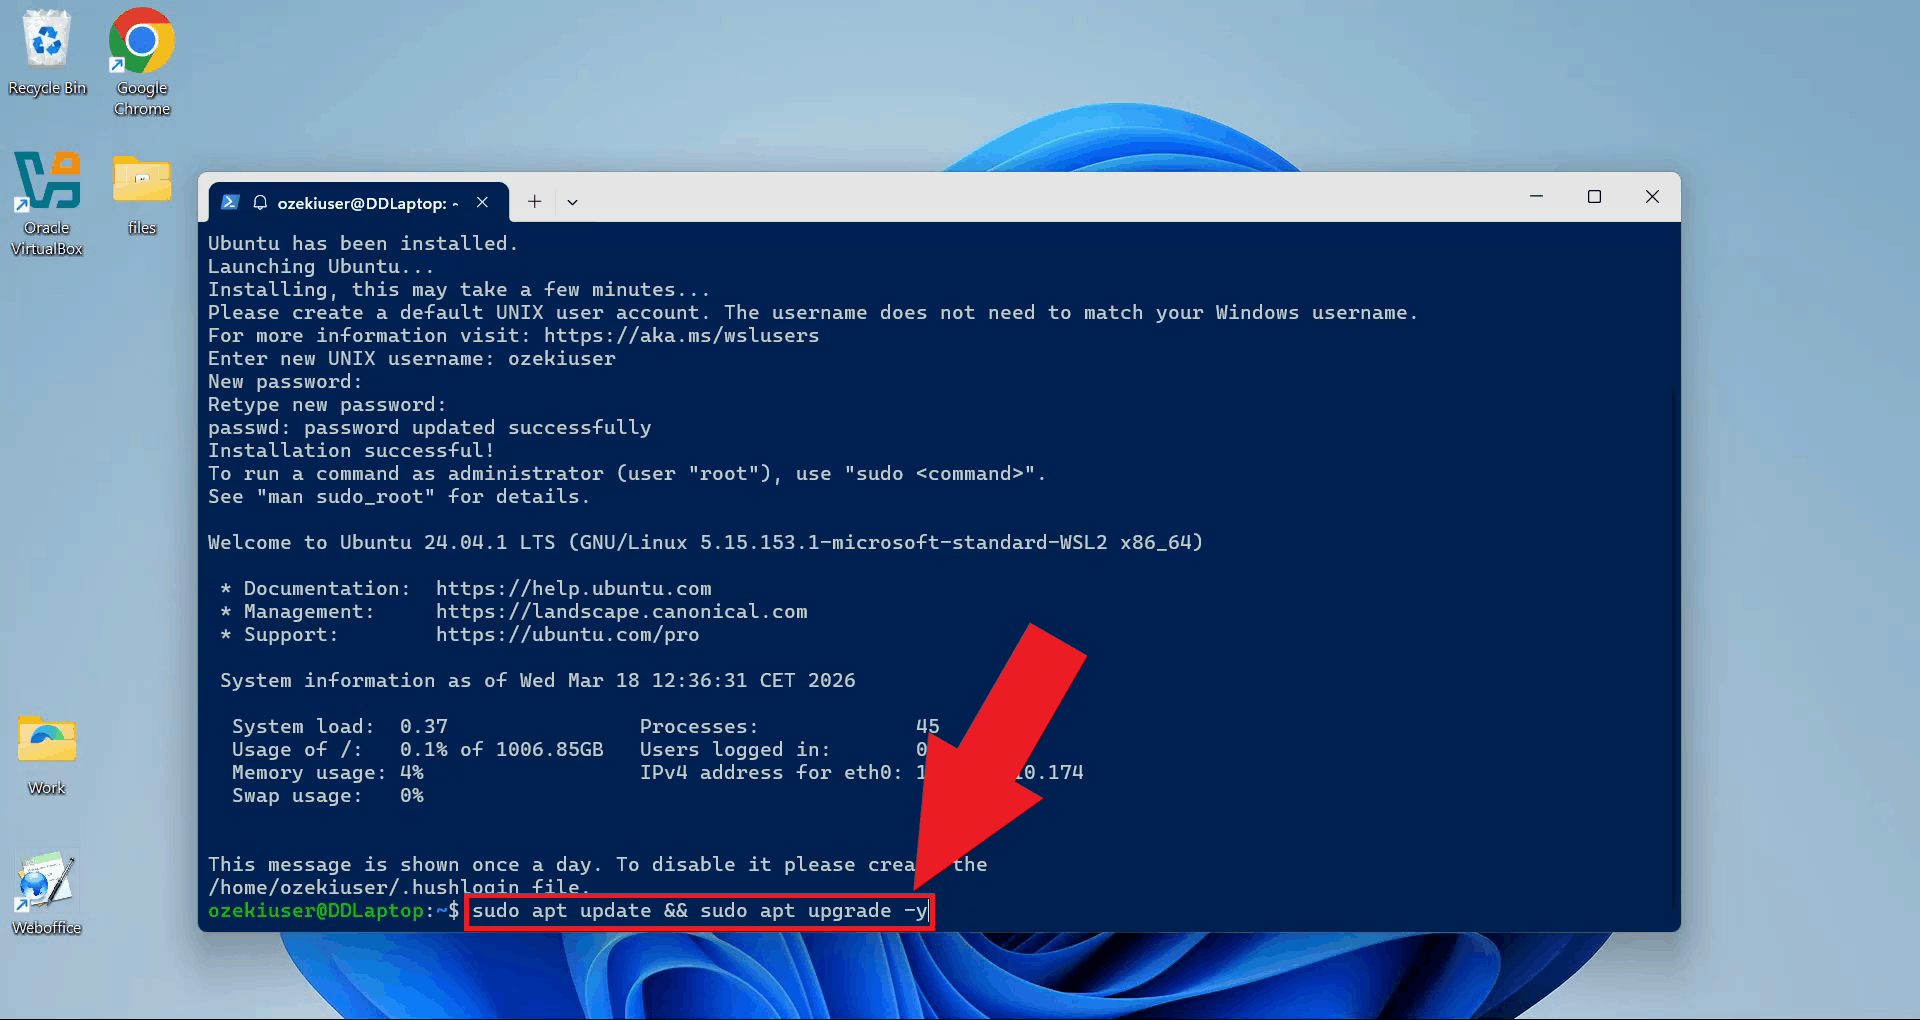
Update and upgrade the Ubuntu package list to make sure all system packages are current before installing any dependencies (Figure 4).
sudo apt update && sudo apt upgrade -y
Step 4 - Install required packages
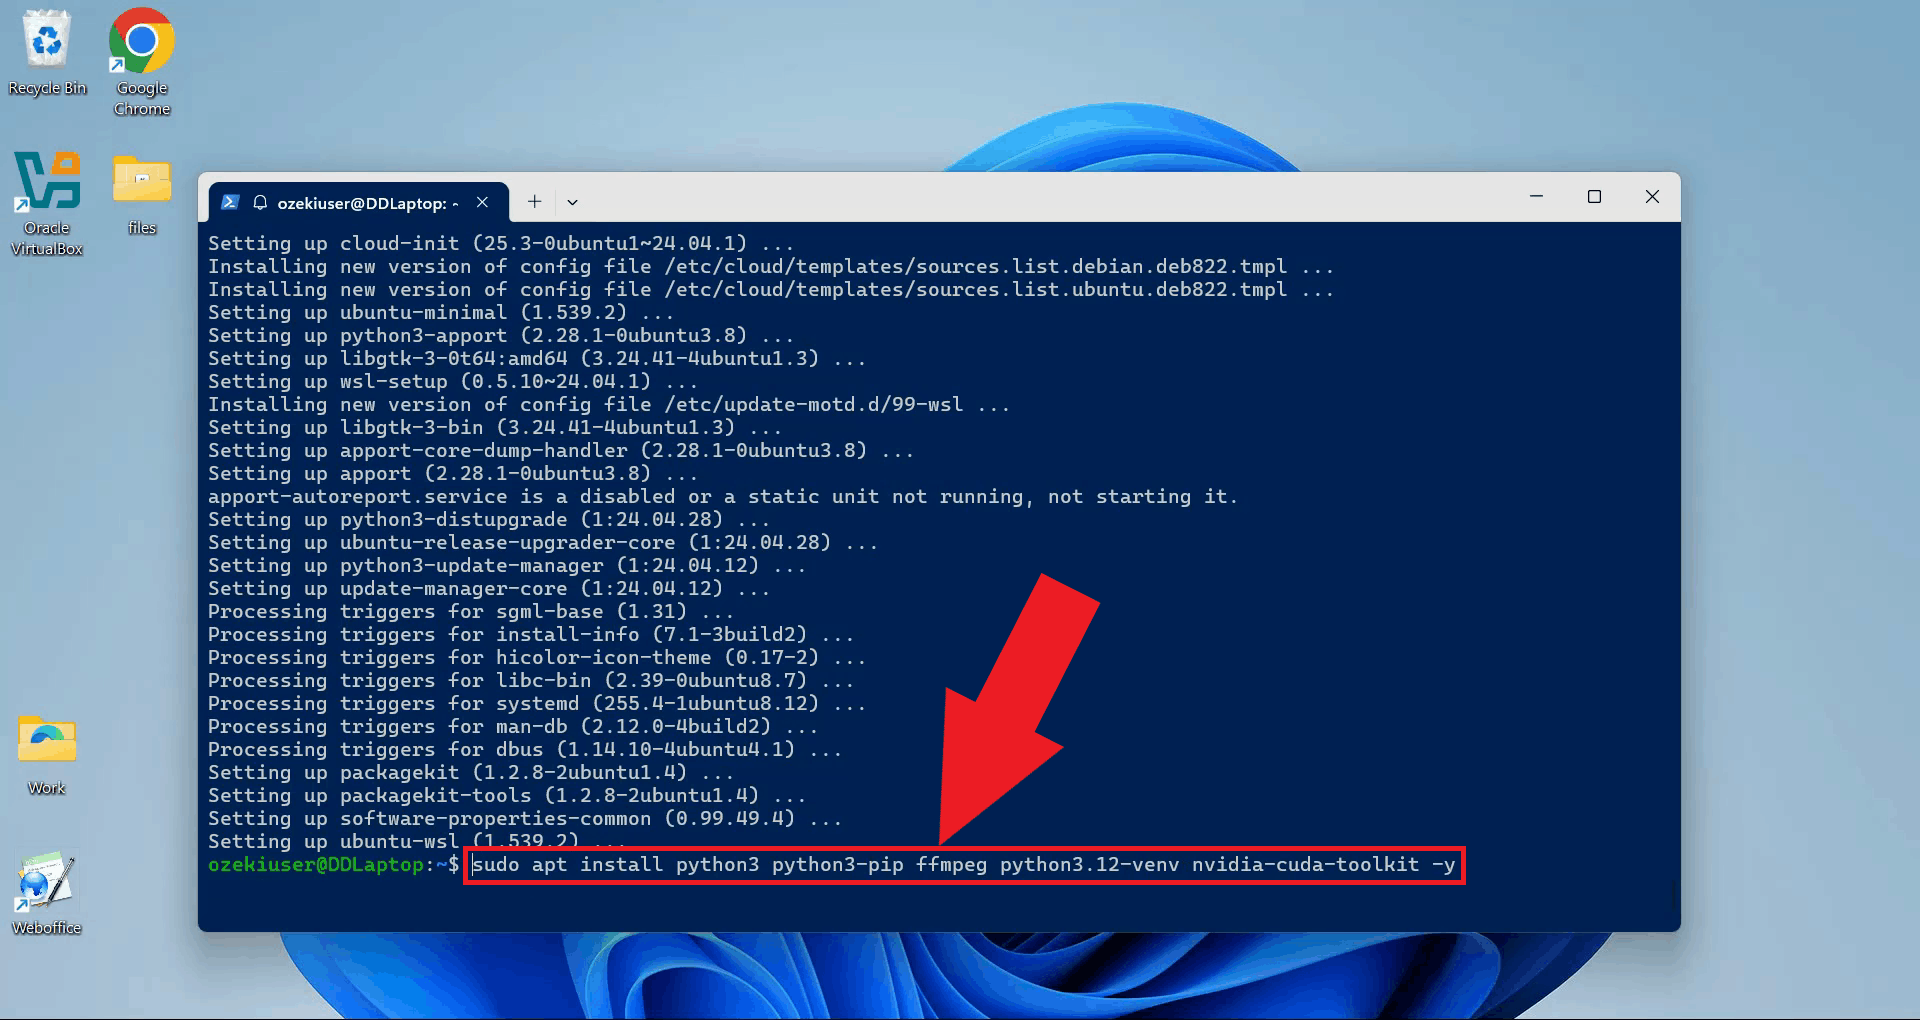
Install Python, pip, FFmpeg, the Python venv module, and the NVIDIA CUDA toolkit in a single command. FFmpeg handles audio processing, venv is needed to create the isolated Python environment, and the CUDA toolkit enables GPU-accelerated transcription if your system has a compatible NVIDIA graphics card (Figure 5).
sudo apt install python3 python3-pip ffmpeg python3.12-venv nvidia-cuda-toolkit -y
Step 5 - Set up the Python virtual environment
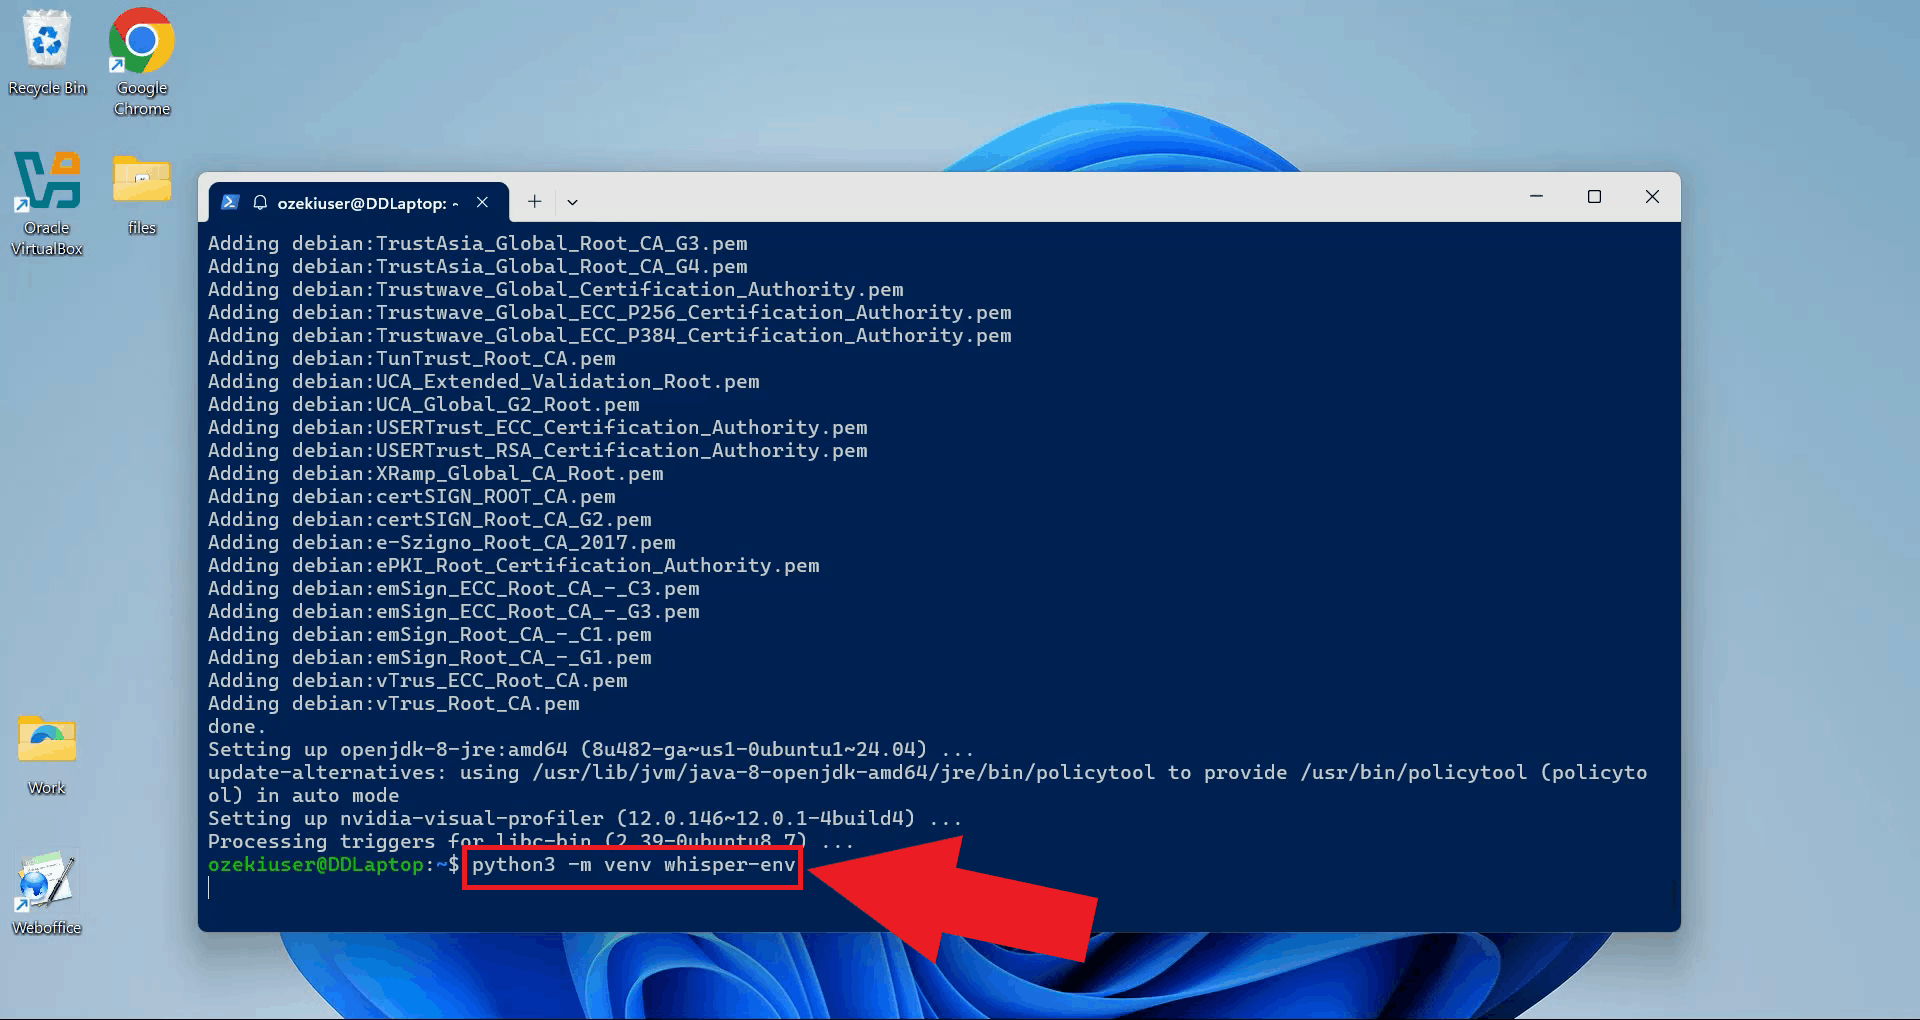
Create a dedicated Python virtual environment for the Whisper server. Using a separate environment keeps its dependencies isolated from other Python projects on your system (Figure 6).
python3 -m venv whisper-env
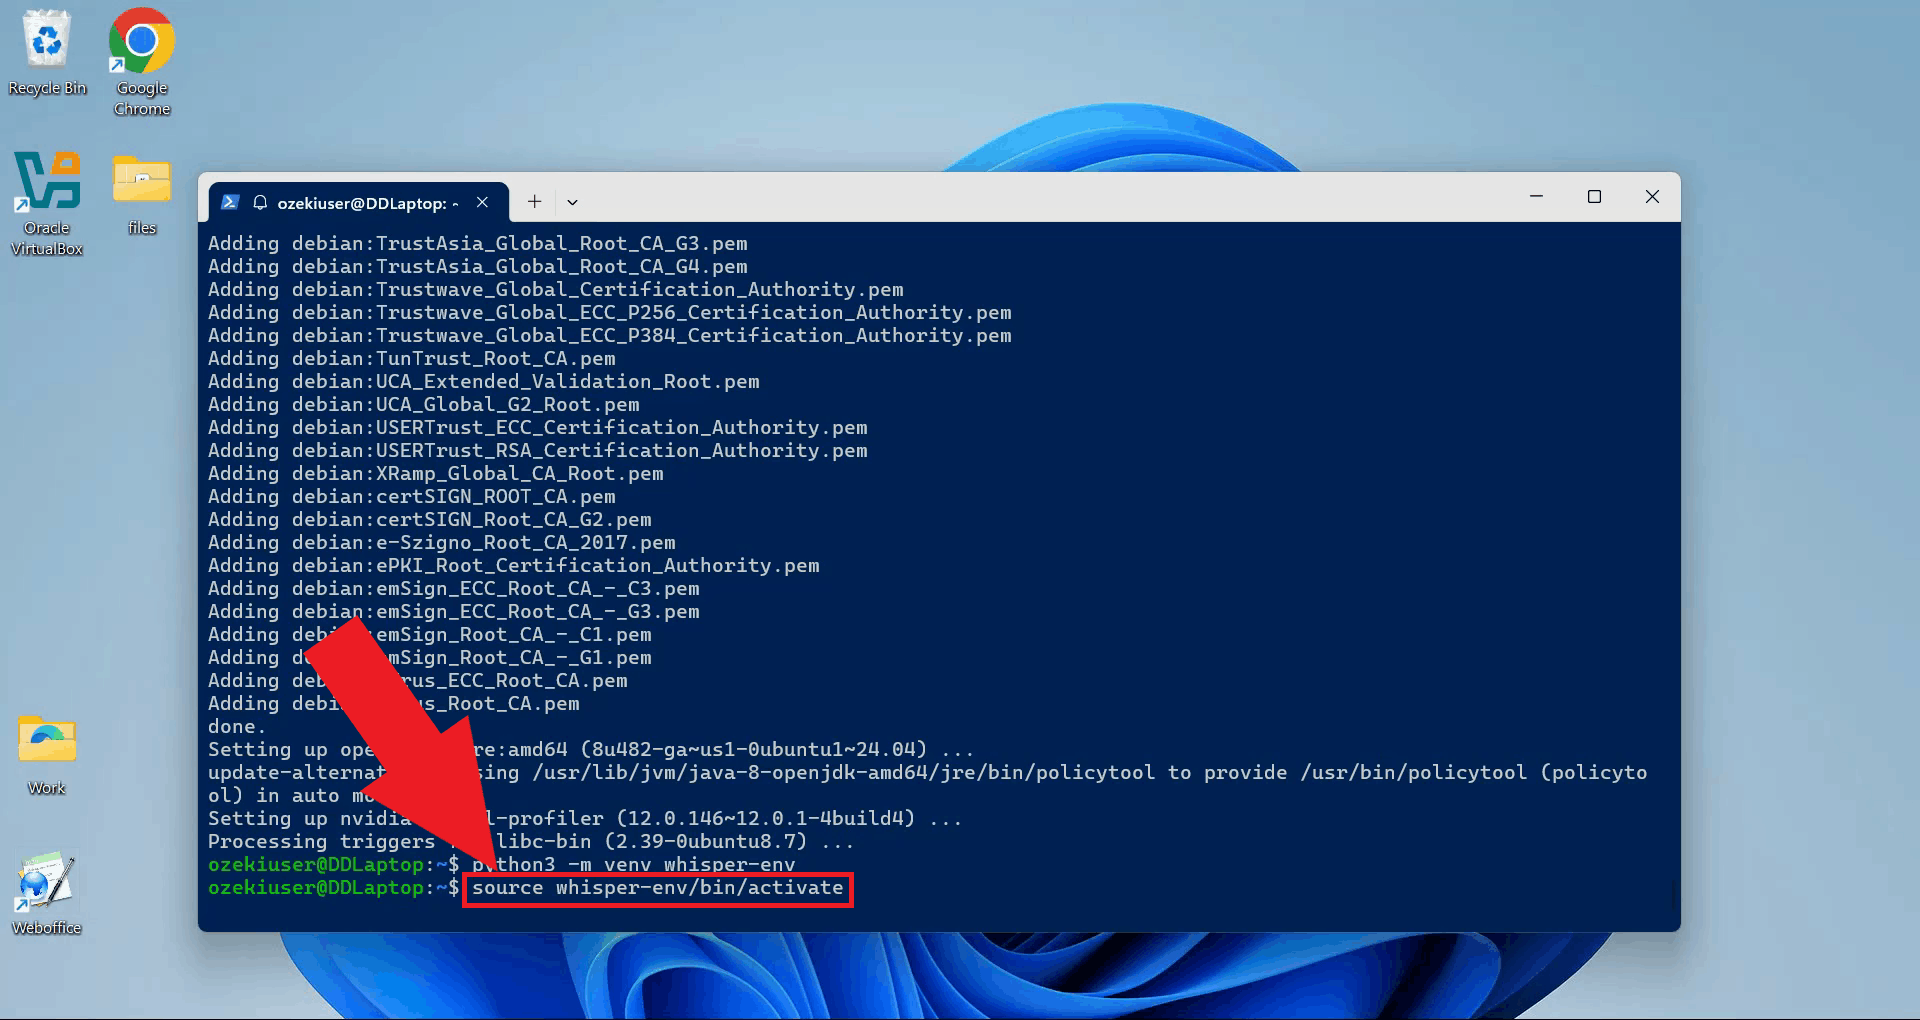
Activate the virtual environment. Your terminal prompt will update to show the active environment name (Figure 7).
source whisper-env/bin/activate
Step 6 - Install agent-cli with faster-whisper
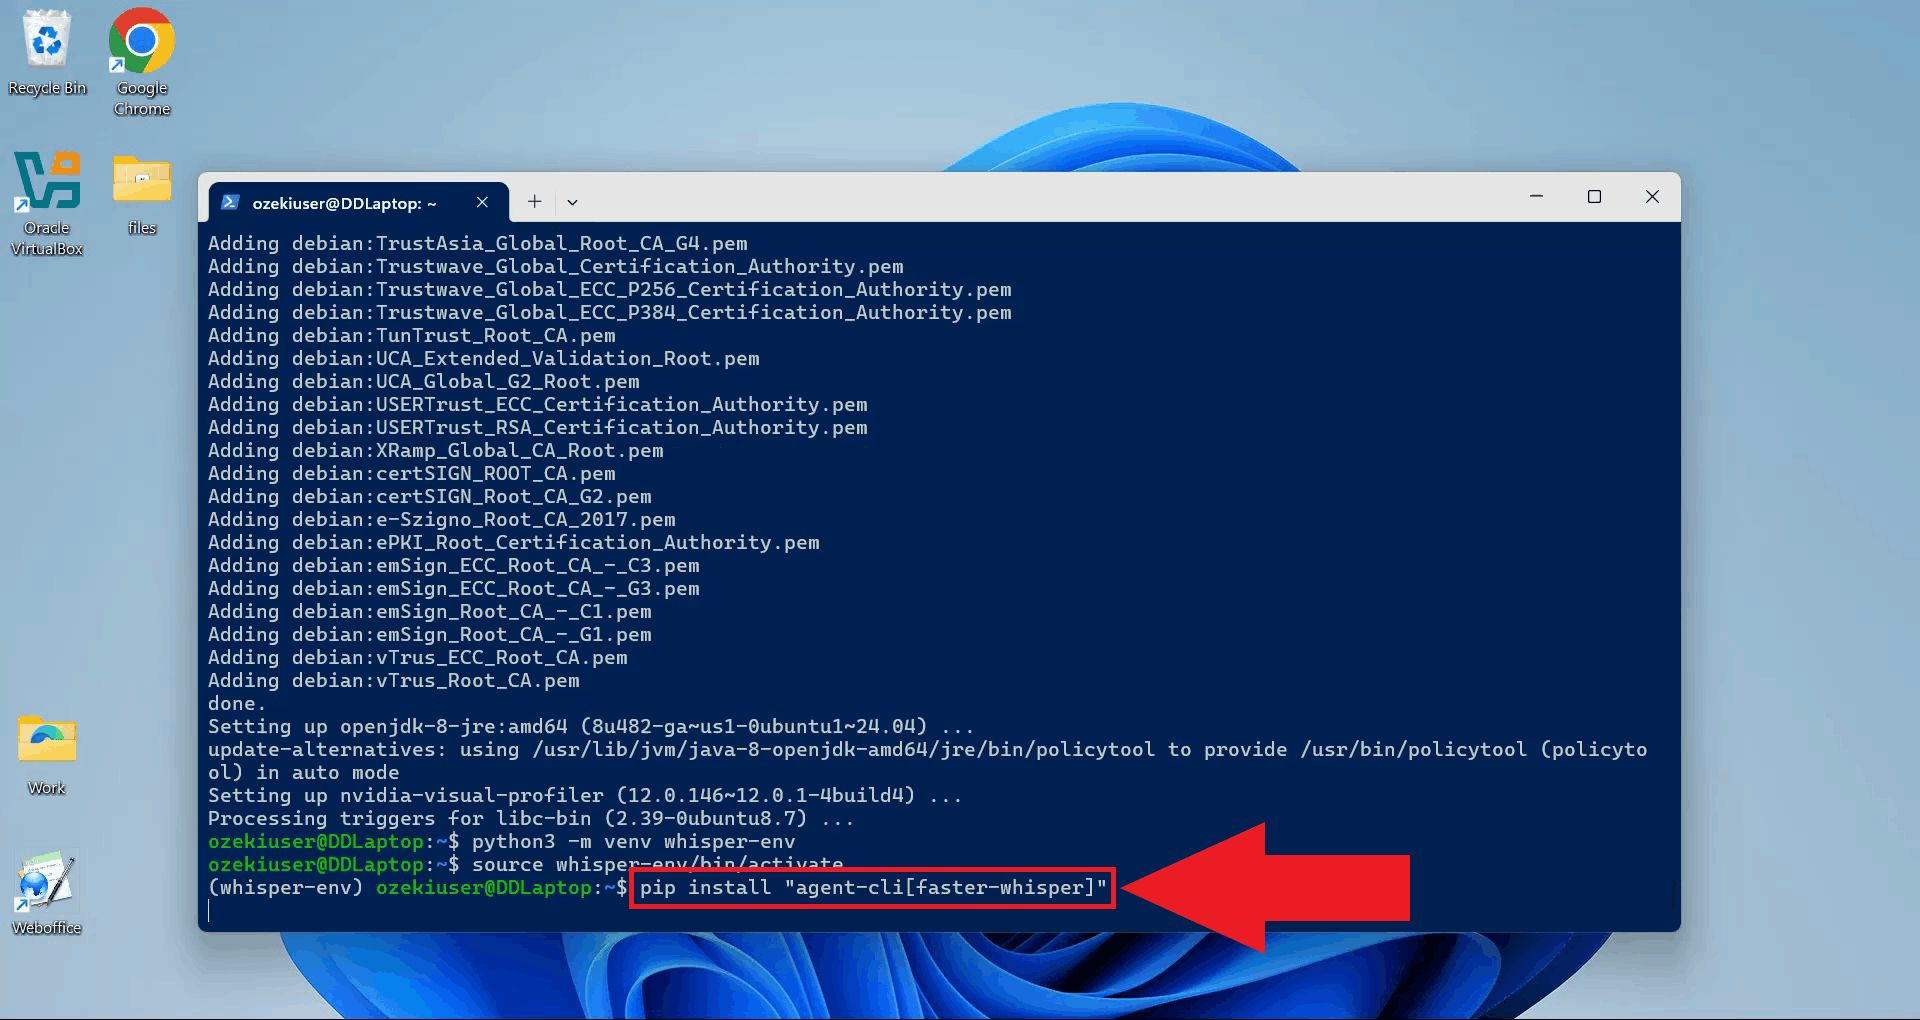
With the virtual environment active, install agent-cli together with the faster-whisper backend using pip. This installs all dependencies needed to run the Whisper speech recognition model locally inside WSL (Figure 8).
pip install "agent-cli[faster-whisper]"
Step 7 - Start the Whisper server
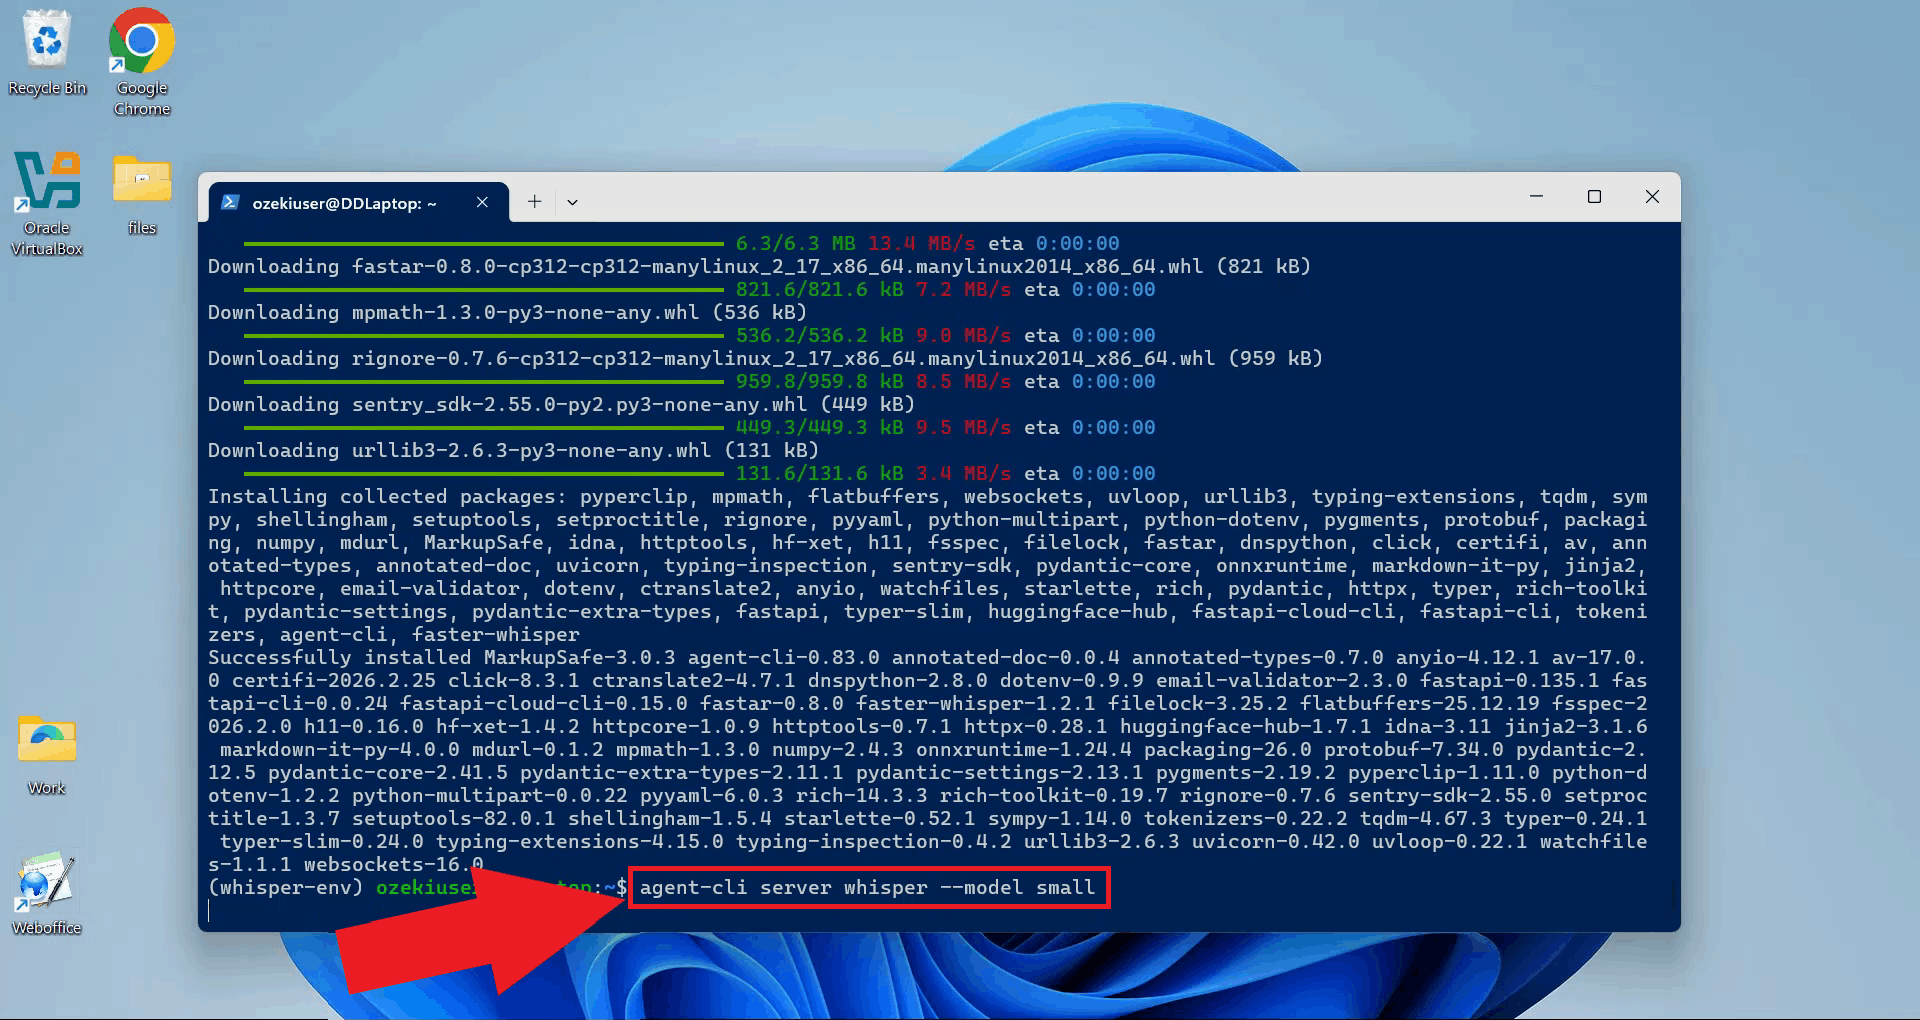
Start the Whisper server using agent-cli with the small model. You can choose between different model sizes depending on how powerful your system is (Figure 9).
agent-cli server whisper --model small
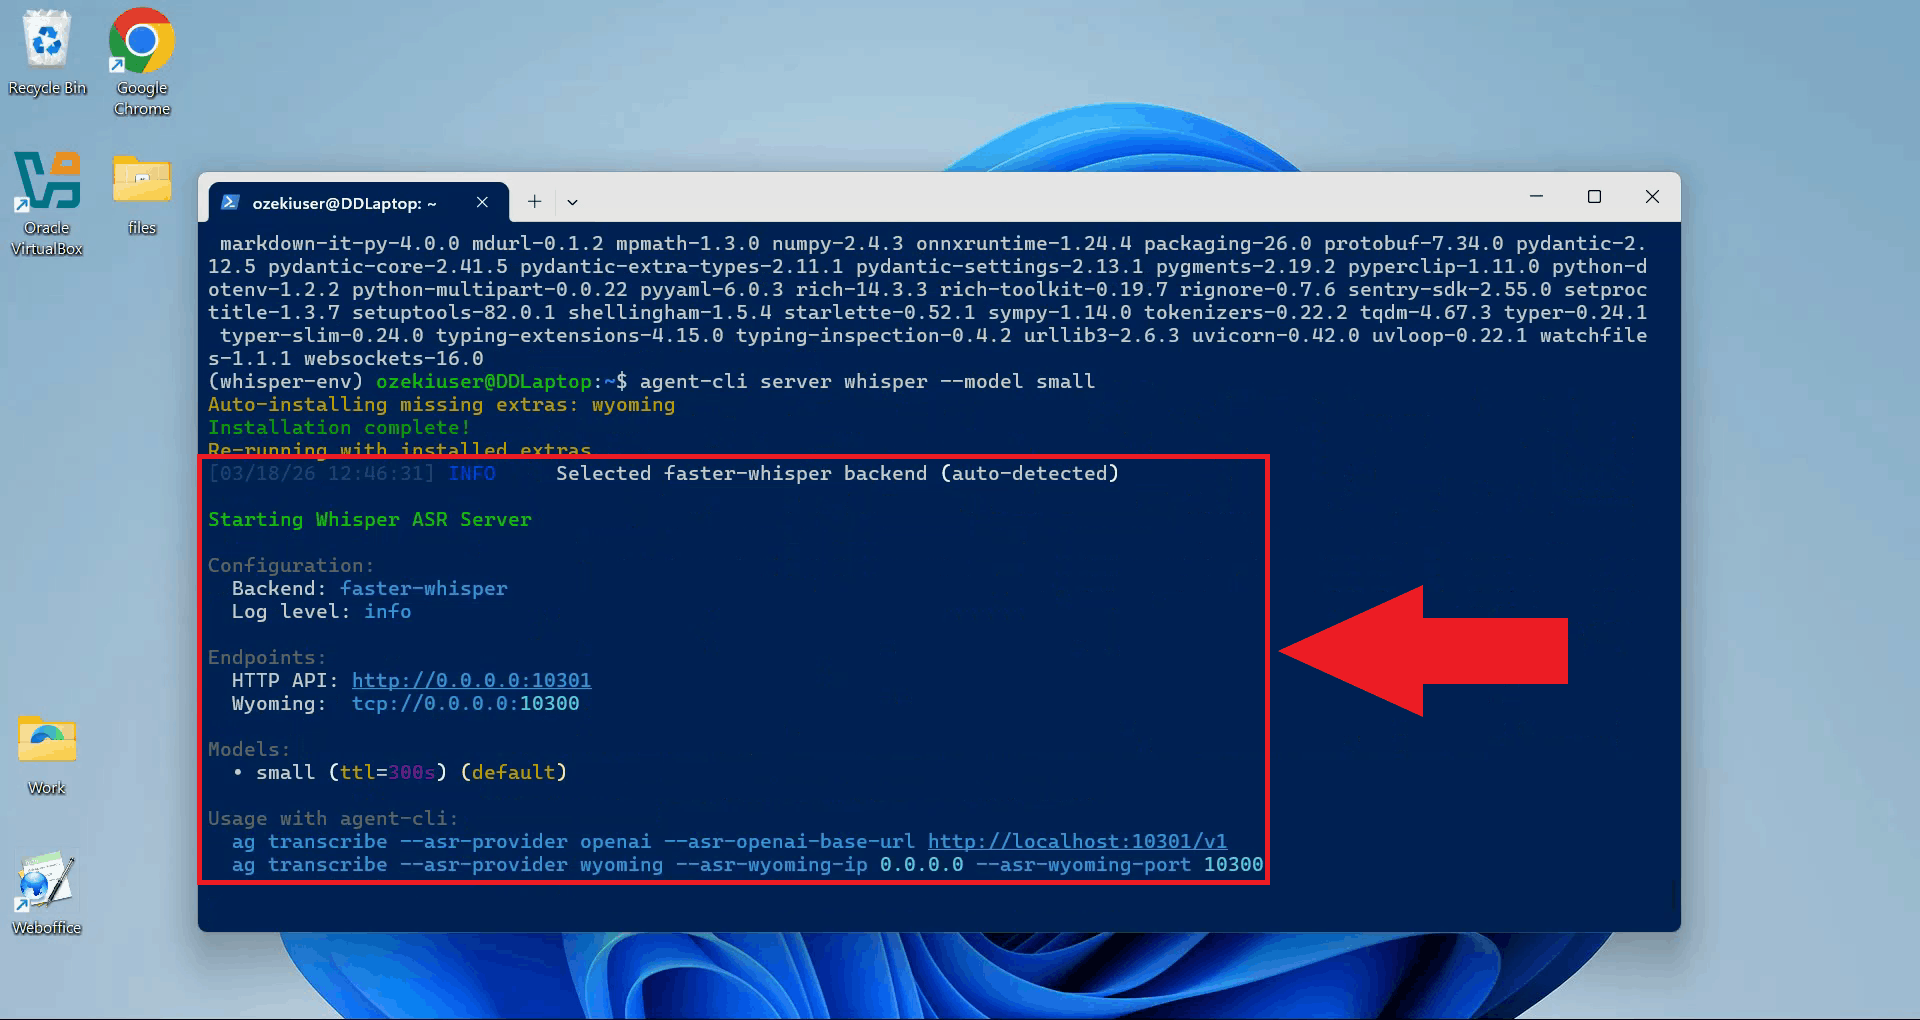
The Whisper server is now running and listening for transcription requests. Keep this terminal open for the duration of your session (Figure 10).
How to send audio to Whisper from Postman
Postman is a desktop and web application designed for building, sending, and testing HTTP-based API requests, making it ideal for working with REST and OpenAI-compatible endpoints such as your local Whisper server. It provides an easy-to-use interface where you can configure URLs, headers, and form-data (including file uploads) and then inspect the JSON responses returned by your services. You can download Postman for Windows, macOS, and Linux from the official Postman Downloads page at https://www.postman.com/downloads/.
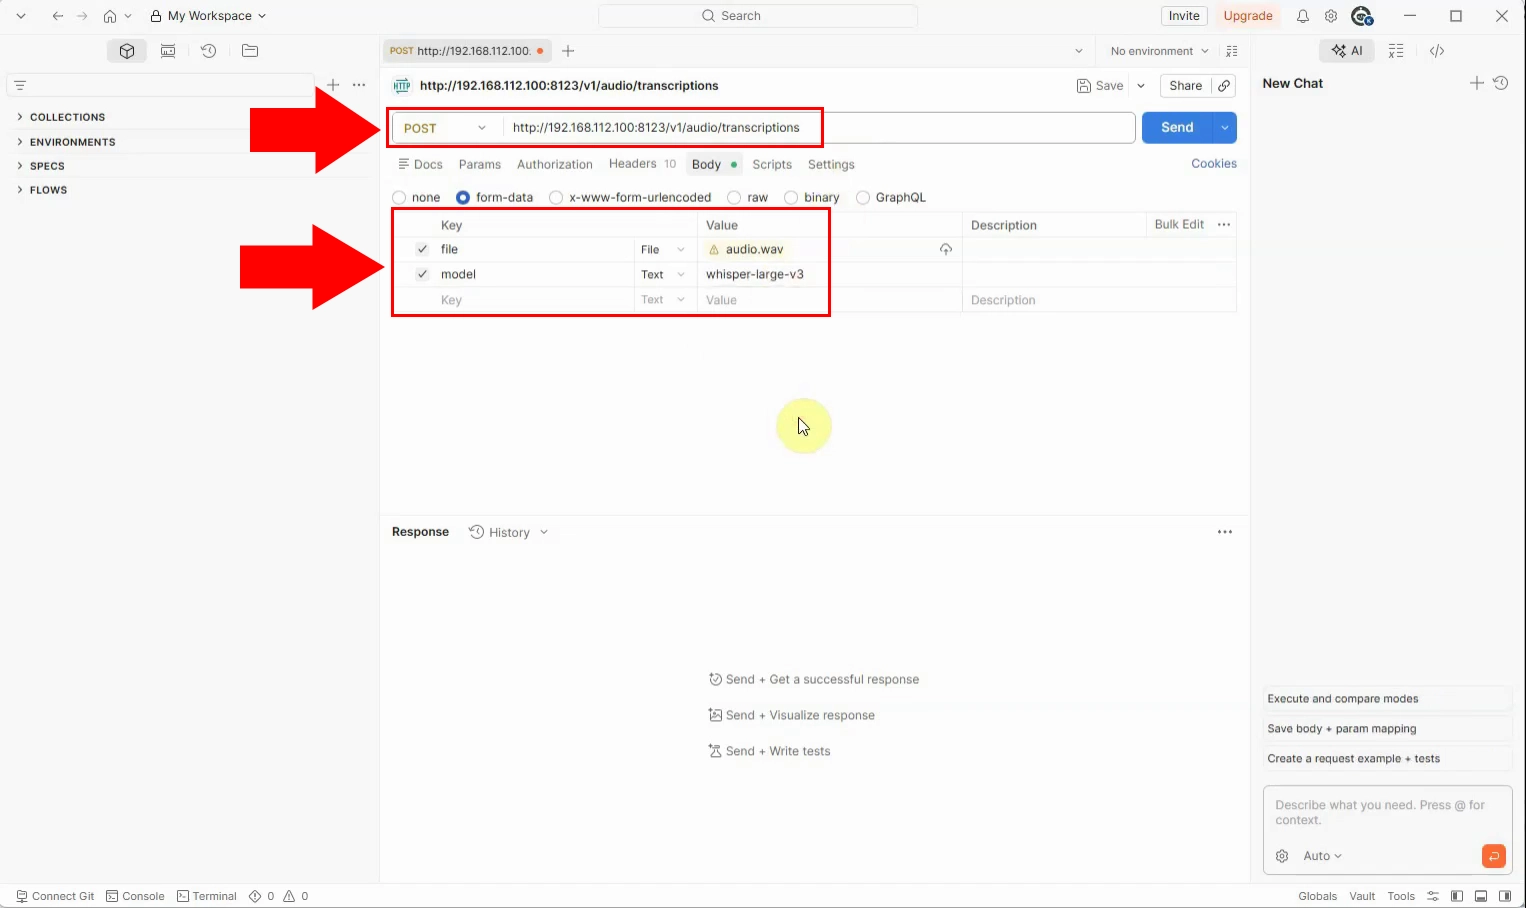
In Postman, create a new POST request and set the request URL to http://IP_ADDRESS:PORT/v1/audio/transcriptions, replacing IP_ADDRESS and PORT with the Ubuntu Whisper server’s actual network address. Under the Body tab choose form-data and add a file field of type File, then select the audio file you want to transcribe from your local machine. Add another form-data field named model and set its value to the served Whisper model name running on the vLLM server (for example openai/whisper-small), then save the request so it can be reused for future tests.
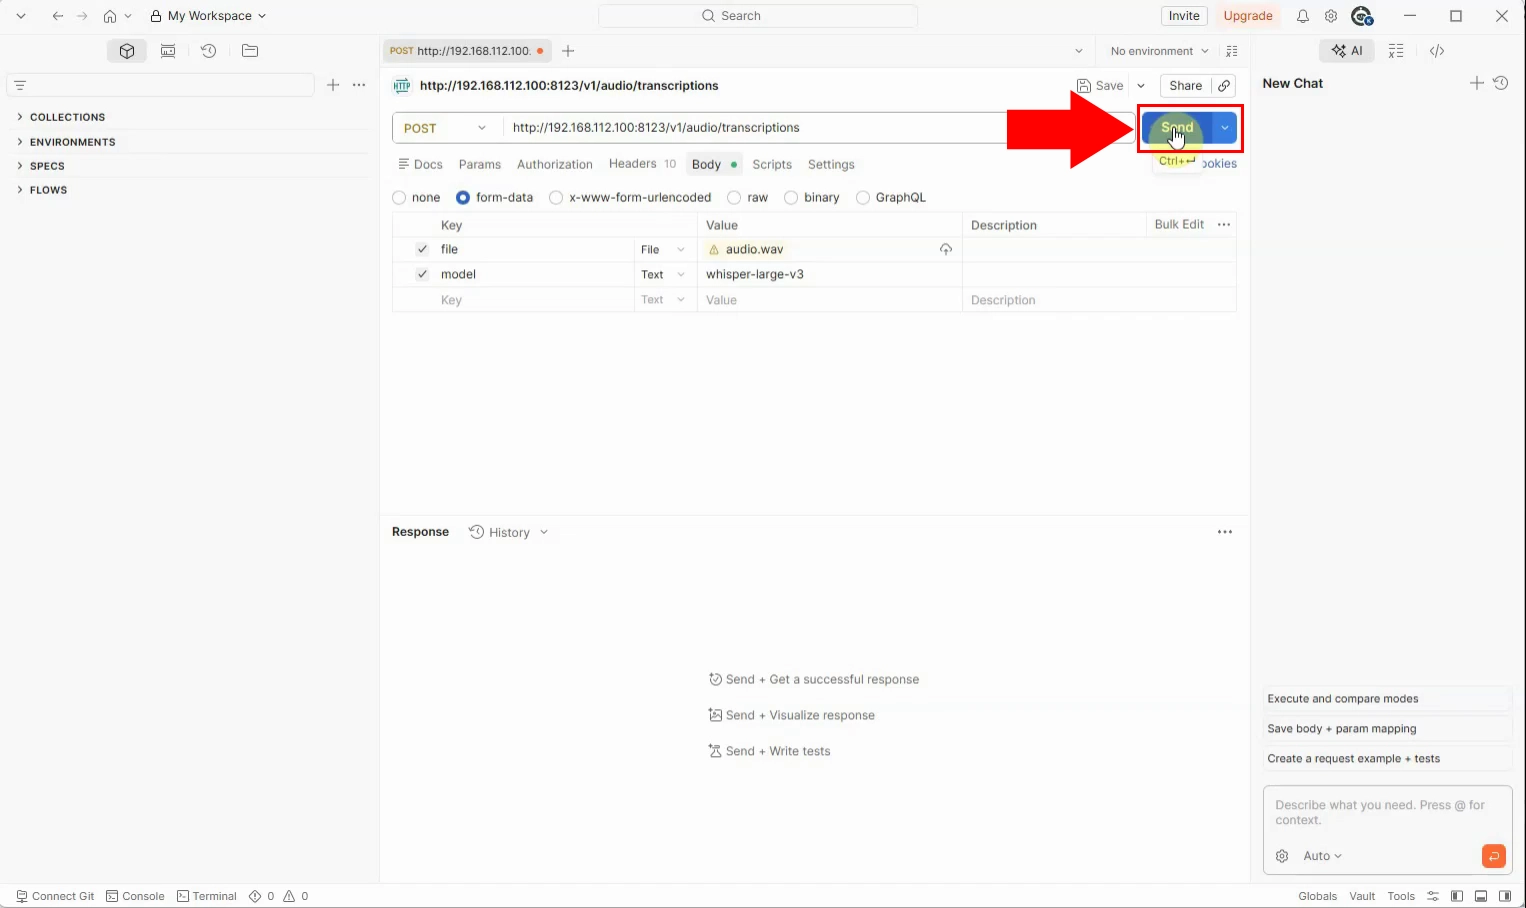
Once the request is configured, click the Send button in Postman to submit the selected audio file and model name to the Whisper endpoint on the Ubuntu machine. Postman will upload the multipart form-data payload, where the binary audio content is sent in the file field and the target Whisper model is specified in the model field. The vLLM-based Whisper server receives this request at /v1/audio/transcriptions, processes the audio, and generates a transcription that will be returned in the HTTP response.
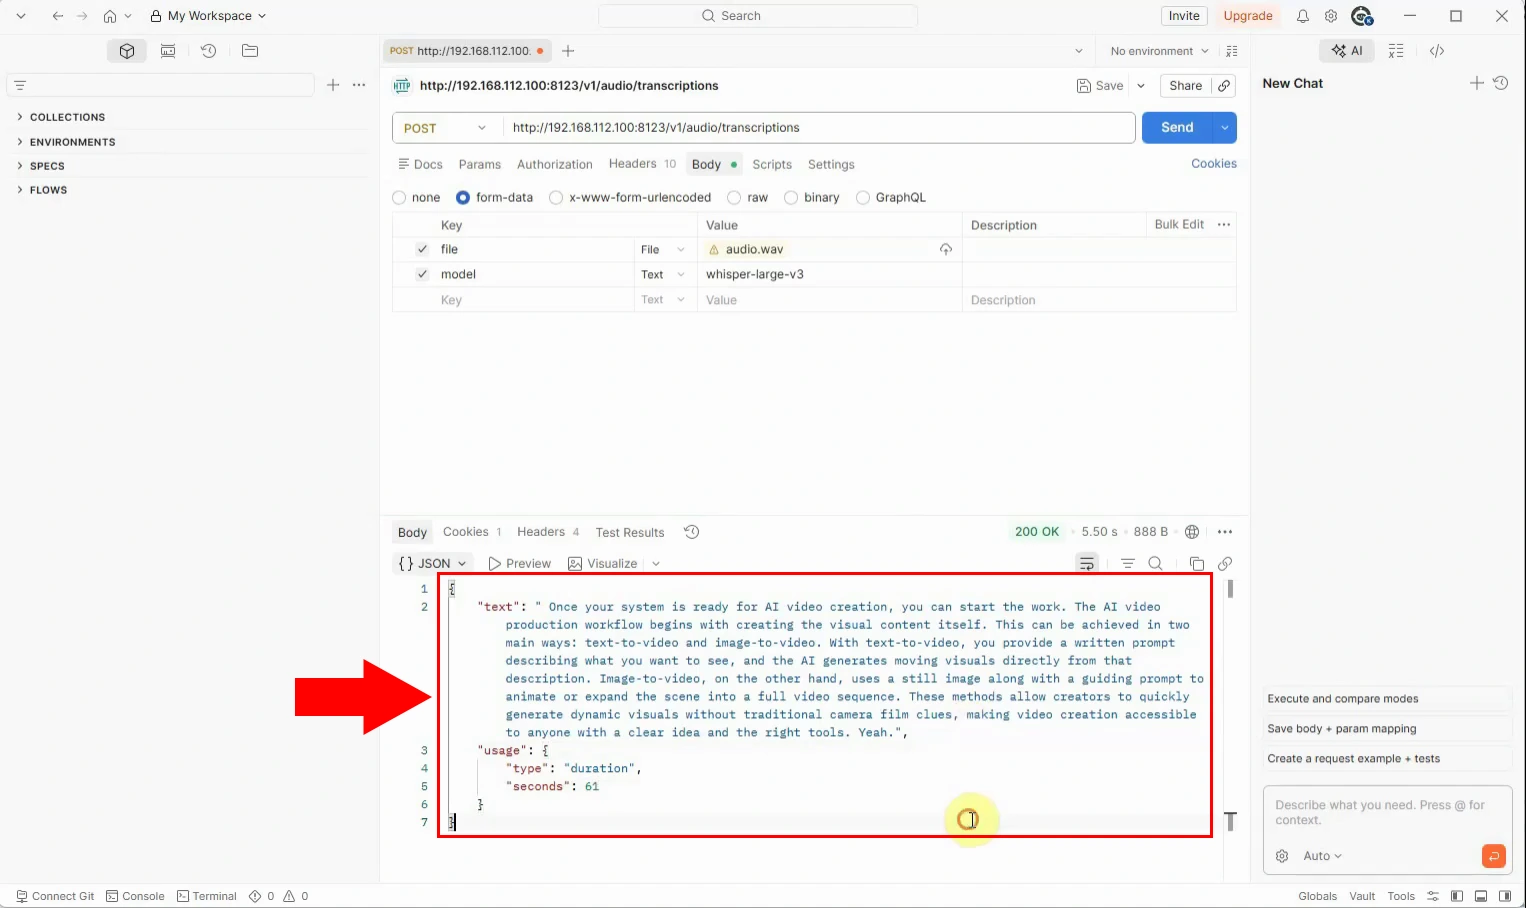
After the Whisper server finishes processing, Postman displays the text response in the Response pane, typically as a JSON object containing the recognized transcription. This transcription corresponds to the spoken content of the audio file you sent and can be copied directly from Postman for use in your application or documentation. By reviewing the response format for different test audio files, you can verify that the Ubuntu Whisper server and network configuration are working correctly from the Windows client machine.
Final thoughts
You have successfully set up a local Whisper speech recognition server on Windows using WSL and verified that it can accept audio transcription requests from your Windows environment. From now on, your applications can send audio directly to this Ubuntu-based Whisper endpoint, giving you a fast and reliable speech-to-text pipeline that stays entirely under your control. Because everything runs locally on your machine, your voice data remains private and does not depend on any external cloud service.