
How to setup Whisper on Ubuntu Linux
This guide demonstrates how to set up a Whisper speech recognition server on an Ubuntu machine. You will learn how to install the required dependencies, start the Whisper server using vLLM, and send audio to the Ubuntu machine for transcription over the network.

Why do we need to self-host Whisper?
Cloud speech-to-text APIs are convenient, but every audio clip you send leaves your network and depends on a third party's uptime and data handling policies. That isn't always acceptable for sensitive recordings or systems that need to keep working without a reliable connection to an external provider. Hosting Whisper yourself keeps every recording and transcription local, removes any per-request cost, and gives you an endpoint that behaves the same regardless of your internet connection.

What is Whisper?
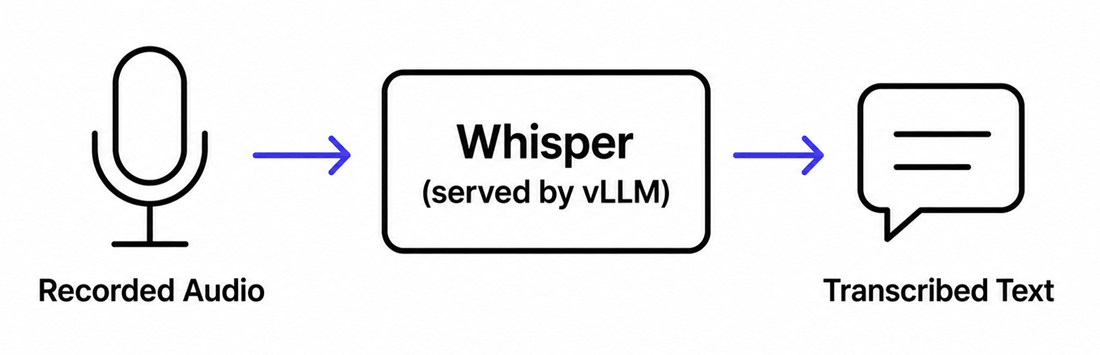
Whisper is an open-source speech recognition model developed by OpenAI, trained to convert spoken audio into written text across many languages and noise conditions. The model itself is freely available to run on your own hardware, rather than being locked behind a single provider's cloud service. In this setup, Whisper is served on an Ubuntu machine using vLLM, which exposes an OpenAI-compatible HTTP endpoint on the network. A separate Windows machine sends recorded audio to that endpoint and receives the transcribed text back in response.
How does it work?
The Ubuntu machine runs vLLM, which loads Whisper into memory and exposes a
/v1/audio/transcriptions endpoint that mirrors OpenAI's own API shape.
The Windows machine sends a POST request to that endpoint with the audio file
attached as multipart form-data, along with the served model's name. vLLM runs the
audio through Whisper and returns the transcription as JSON, which the Windows
client can read, display, or paste into another application.
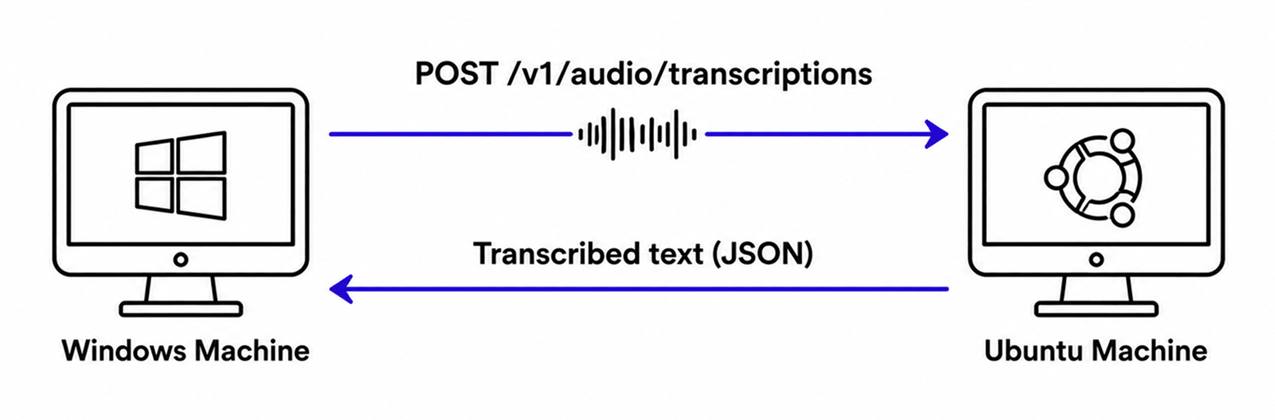
System architecture
The diagram below illustrates how a Windows machine communicates with the Ubuntu machine hosting the Whisper server.
Steps to follow
Before proceeding, make sure Anaconda is installed on your
Ubuntu machine. The vllm package will be installed via pip during the setup process.
- Create and activate the Conda environment
- Install vLLM
- Start the Whisper server
- Send audio to Whisper from Postman
Quick reference commands
# Create a Python 3.12 Conda environment
conda create -n whisper python=3.12

# Activate the environment
conda activate whisper

# Install vLLM with audio support
pip install vllm vllm[audio]

# Start the Whisper server
vllm serve openai/whisper-small

# API endpoint (replace with your Ubuntu machine's IP)
http://ubuntu.machine/v1/audio/transcriptions
How to set up Whisper on Ubuntu video
The following video shows how to set up and run the Whisper speech recognition server on Ubuntu step-by-step. The video covers creating the Conda environment, installing vLLM, and starting the server.
Step 1 - Create and activate the Conda environment
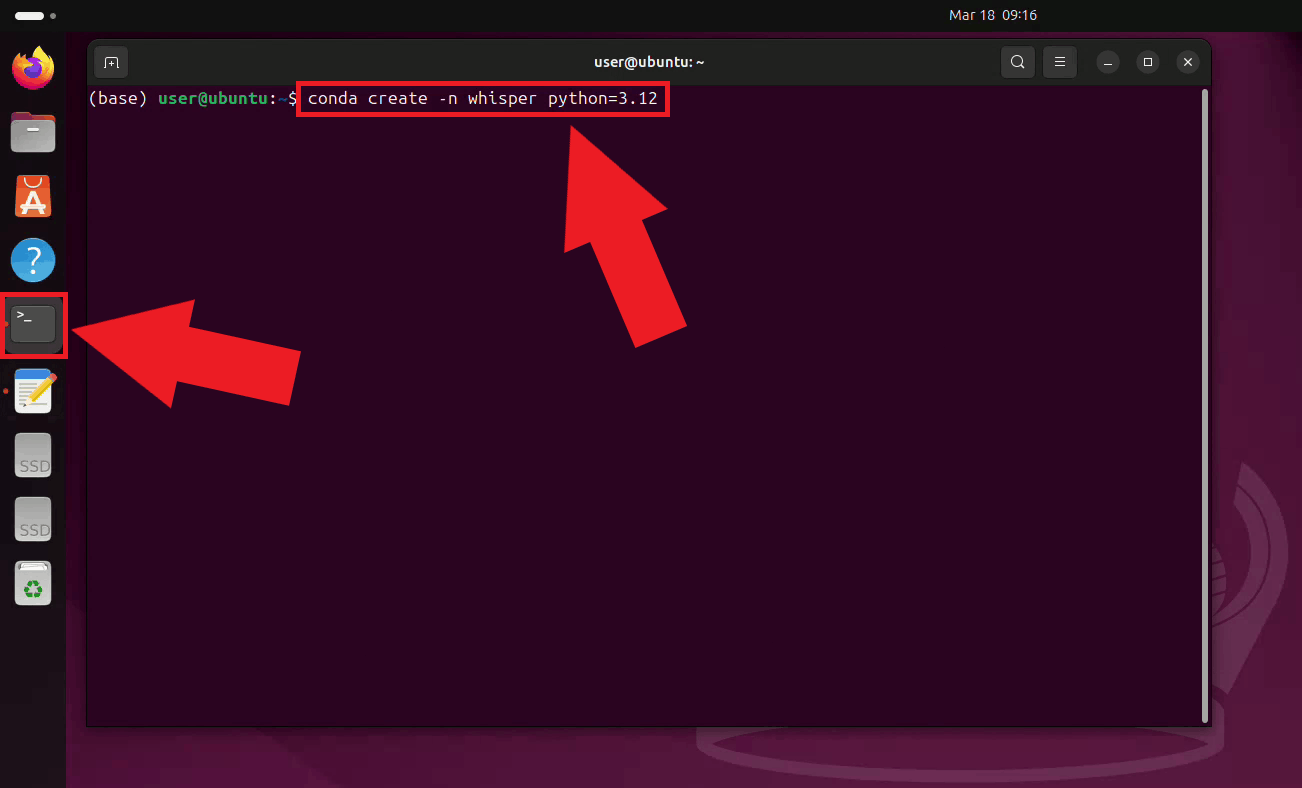
Open a terminal on your Ubuntu machine and create a dedicated Conda environment with Python 3.12 for the Whisper server. Using a separate environment keeps its dependencies isolated from other Python projects on your system (Figure 1).
conda create -n whisper python=3.12
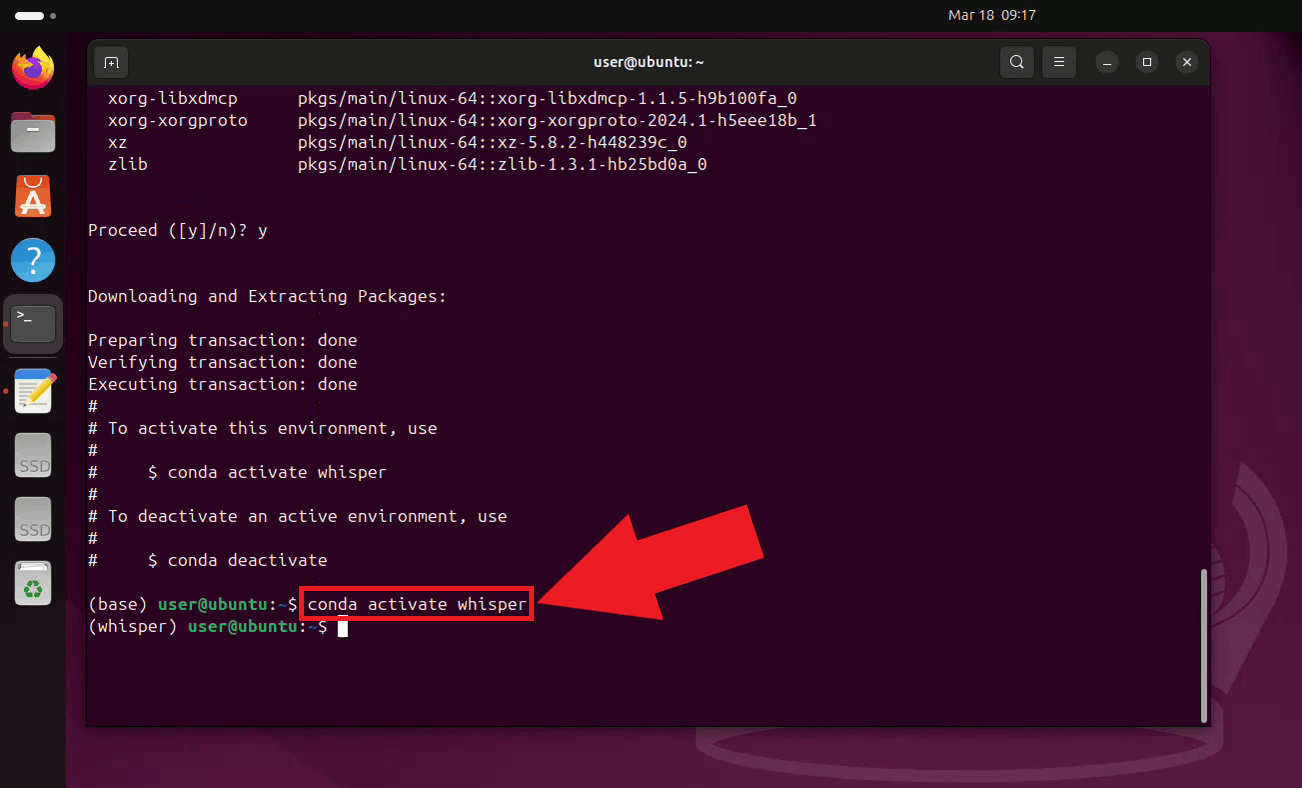
Activate the newly created environment. Your terminal prompt will update to show the active environment name (Figure 2).
conda activate whisper
Step 2 - Install vLLM
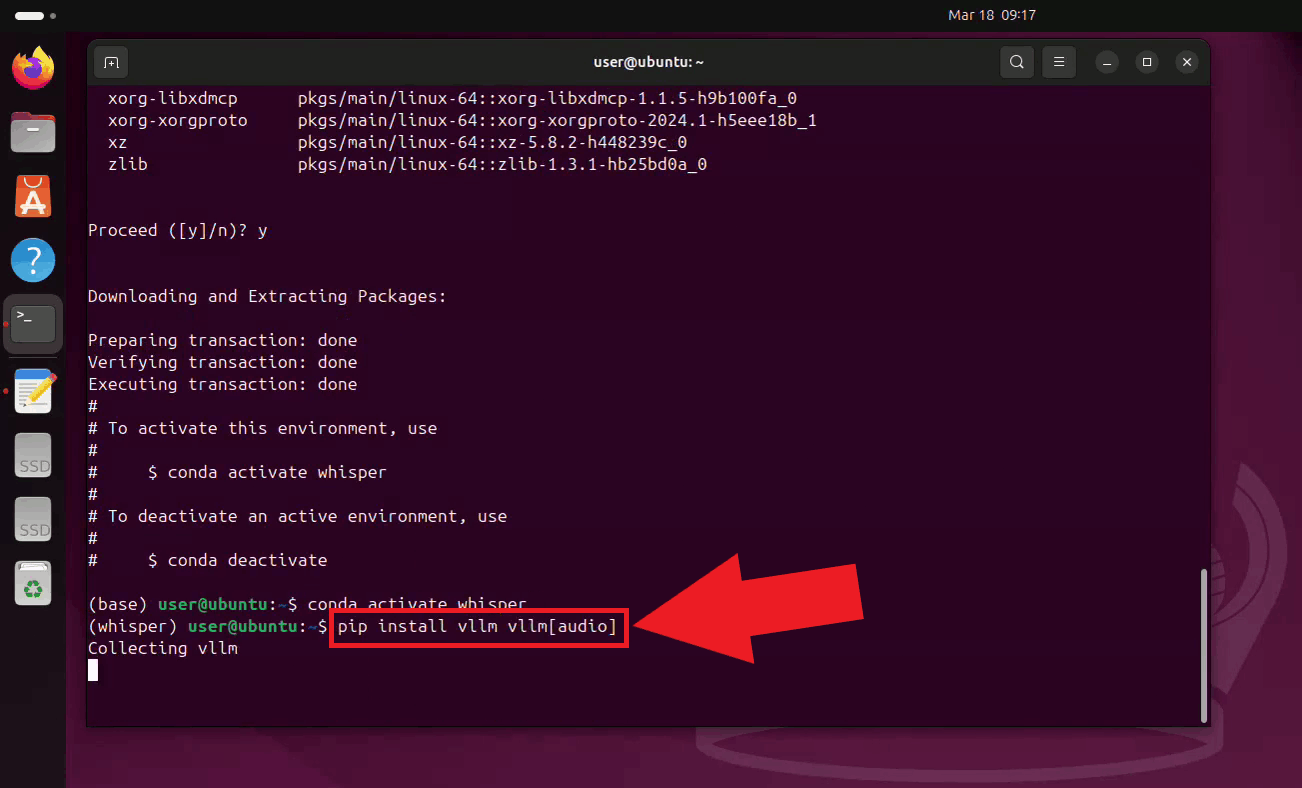
With the environment active, install vLLM along with its audio support extra using pip.
The vllm[audio] extra includes all dependencies needed to serve Whisper as
an audio transcription endpoint (Figure 3).
pip install vllm vllm[audio]
Step 3 - Start the Whisper server
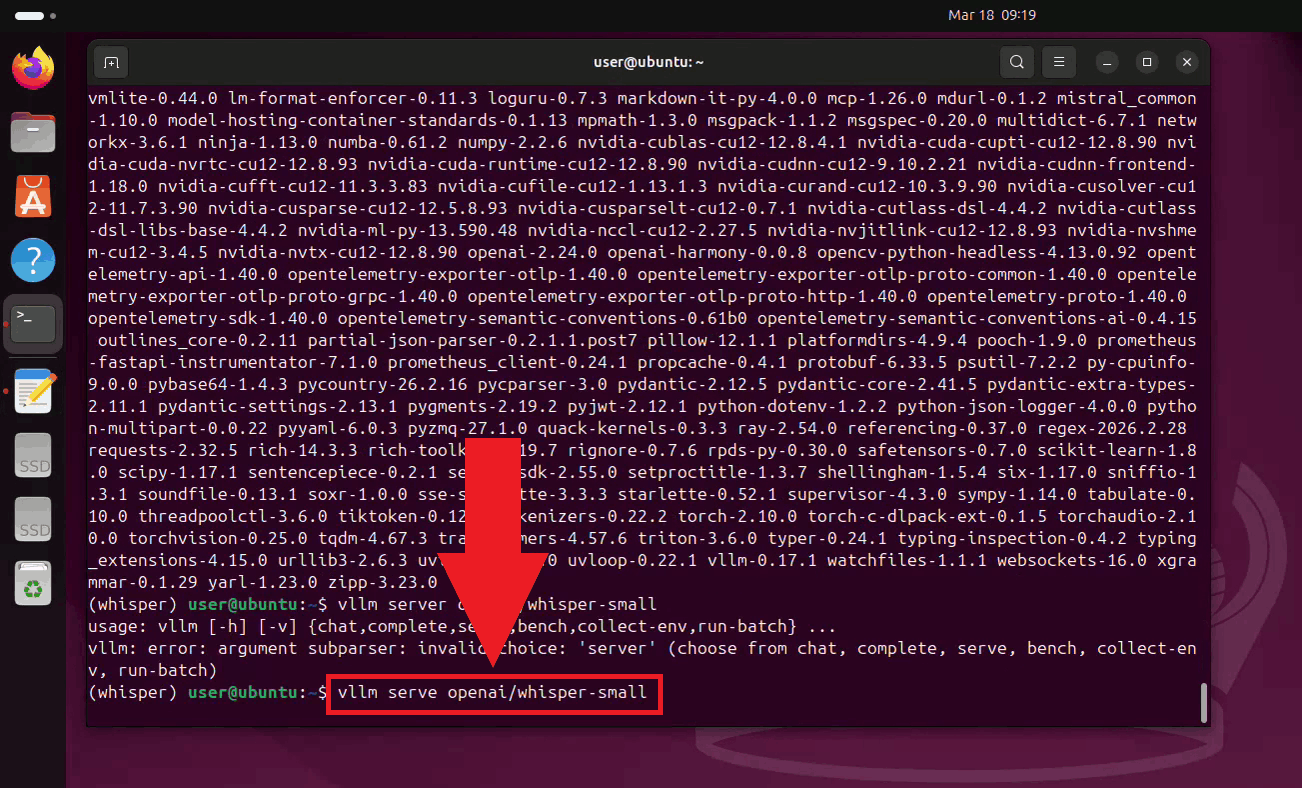
Start the Whisper server by running the vLLM serve command with the small model (You can also use more powerful models depending on your hardware configuration). The server will download the model on the first run, which may take a few minutes depending on your connection speed (Figure 4).
vllm serve openai/whisper-small
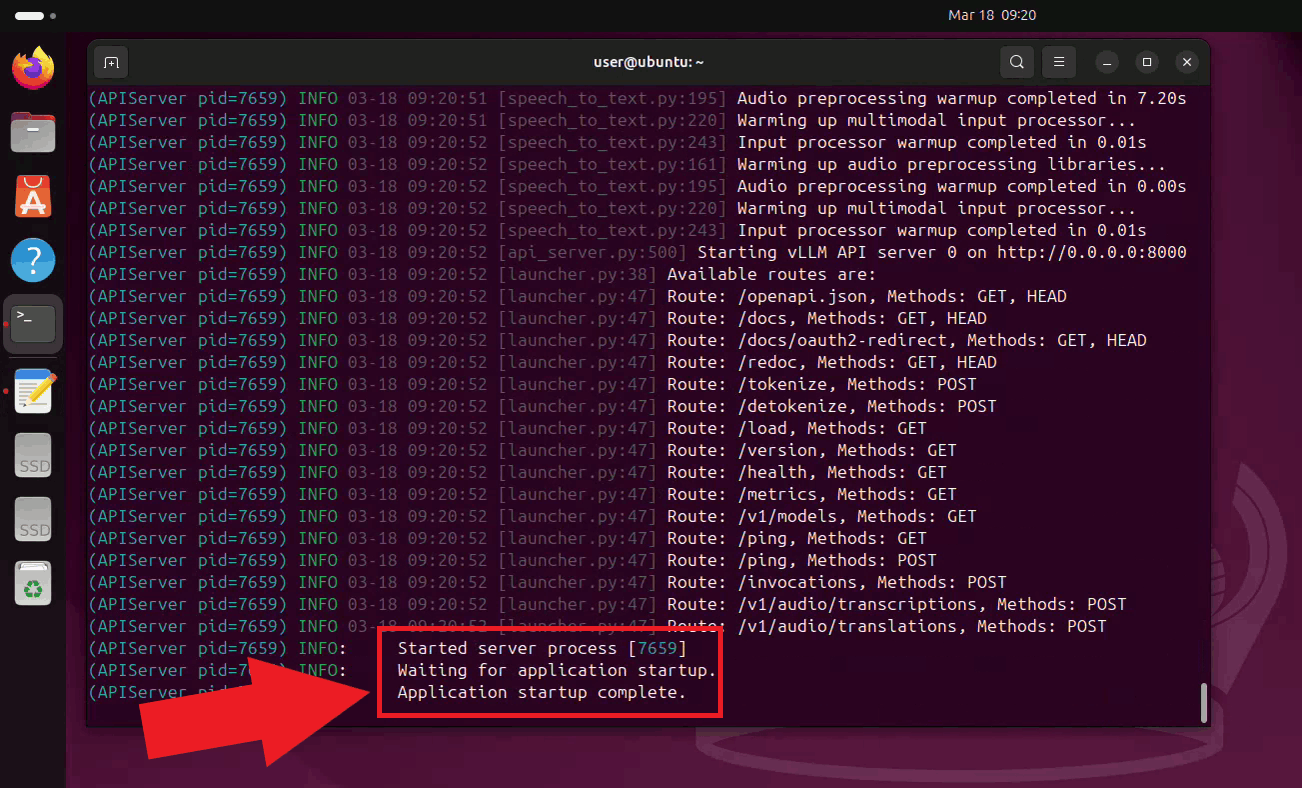
Once the server has started, it will begin listening for transcription requests on
port 8000. Keep this terminal open for the duration of your session. The endpoint
is accessible to other machines on your network at
http://{your-ip-address}/v1/audio/transcriptions (Figure 5).
How to send audio to Whisper from Postman
Postman is an API client and platform that lets you build, send, and debug HTTP requests (REST, SOAP, GraphQL, etc.) to test and develop APIs efficiently. It is mainly used by developers and testers to inspect request/response data, automate collections of tests, and collaborate on API design and documentation across teams. You can download the Postman desktop application for Windows, macOS, and Linux from the official Postman downloads page at https://www.postman.com/downloads/.
In Postman, create a new POST request and set the request URL to http://IP_ADDRESS:PORT/v1/audio/transcriptions, replacing IP_ADDRESS and PORT with the Ubuntu Whisper server’s actual network address. Under the Body tab choose form-data and add a file field of type File, then select the audio file you want to transcribe from your local machine. Add another form-data field named model and set its value to the served Whisper model name running on the vLLM server (for example openai/whisper-small), then save the request so it can be reused for future tests.
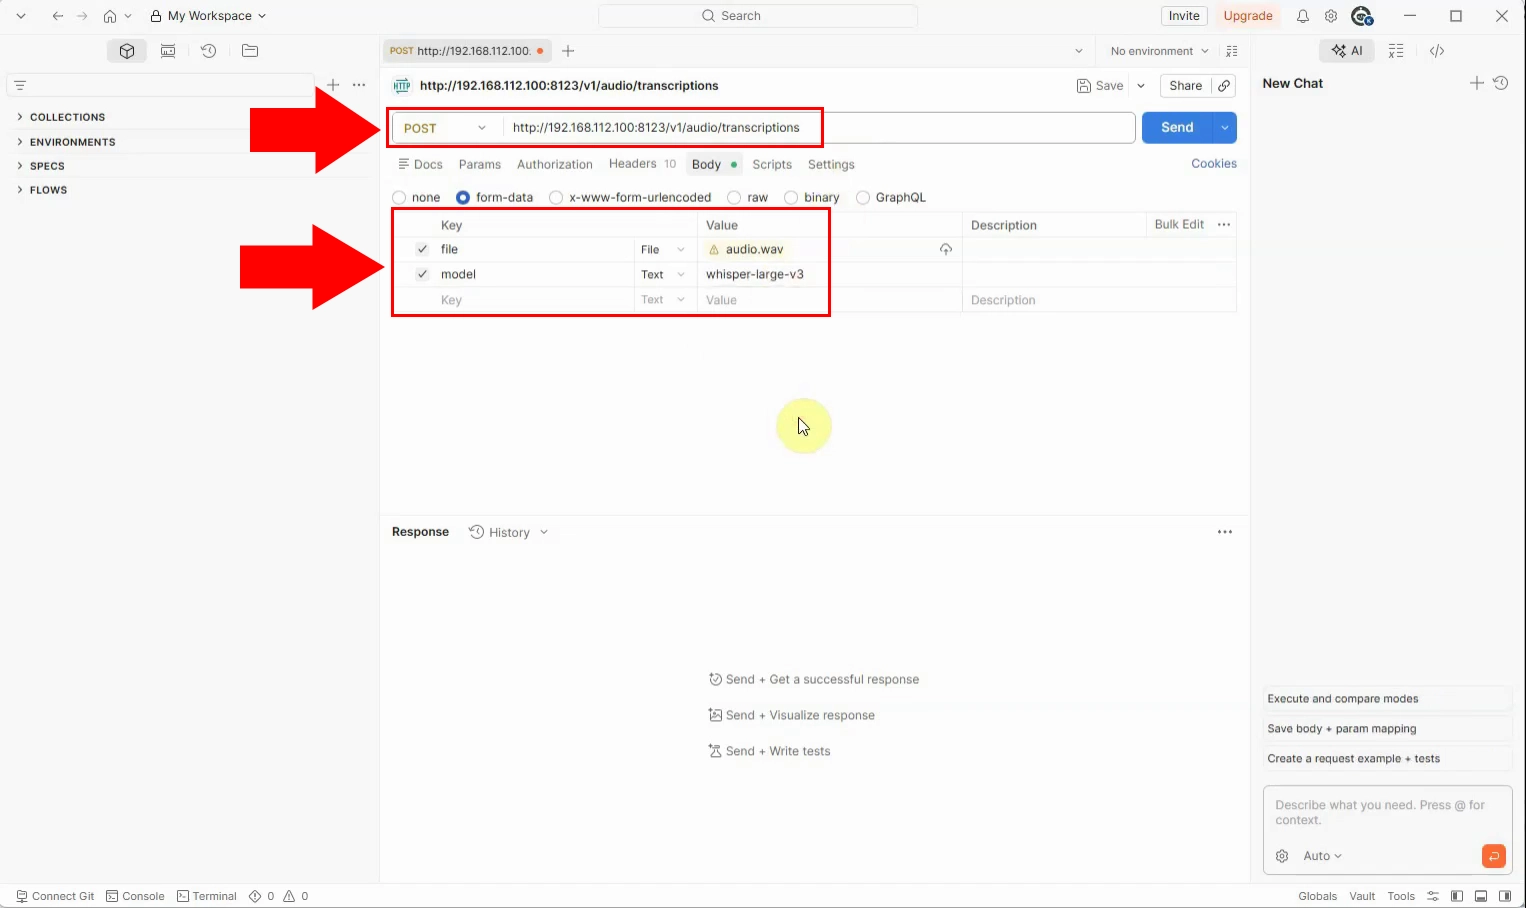
Once the request is configured, click the Send button in Postman to submit the selected audio file and model name to the Whisper endpoint on the Ubuntu machine. Postman will upload the multipart form-data payload, where the binary audio content is sent in the file field and the target Whisper model is specified in the model field. The vLLM-based Whisper server receives this request at /v1/audio/transcriptions, processes the audio, and generates a transcription that will be returned in the HTTP response.
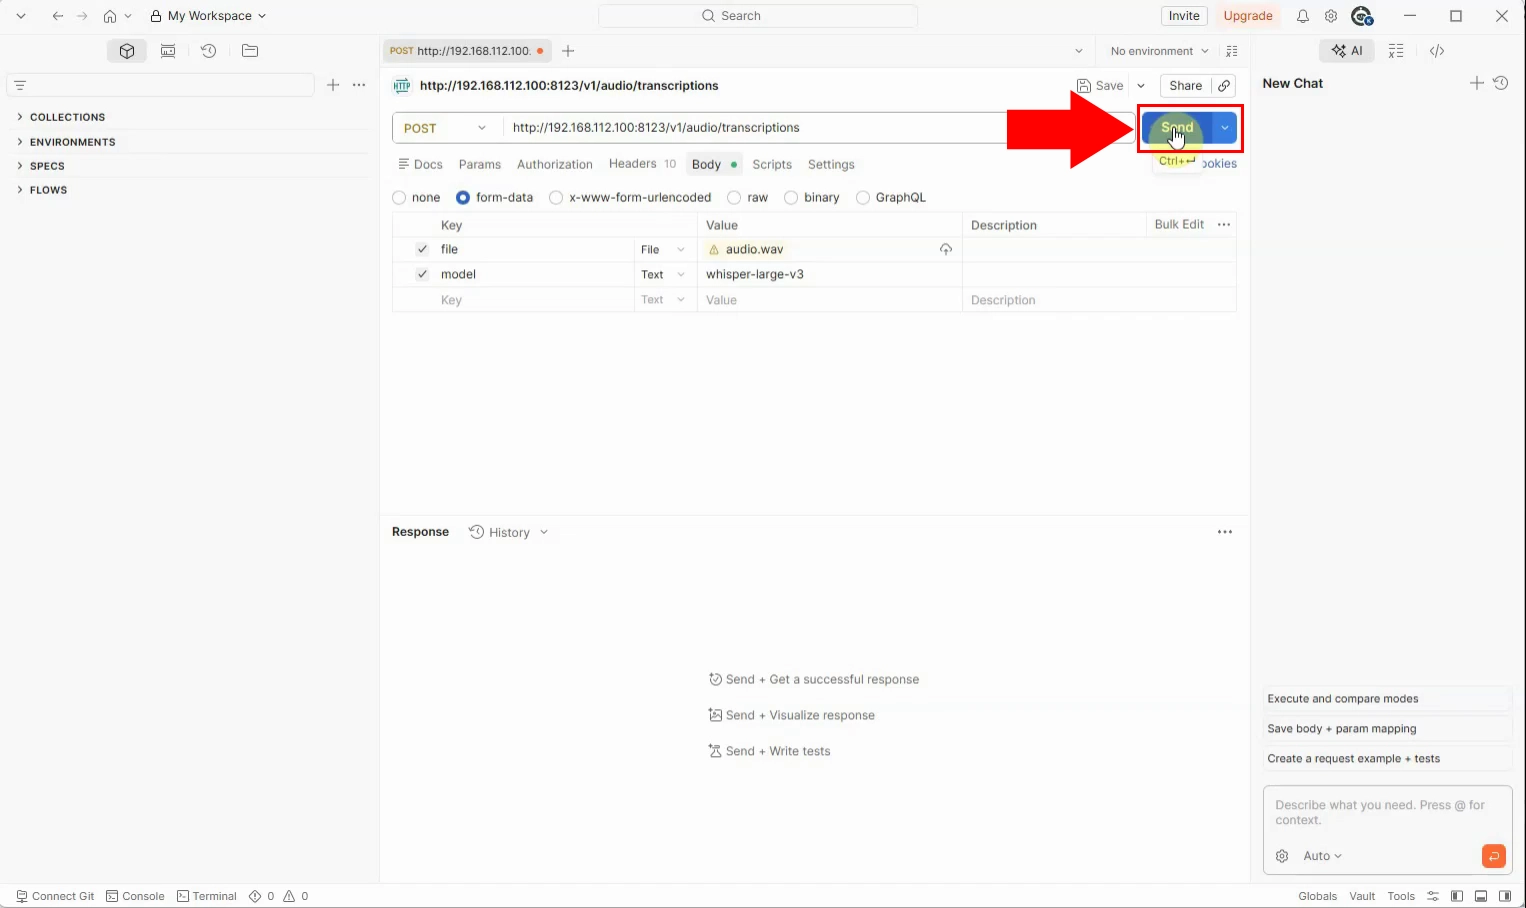
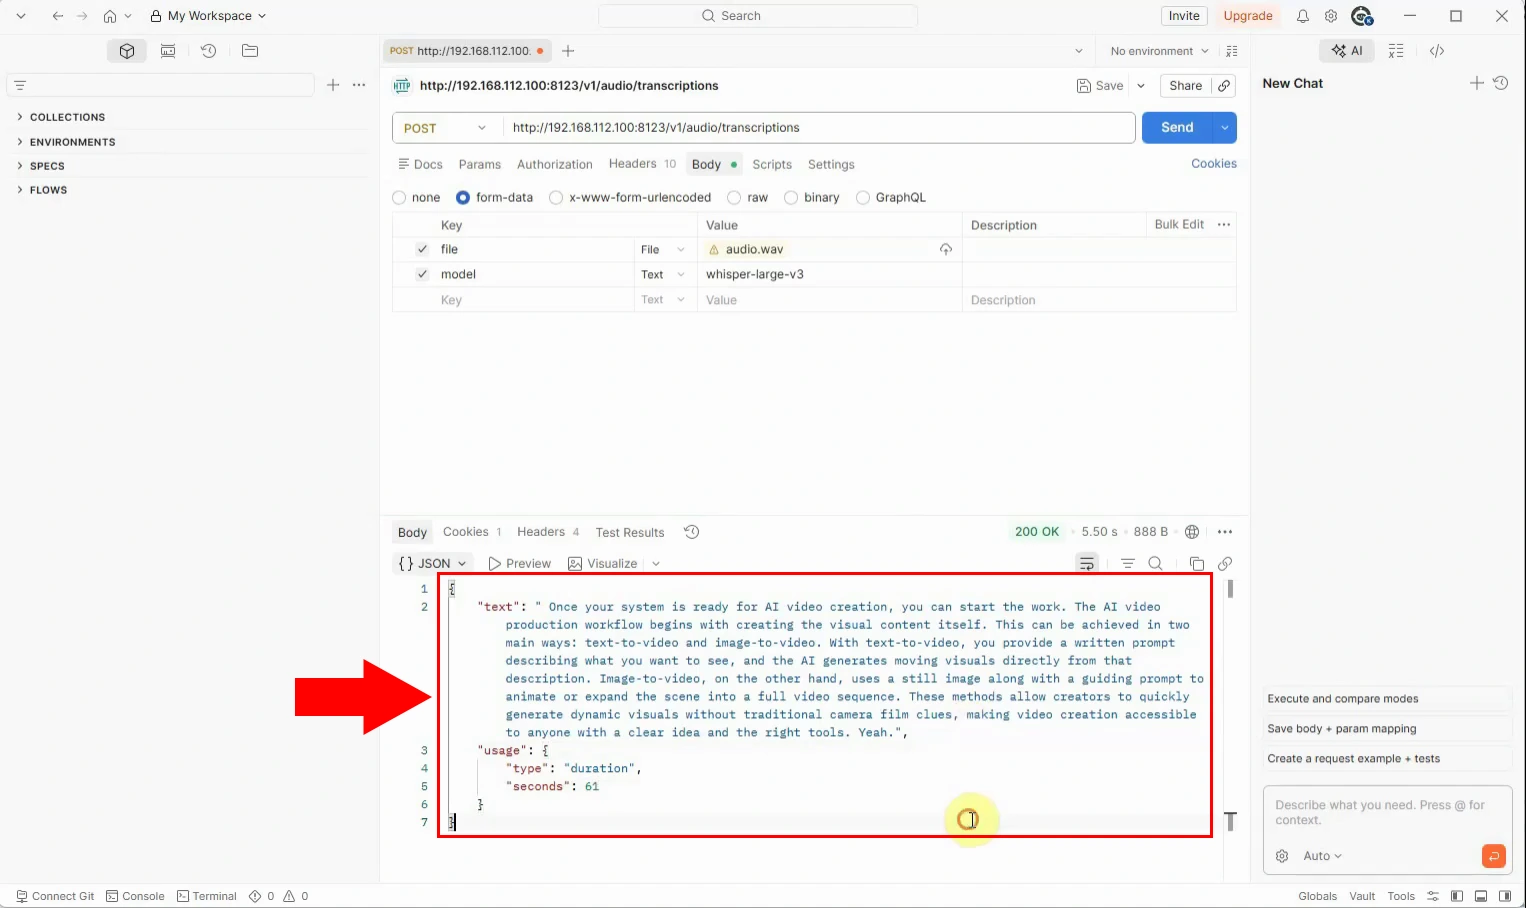
After the Whisper server finishes processing, Postman displays the text response in the Response pane, typically as a JSON object containing the recognized transcription. This transcription corresponds to the spoken content of the audio file you sent and can be copied directly from Postman for use in your application or documentation. By reviewing the response format for different test audio files, you can verify that the Ubuntu Whisper server and network configuration are working correctly from the Windows client machine.
To sum it up
You have successfully set up a Whisper speech recognition server on Ubuntu using vLLM and exposed an OpenAI-compatible audio transcription endpoint on your network. From now on, your Windows client can send audio files to this Ubuntu server and receive accurate transcriptions over HTTP without relying on any external cloud service. This gives you a fast, private, and fully controllable speech-to-text pipeline that you can integrate into your own applications, tools, or documentation workflows.