
Quick start guide to softphone development
This article is a quick start guide to building your own custom softphone application using the Ozeki VoIP SDK. It walks you through setting up a test PBX with Asterisk, installing Visual Studio and the SDK, and building, running, and debugging a working softphone example, all the way to placing and inspecting a test call between two extensions.
Why do we need to set up a softphone development environment?
An off-the-shelf softphone app lets you make and receive calls, but it doesn't let you change what happens during those calls. If you want a call to trigger a database lookup, drive outbound dialing from a list, or feed live audio into an AI transcription tool, you need source code you can actually modify, not just a finished application. Setting up a PBX, Visual Studio, and the Ozeki VoIP SDK together gives you a working softphone you fully control, along with a private test environment to build and debug it in before connecting it to a real phone system.

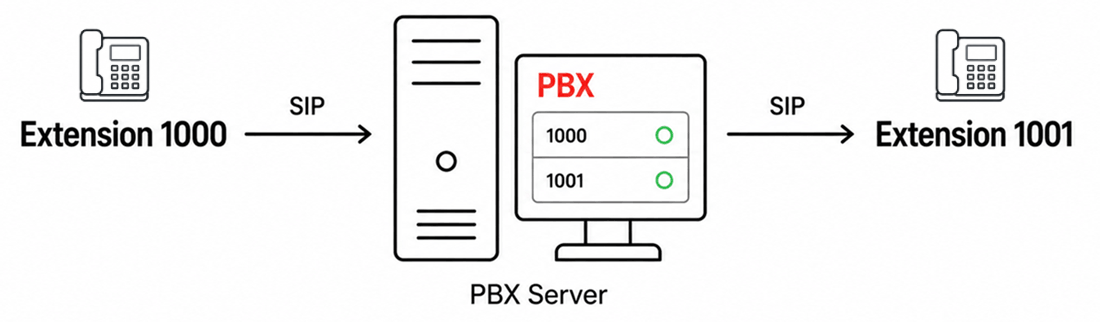
What is a VoIP PBX?
A VoIP PBX (Voice over Internet Protocol Private Branch Exchange) is a modern business telephone system that routes and manages voice and video calls over IP networks. It acts as a central switchboard, allowing employees to share external phone lines while maintaining unique internal extensions. Because it operates digitally rather than over legacy copper telephone lines, it is also frequently referred to as an IP PBX.
What is a Softphone?
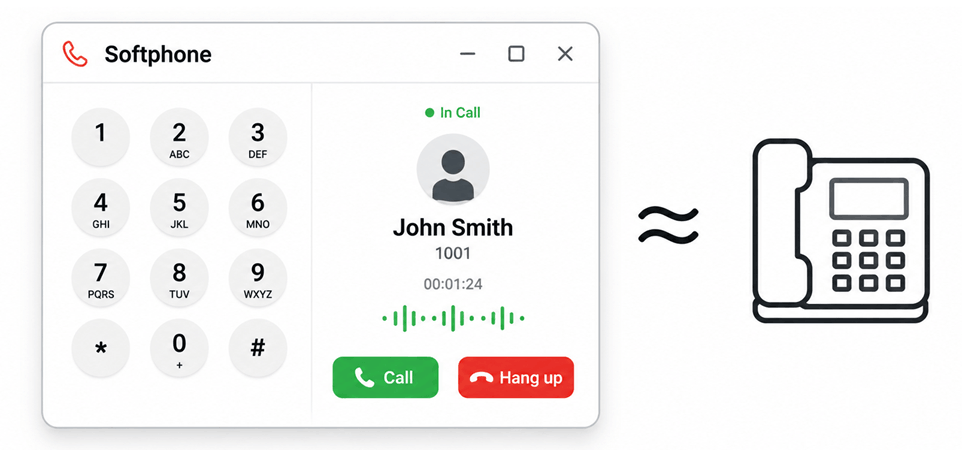
A softphone (software-based telephone) is an application that allows you to make and receive calls over the internet using a computer, smartphone, or tablet, rather than a physical desk phone. It replicates a traditional phone's interface digitally, using VoIP (Voice over Internet Protocol) technology to transmit voice and video.
How does it work?
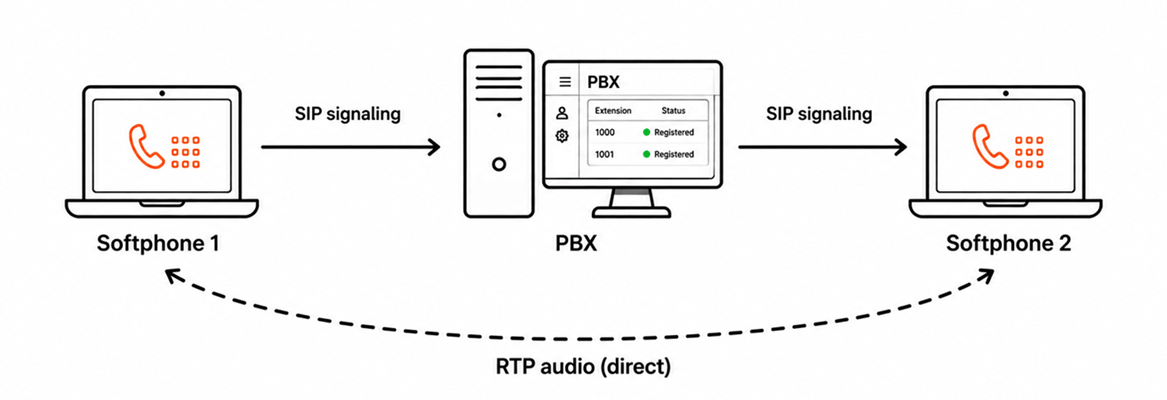
The diagram below shows the basic architecture used throughout this guide. Two softphone instances, registered as extensions 1000 and 1001, both connect to the PBX. When one softphone calls the other, the PBX is only responsible for setting up the call and negotiating which audio codec to use, all done through SIP 2.0 signaling. Once the call is set up, the voice audio itself travels directly between the two softphones, without passing through the PBX.
Why would I want to develop a custom softphone?
A custom softphone gives you full control over what happens during a call, letting you automate tasks that a regular phone application can't perform on its own, including:
- Caller-ID-based lookups: Automatically search your customer database the moment a call comes in, so the agent already has the caller's details on screen before picking up.
- Automatic dialing: Drive outbound calls directly from a list or CRM, removing the need to manually dial every number.
- Integrating voice calls into existing applications: Add calling functionality directly into software your team already uses, instead of switching between separate phone and business applications.
- AI integration: Connect a call to AI-based tools for tasks such as live transcription, call summaries, or automated responses.
Steps to follow
- Install and configure your PBX
- Install Visual Studio
- Install Ozeki VoIP SDK
- Build and run the Softphone example
- Make a test call
- View logs in Asterisk
Install and configure your PBX
The following video shows how to install and configure Asterisk for use with the Ozeki VoIP SDK.
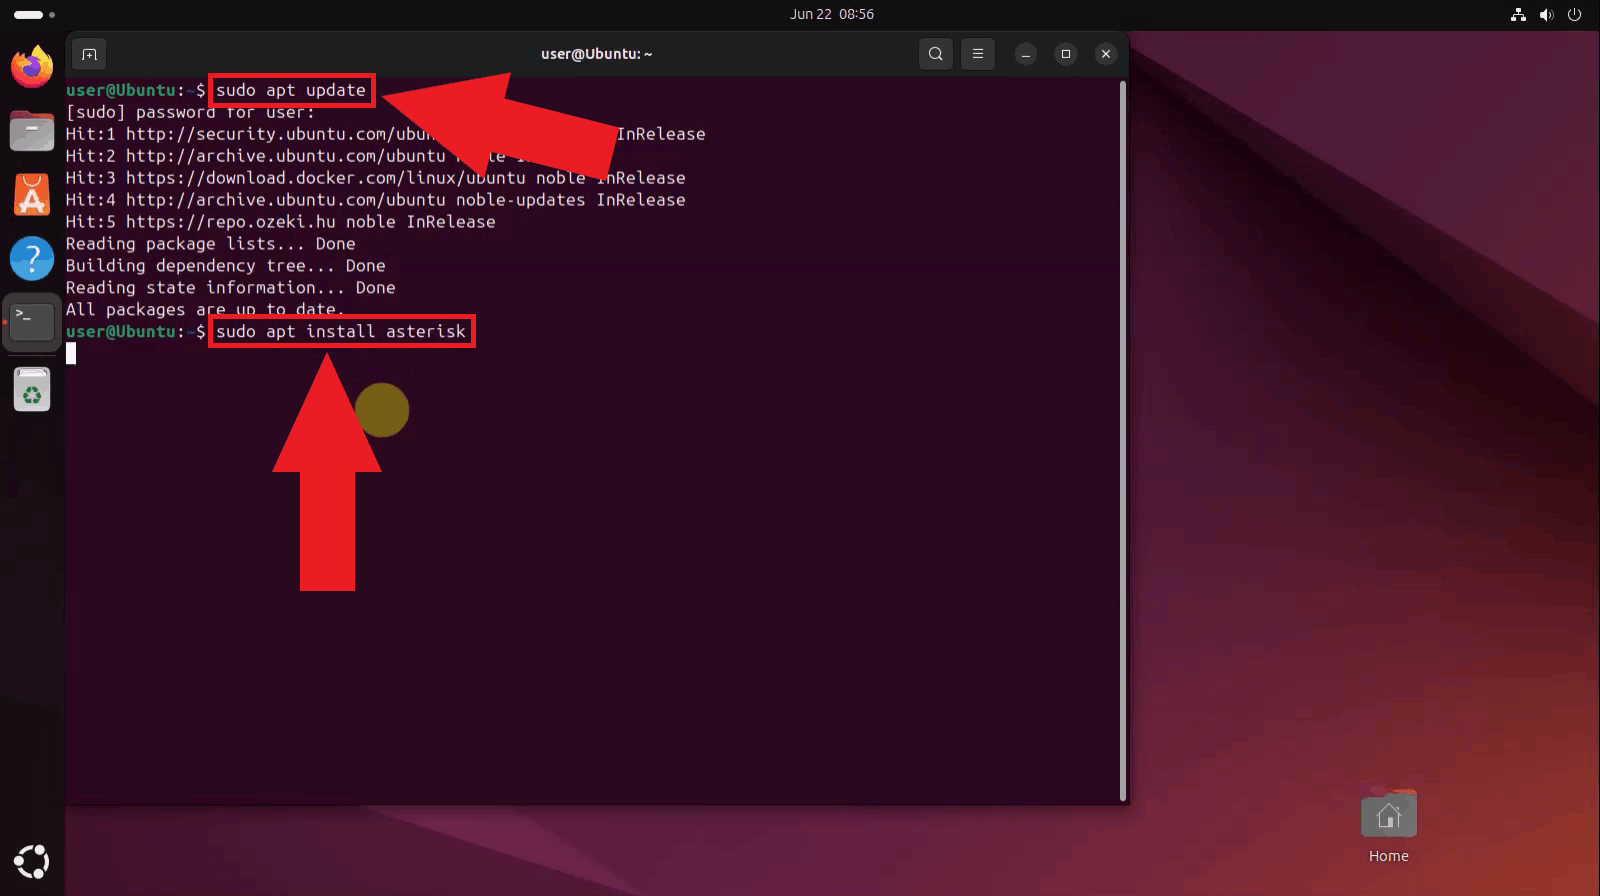
Update the package list and install Asterisk (Figure 1). Running the update first makes sure apt installs the latest Asterisk package available in the Ubuntu repositories, including the chan_sip module this guide relies on.
sudo apt update
sudo apt install asterisk
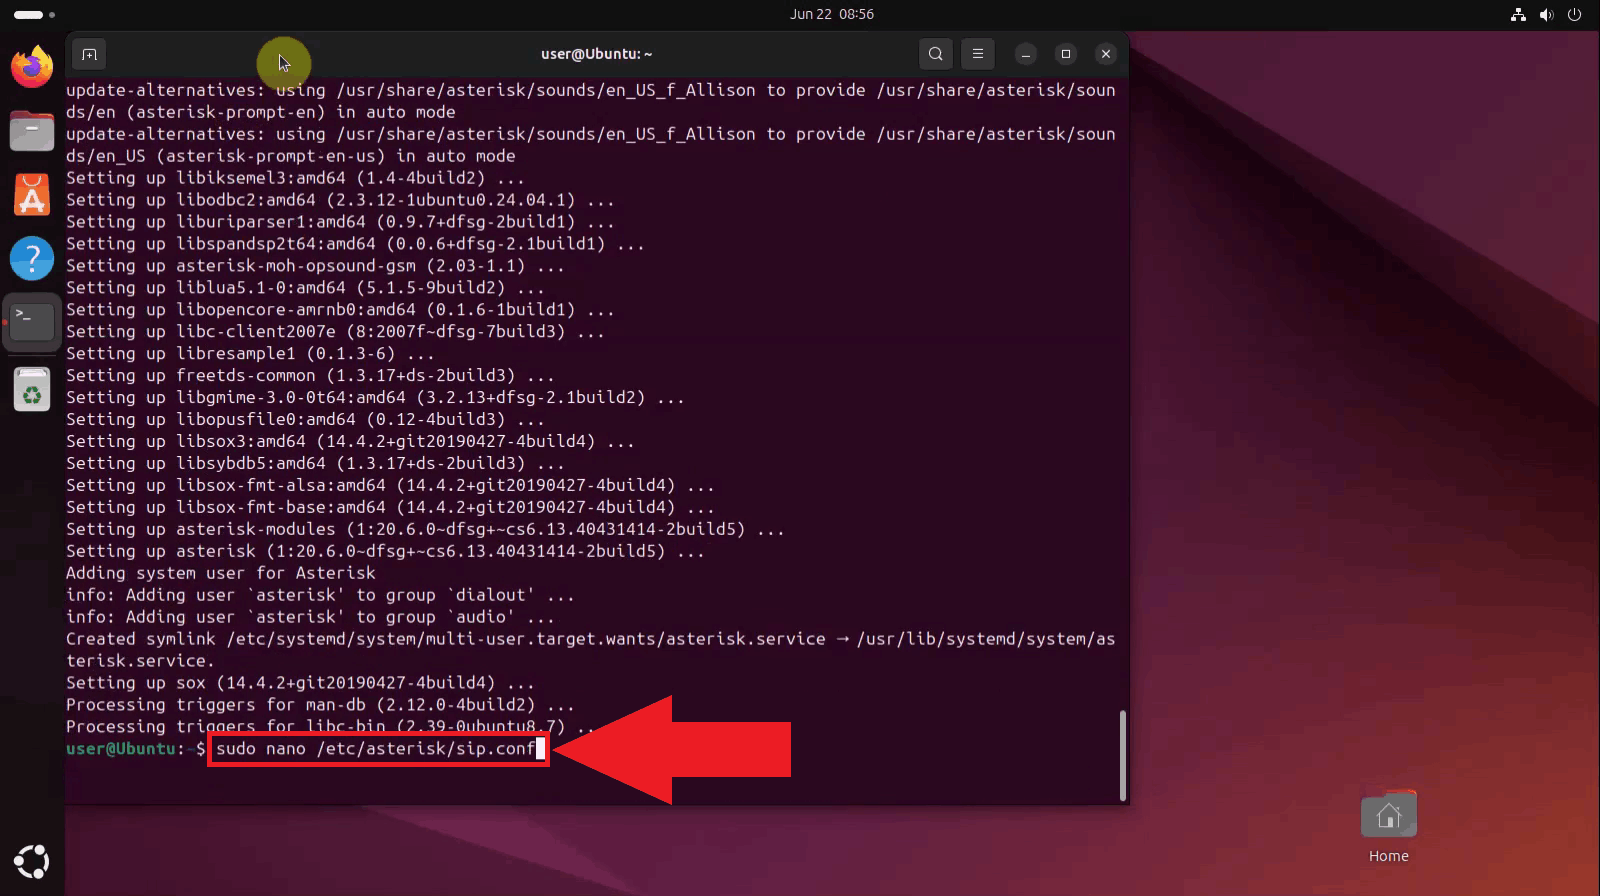
Open the sip.conf configuration file in the nano text editor (Figure 2). This file
defines the SIP peers that Asterisk will accept registrations from.
sudo nano /etc/asterisk/sip.conf
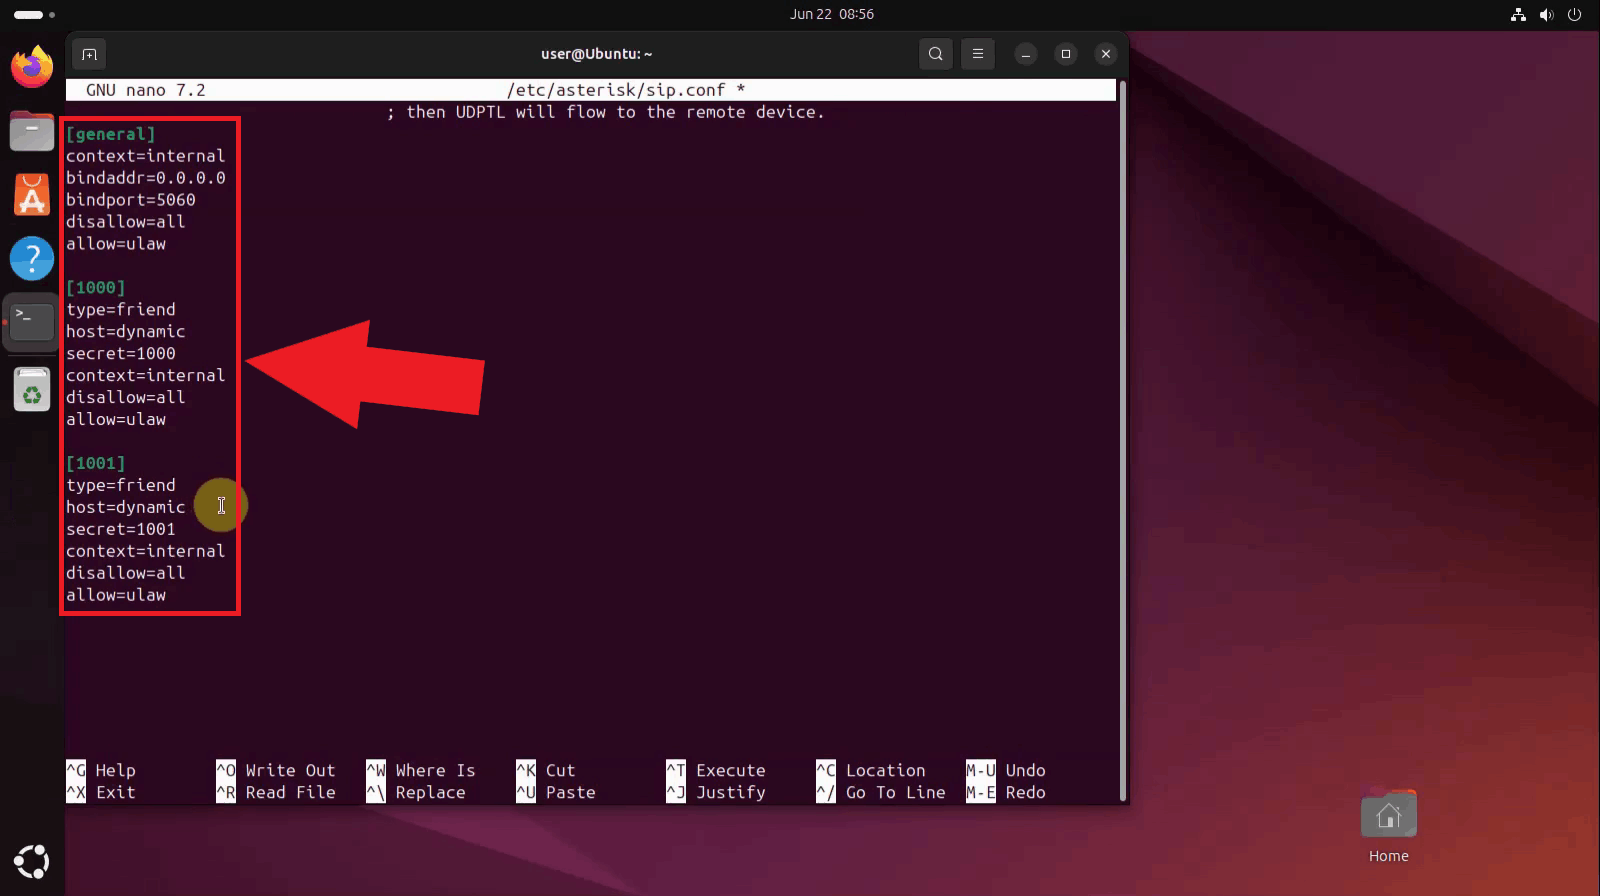
Add the configuration shown below to sip.conf (Figure 3). The [general]
block sets Asterisk to listen for SIP traffic on port 5060, while the [1000] and
[1001] blocks define the two extensions used for the test call later in this guide,
each with its own username and password.
[general]
context=internal
bindaddr=0.0.0.0
bindport=5060
disallow=all
allow=ulaw

[1000]
type=friend
host=dynamic
secret=1000
context=internal
disallow=all
allow=ulaw

[1001]
type=friend
host=dynamic
secret=1001
context=internal
disallow=all
allow=ulaw
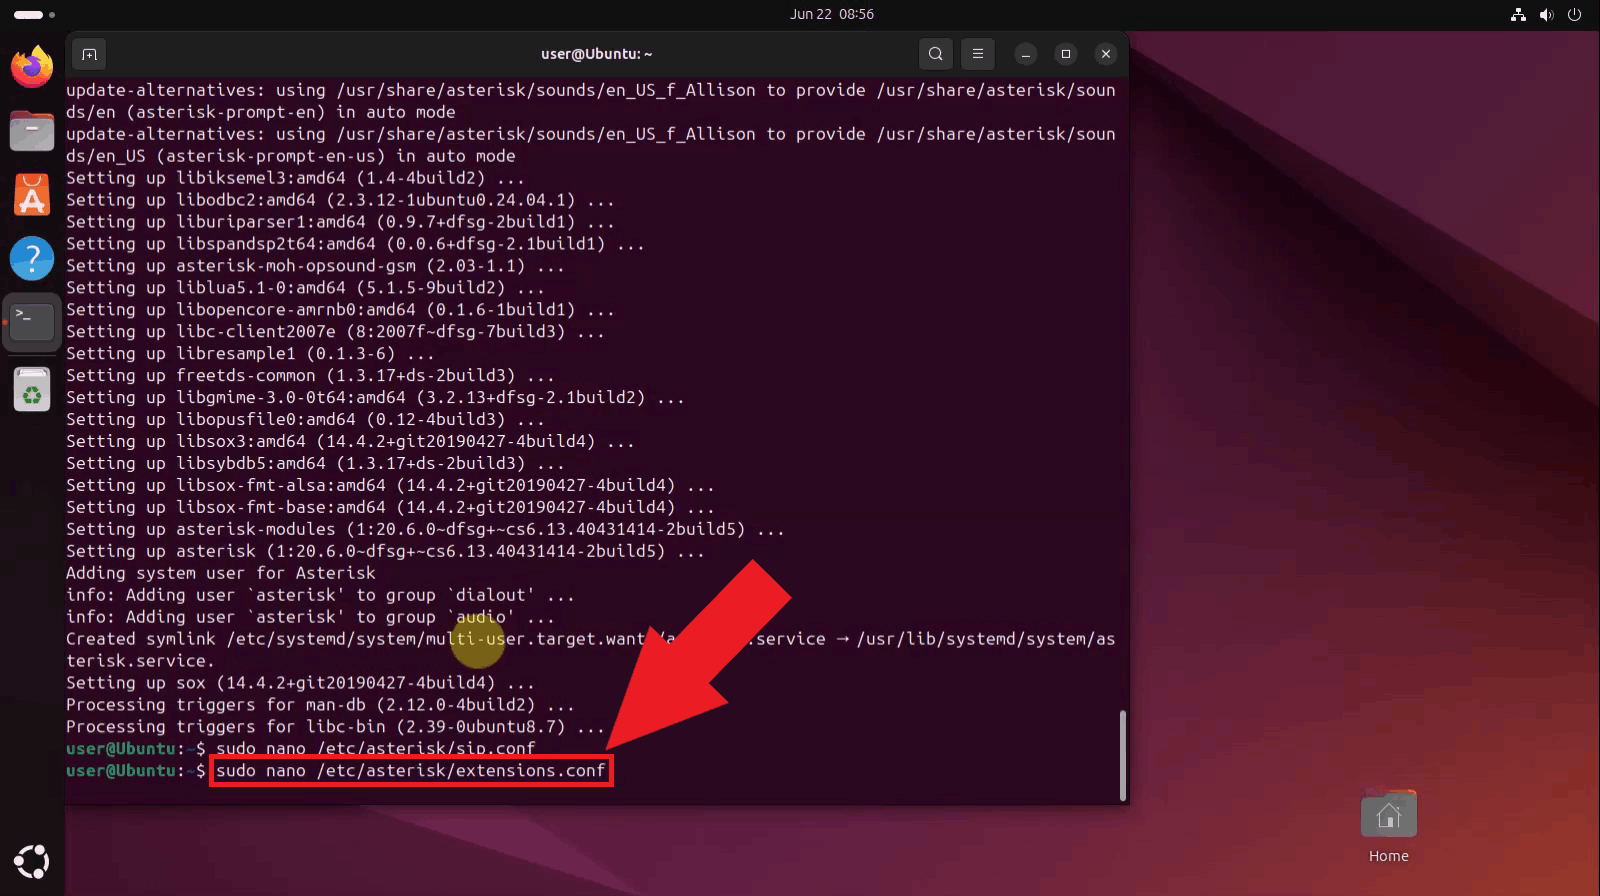
Open the extensions.conf file in nano (Figure 4).
This file defines the dial plan, which determines what Asterisk should do when one extension calls another.
sudo nano /etc/asterisk/extensions.conf
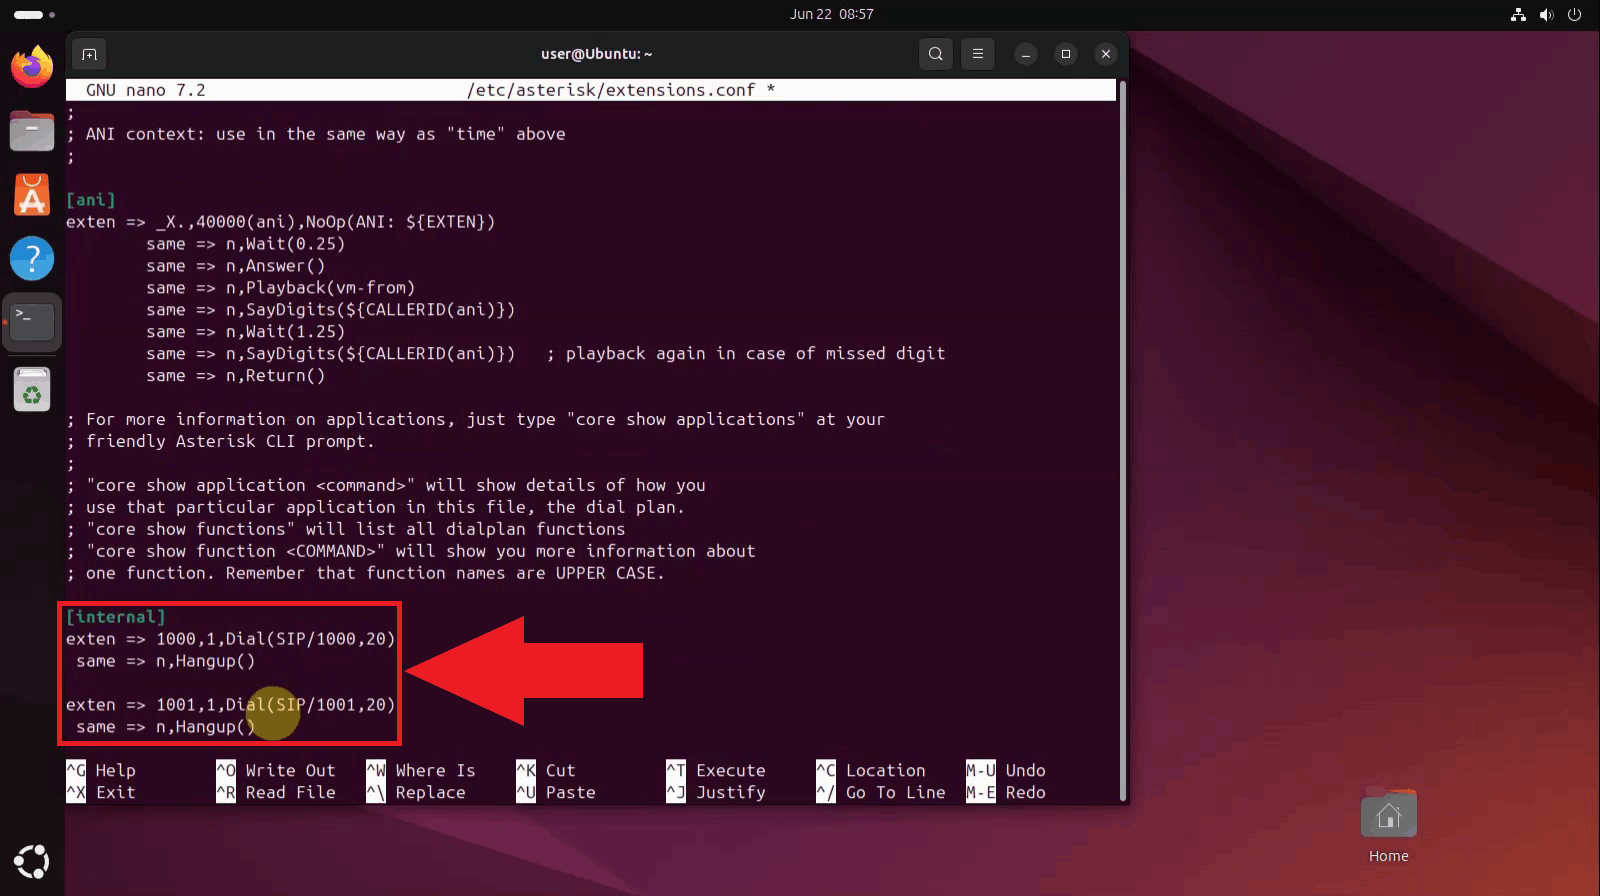
Add the dial plan shown below to extensions.conf (Figure 5). This tells Asterisk
that a call to extension 1000 should ring SIP/1000 for up to 20 seconds before hanging up, and
the same for extension 1001.
[internal]
exten => 1000,1,Dial(SIP/1000,20)
same => n,Hangup()
exten => 1001,1,Dial(SIP/1001,20)
same => n,Hangup()
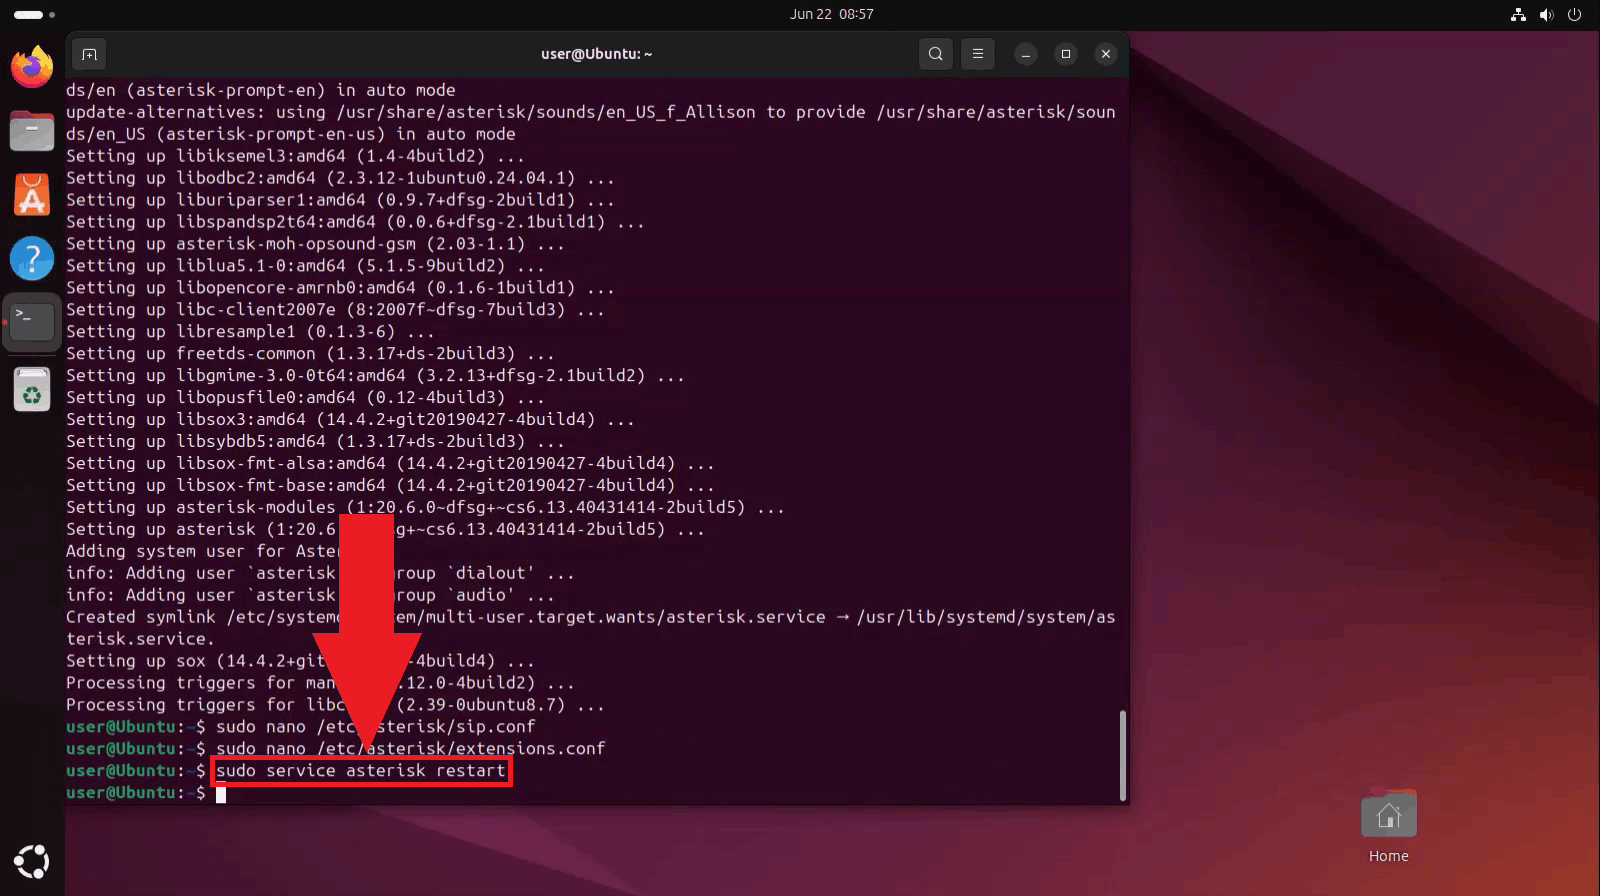
Restart the Asterisk service so the new configuration is loaded (Figure 6). Asterisk doesn't
pick up changes to sip.conf or extensions.conf automatically,
so restarting Asterisk applies the changes from both files at once.
sudo service asterisk restart
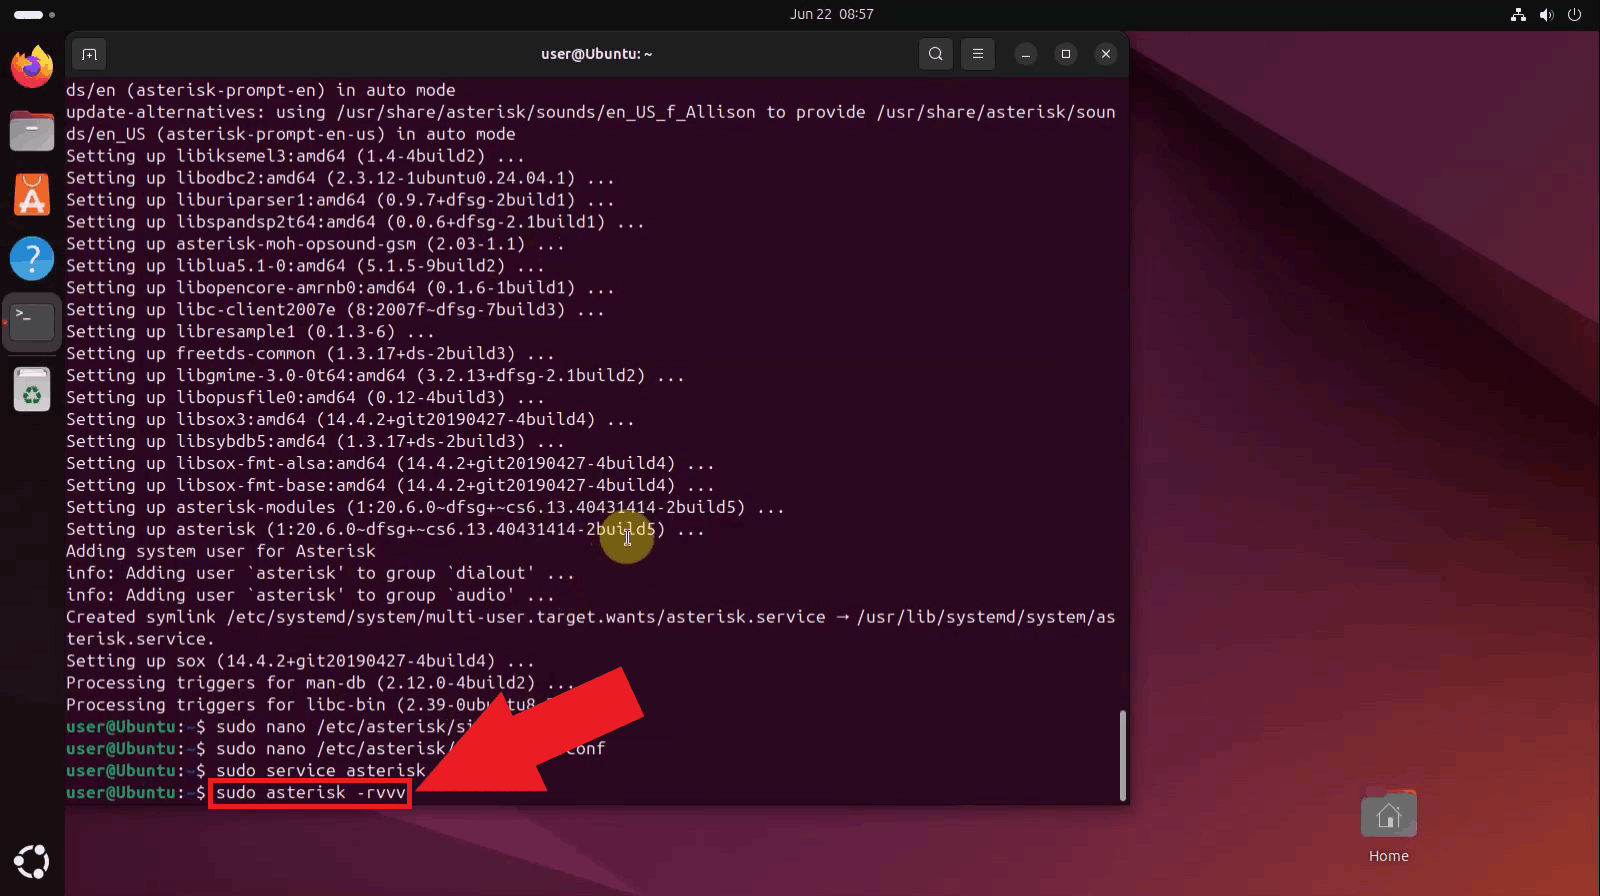
Connect to the Asterisk console with verbose logging enabled to confirm the service restarted without errors (Figure 7). Keeping this console open also lets you watch call activity in real time later in this guide.
sudo asterisk -rvvv
Install Visual Studio
The following video shows how to download and install Visual Studio 2026.
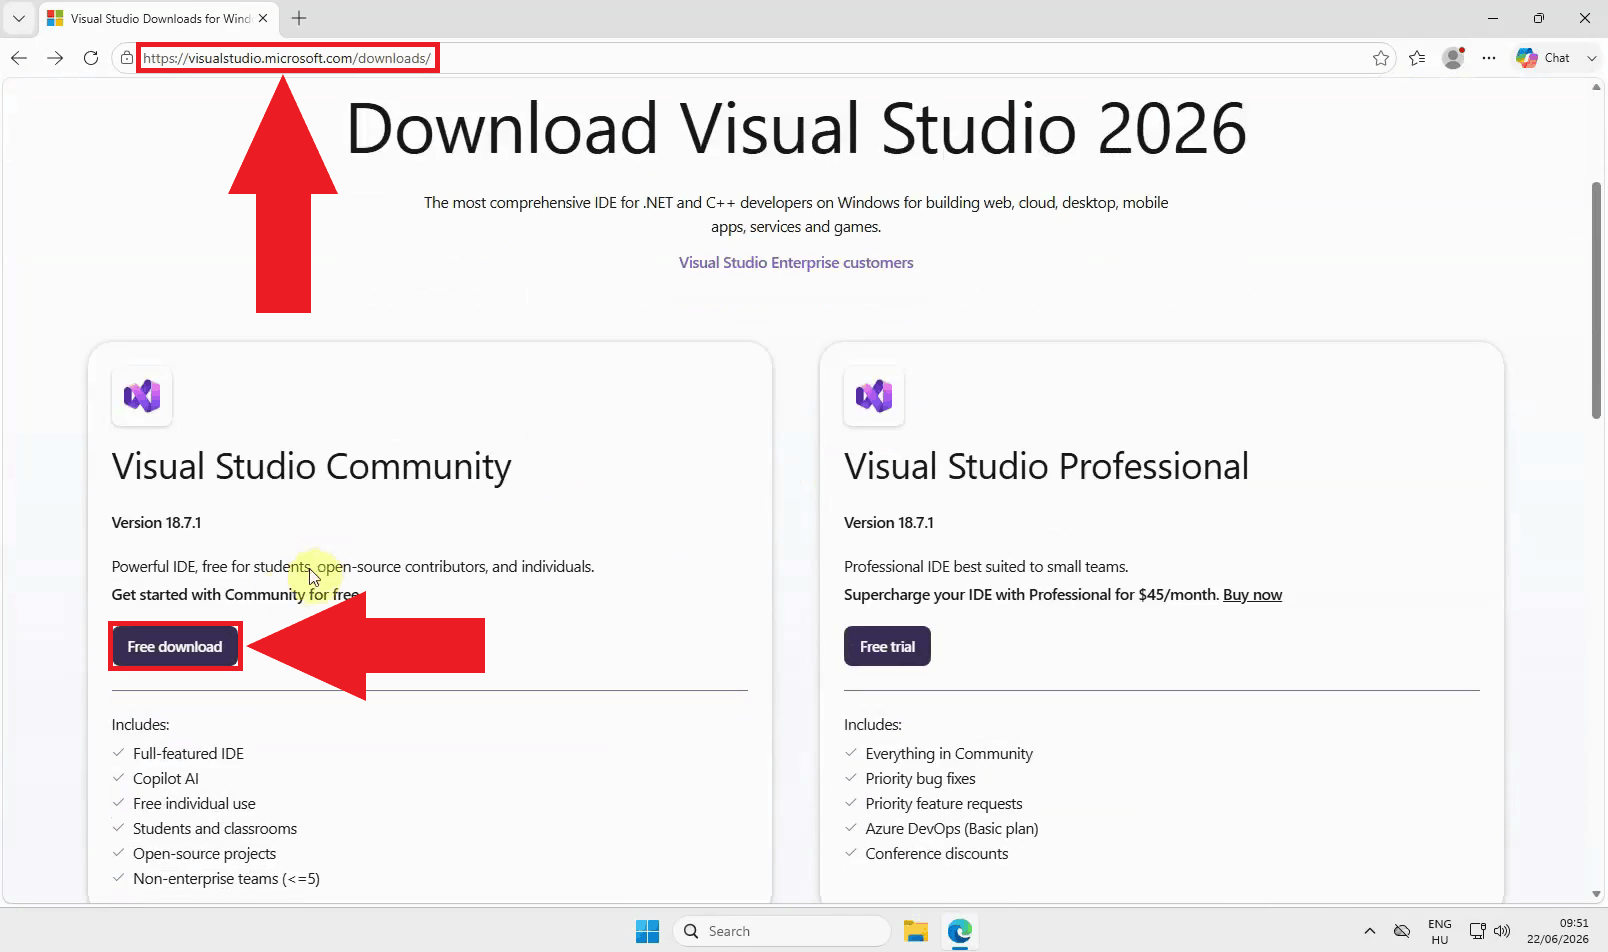
Go to the official Visual Studio website and download the Community edition, which is free to use (Figure 8).
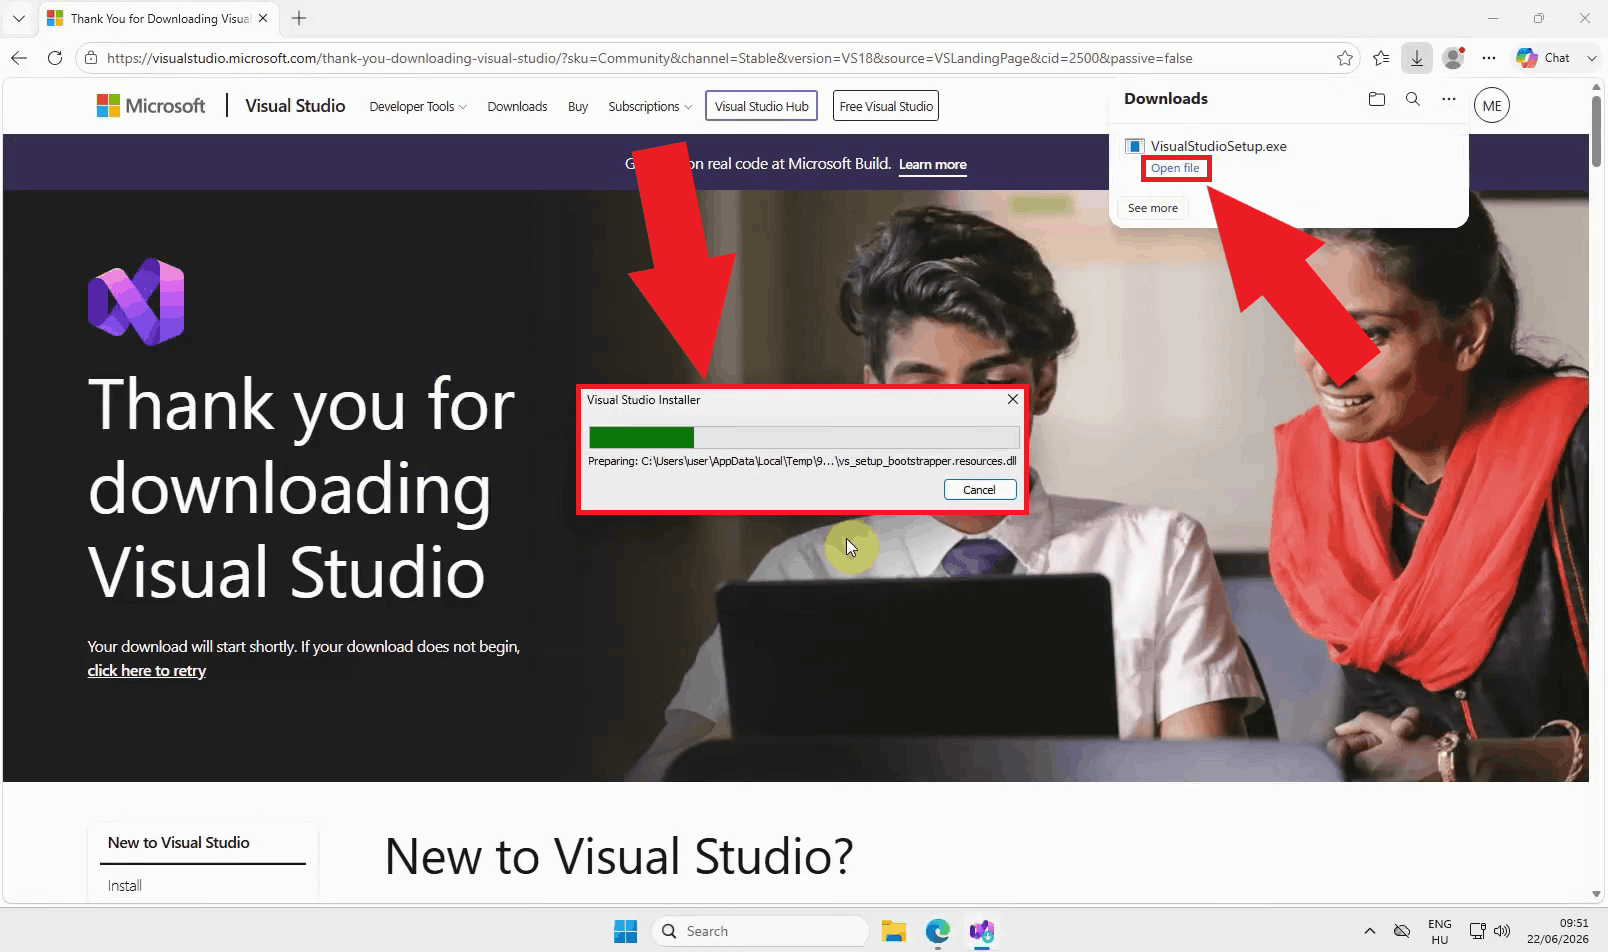
Run the downloaded installer to begin the installation (Figure 9). This small bootstrapper downloads the actual Visual Studio components based on the workloads you select next.
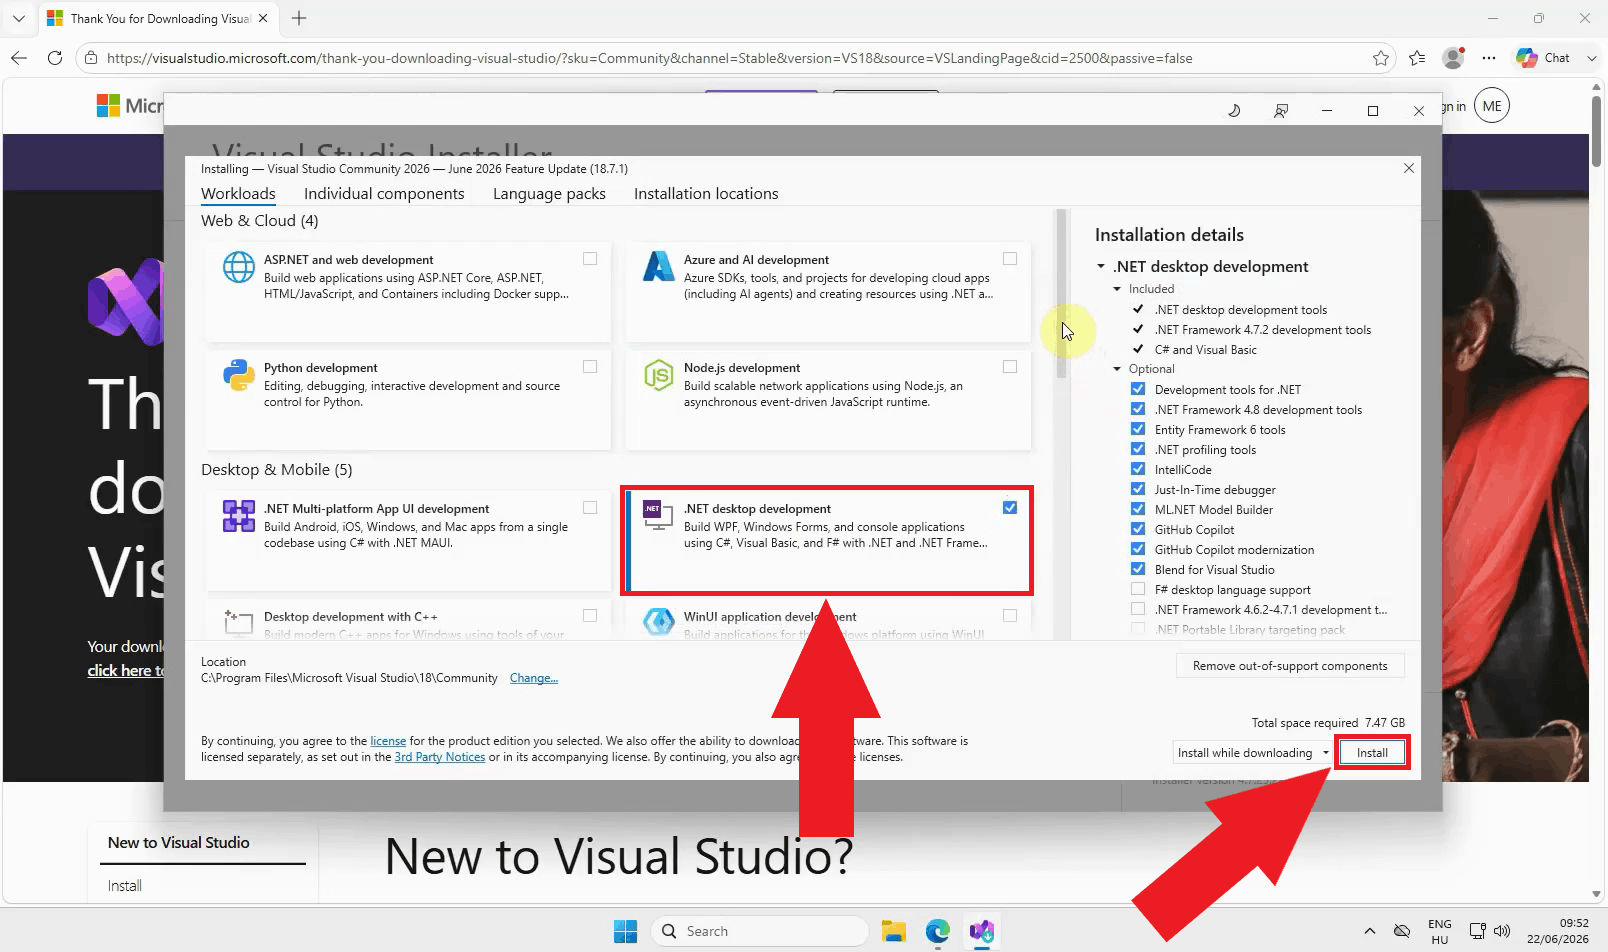
On the Workloads tab, select .NET desktop development and press Install (Figure 10). This workload includes the C# and .NET tooling needed to open and build the Ozeki demo Softphone project.
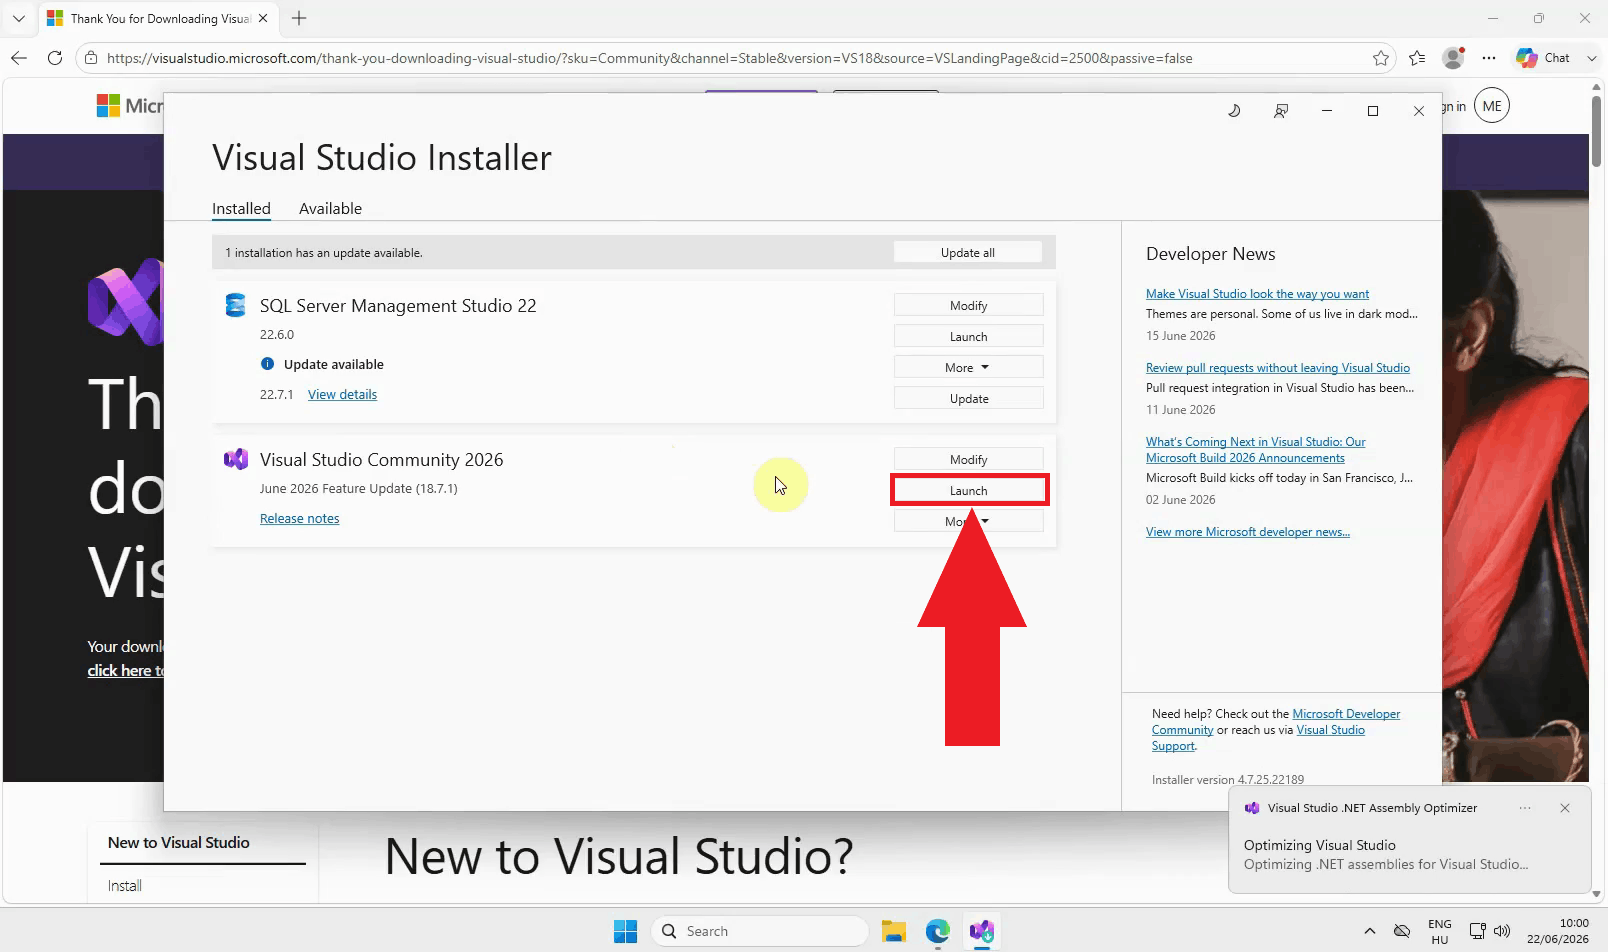
Once the installation is complete, launch Visual Studio Community by pressing the Launch button (Figure 11).
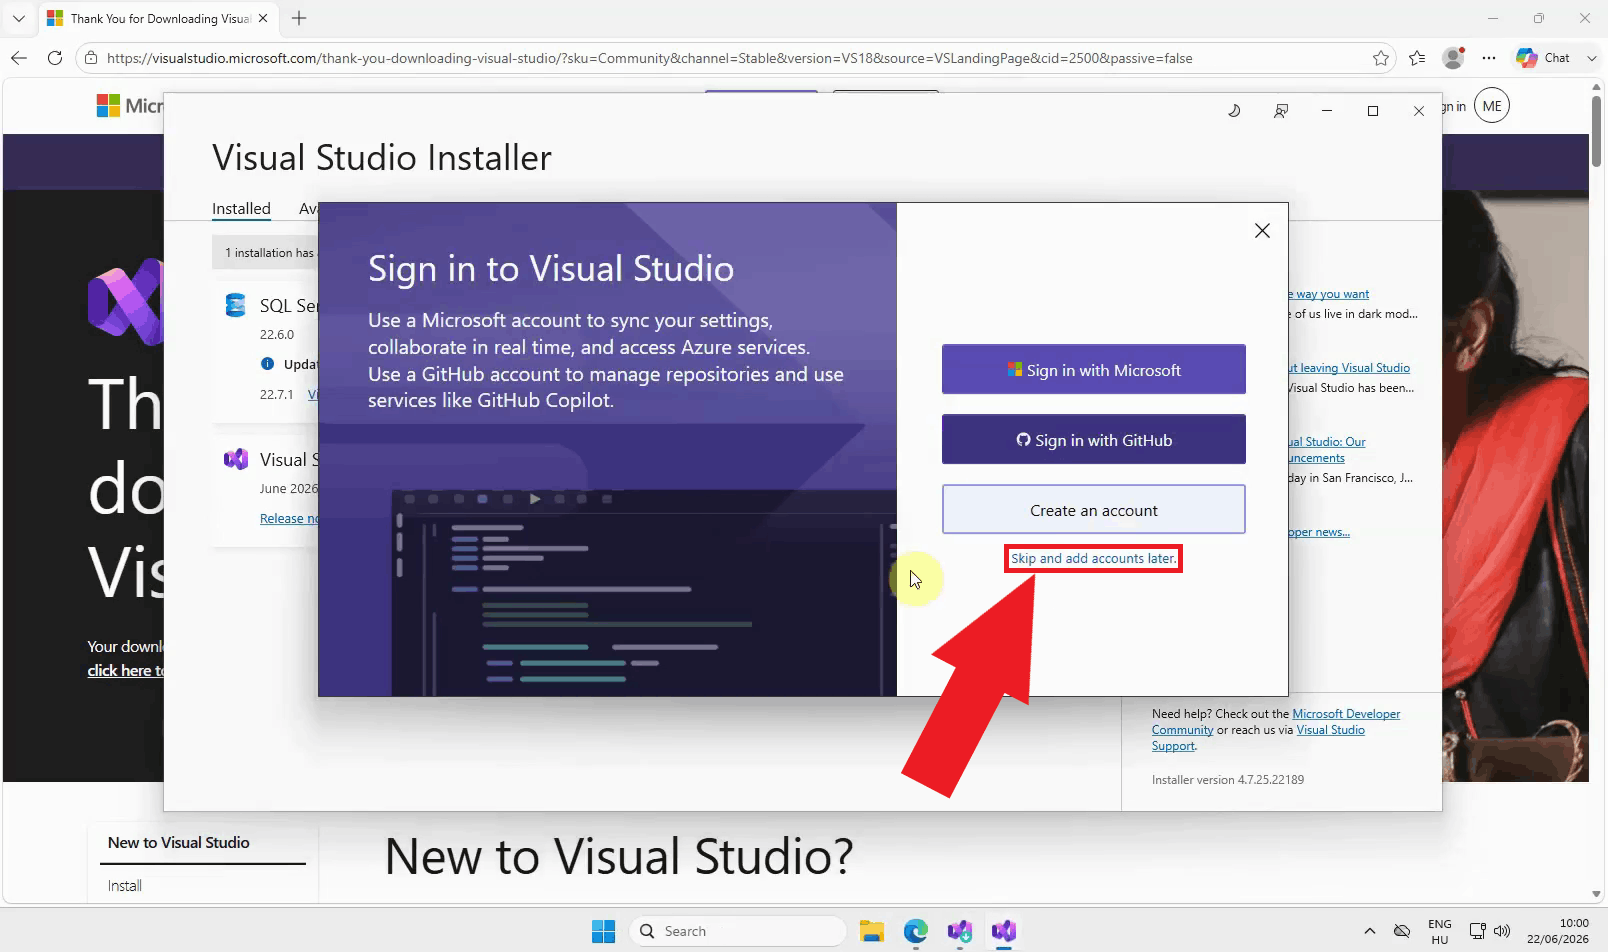
If prompted to sign in, you can skip this step and continue without a Microsoft account (Figure 12). Signing in is optional and not required to build or run the Ozeki demo Softphone project.
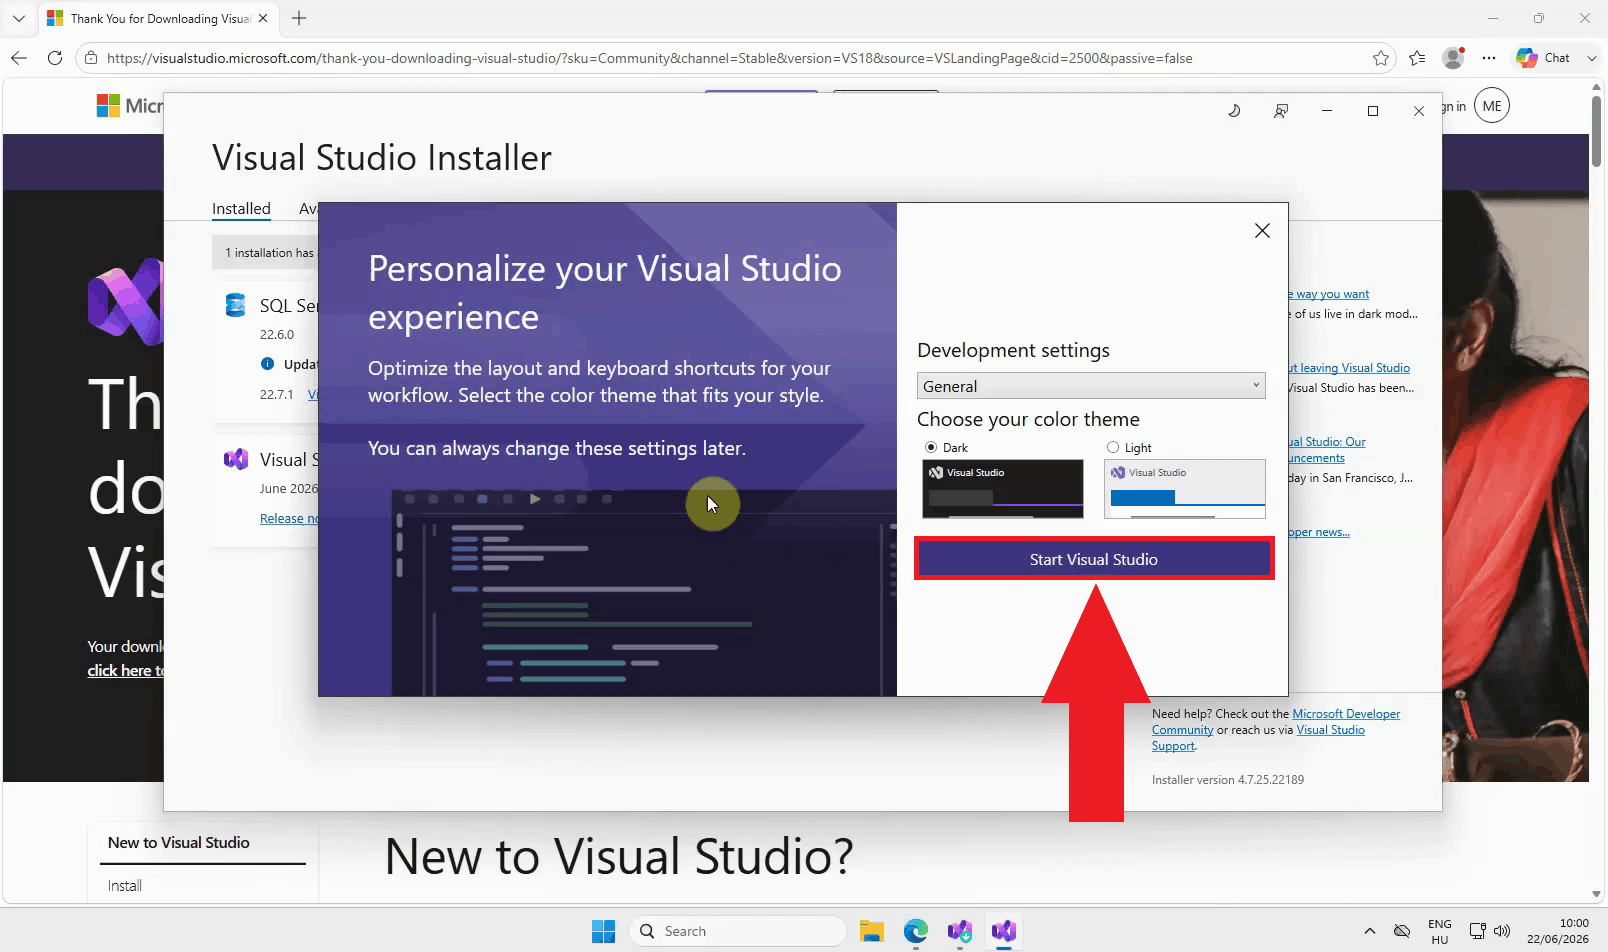
Choose your preferred development settings and color theme, then press Start Visual Studio (Figure 13). These are personal preferences and don't affect whether the demo project builds correctly.
Install Ozeki VoIP SDK
The following video shows how to install the Ozeki VoIP SDK.
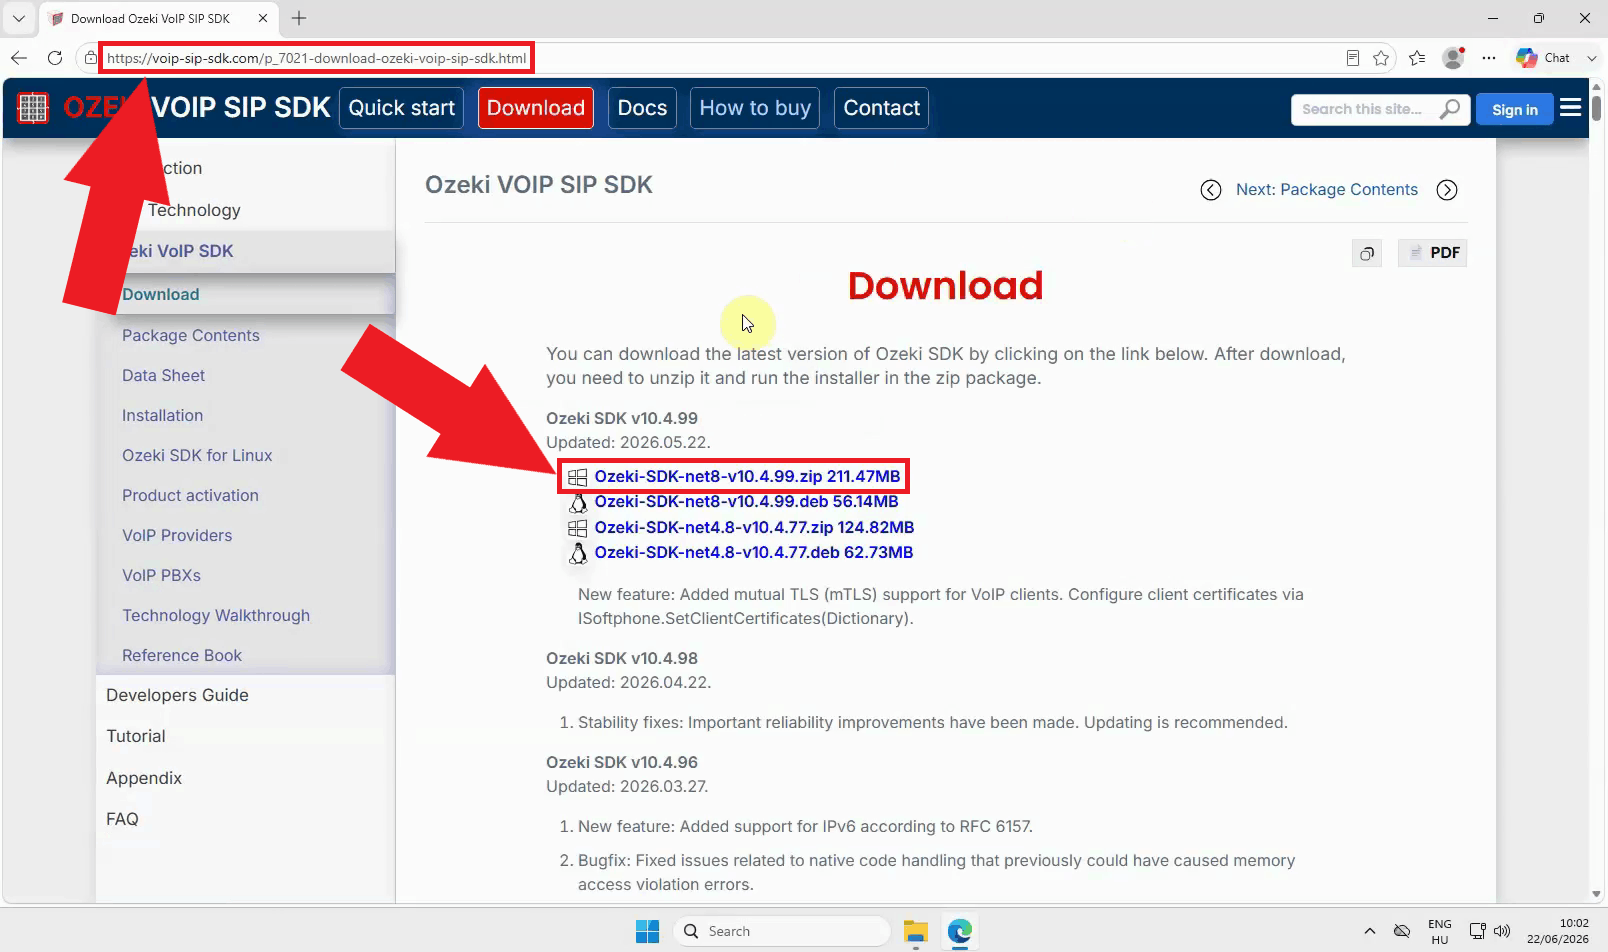
Go to the Ozeki VoIP SDK download page and download the .NET 8 build of the SDK (Figure 14).
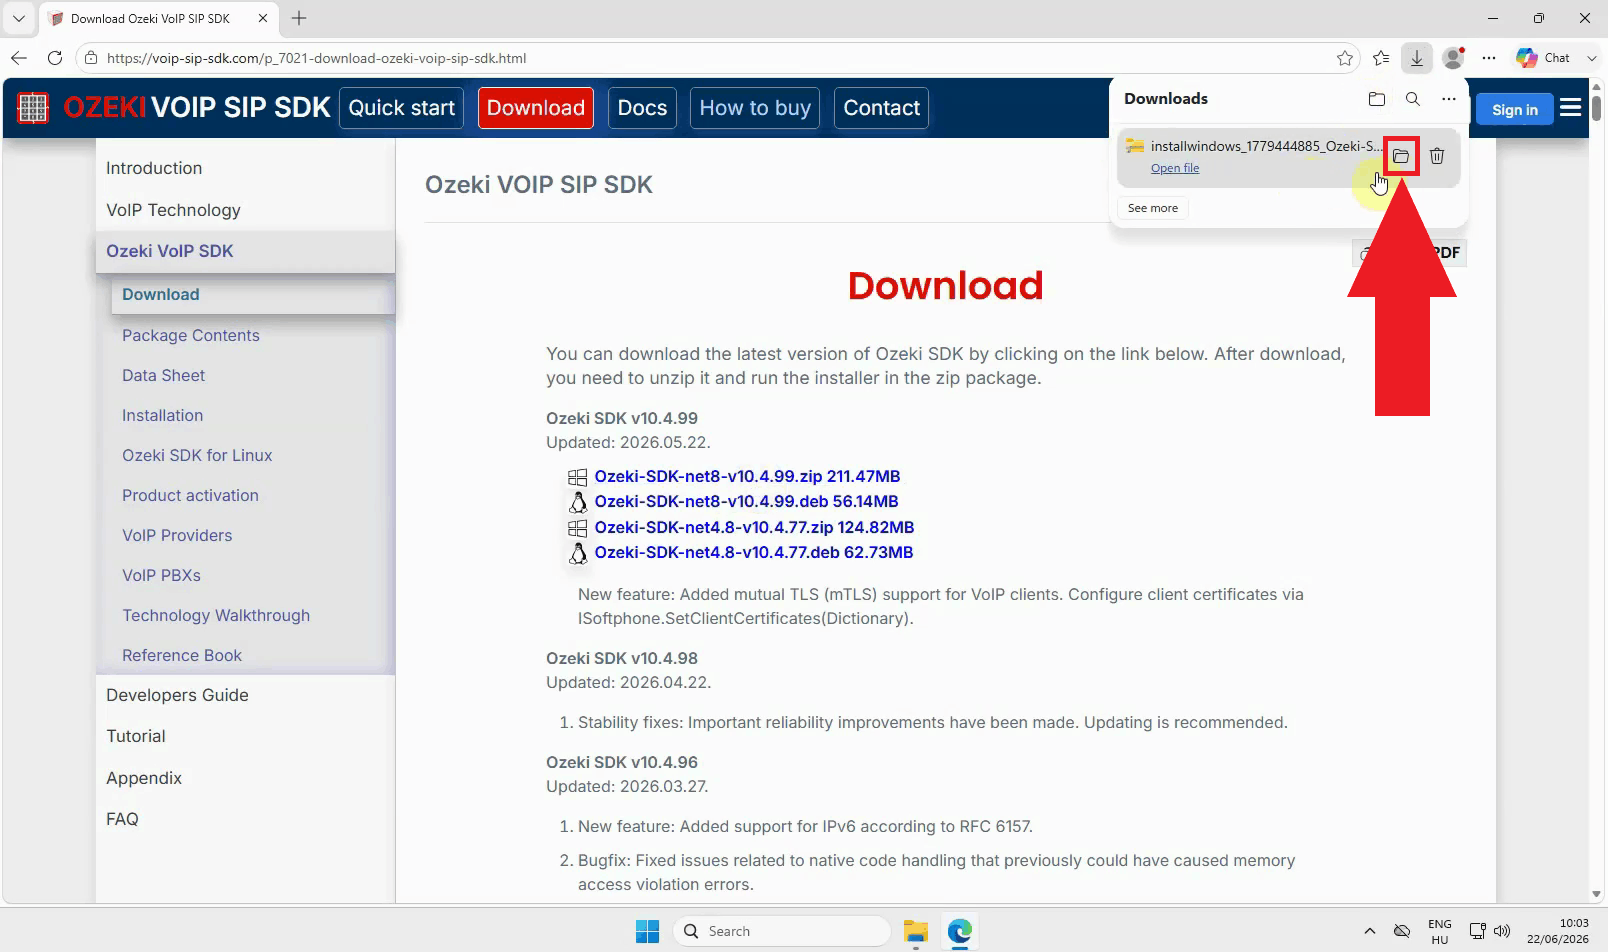
Open your Downloads folder and locate the downloaded ZIP package (Figure 15). Depending on your browser settings, the file may already be visible in a downloads bar or notification, but it's saved to the Downloads folder either way.
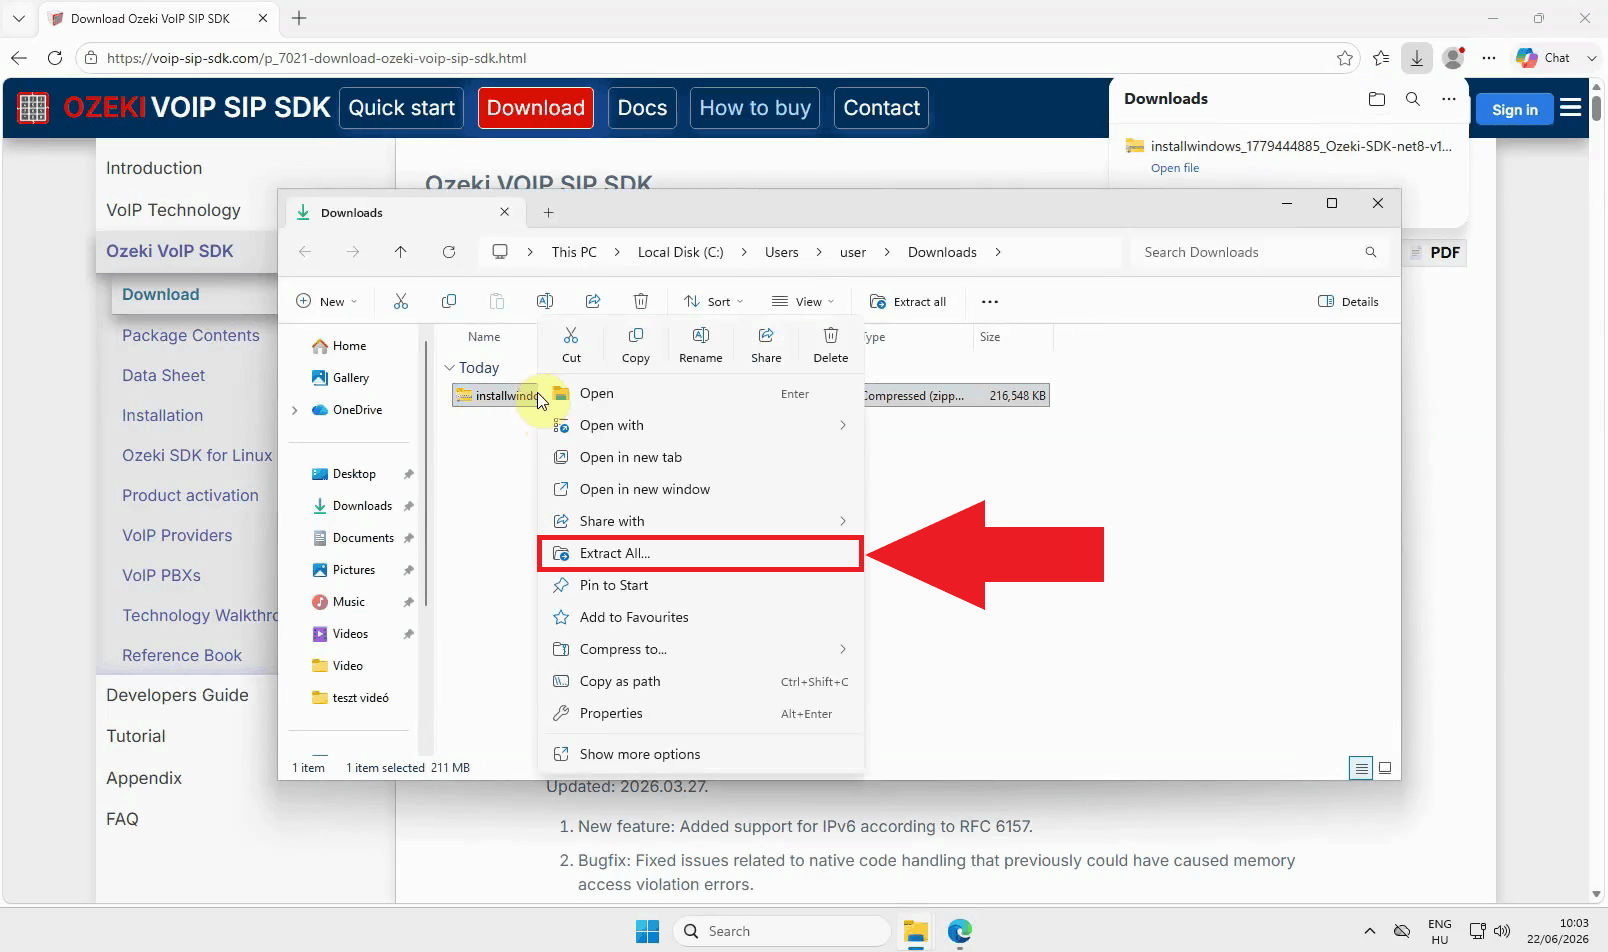
Extract the downloaded package (Figure 16). This produces a folder containing the Ozeki SDK installer.
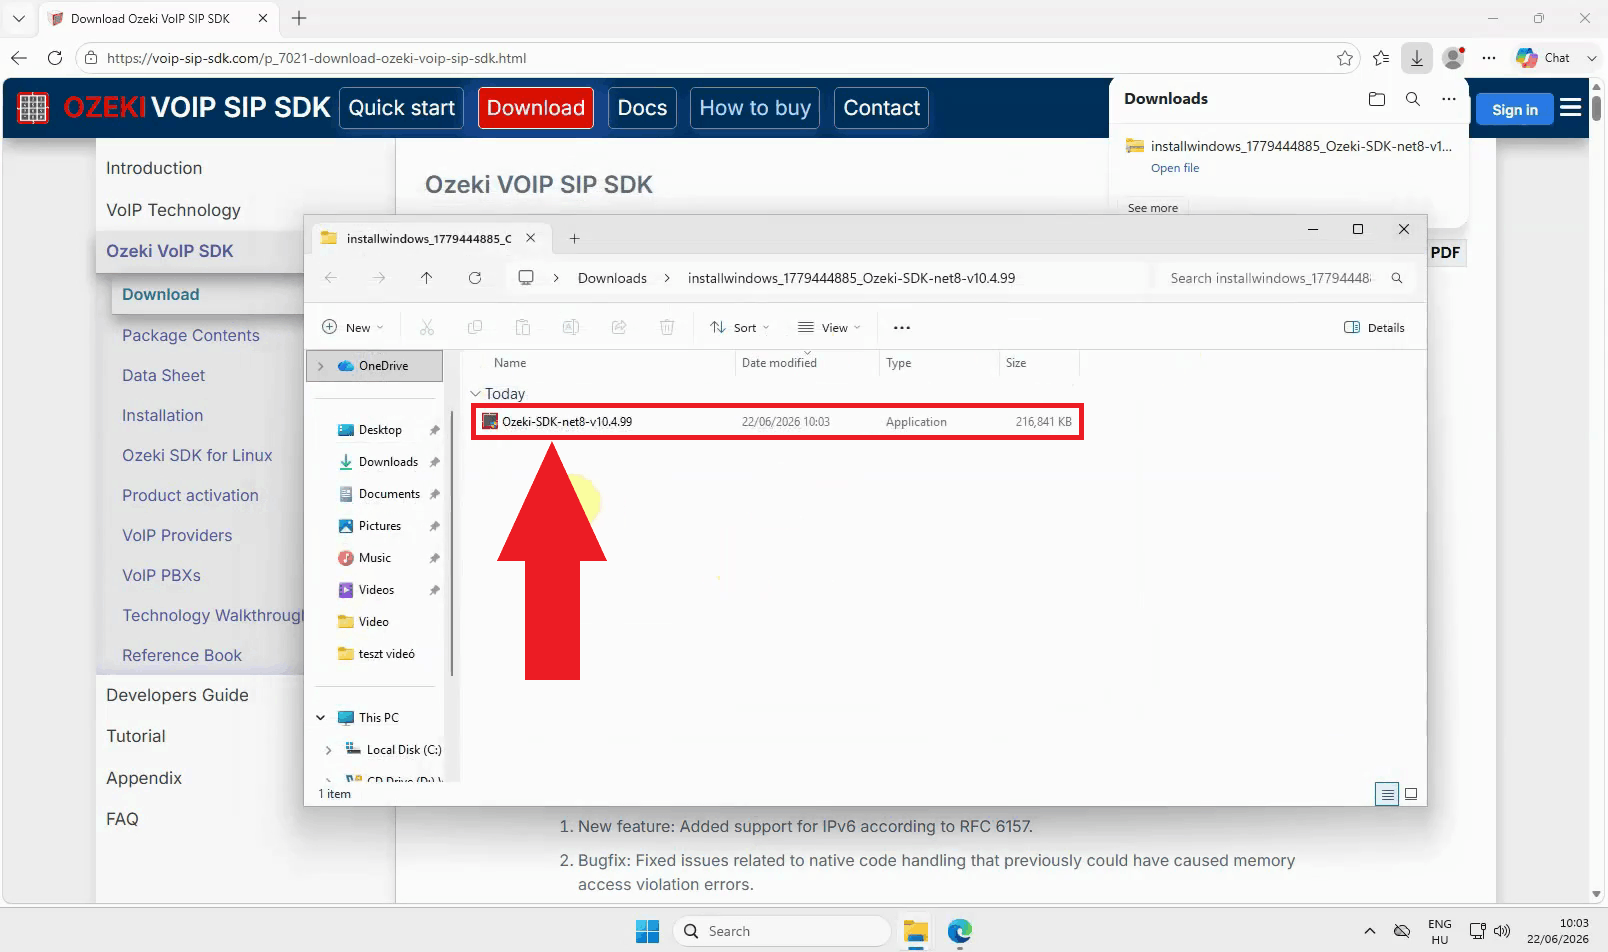
Open the extracted folder and double-click the installer to start the setup (Figure 17).
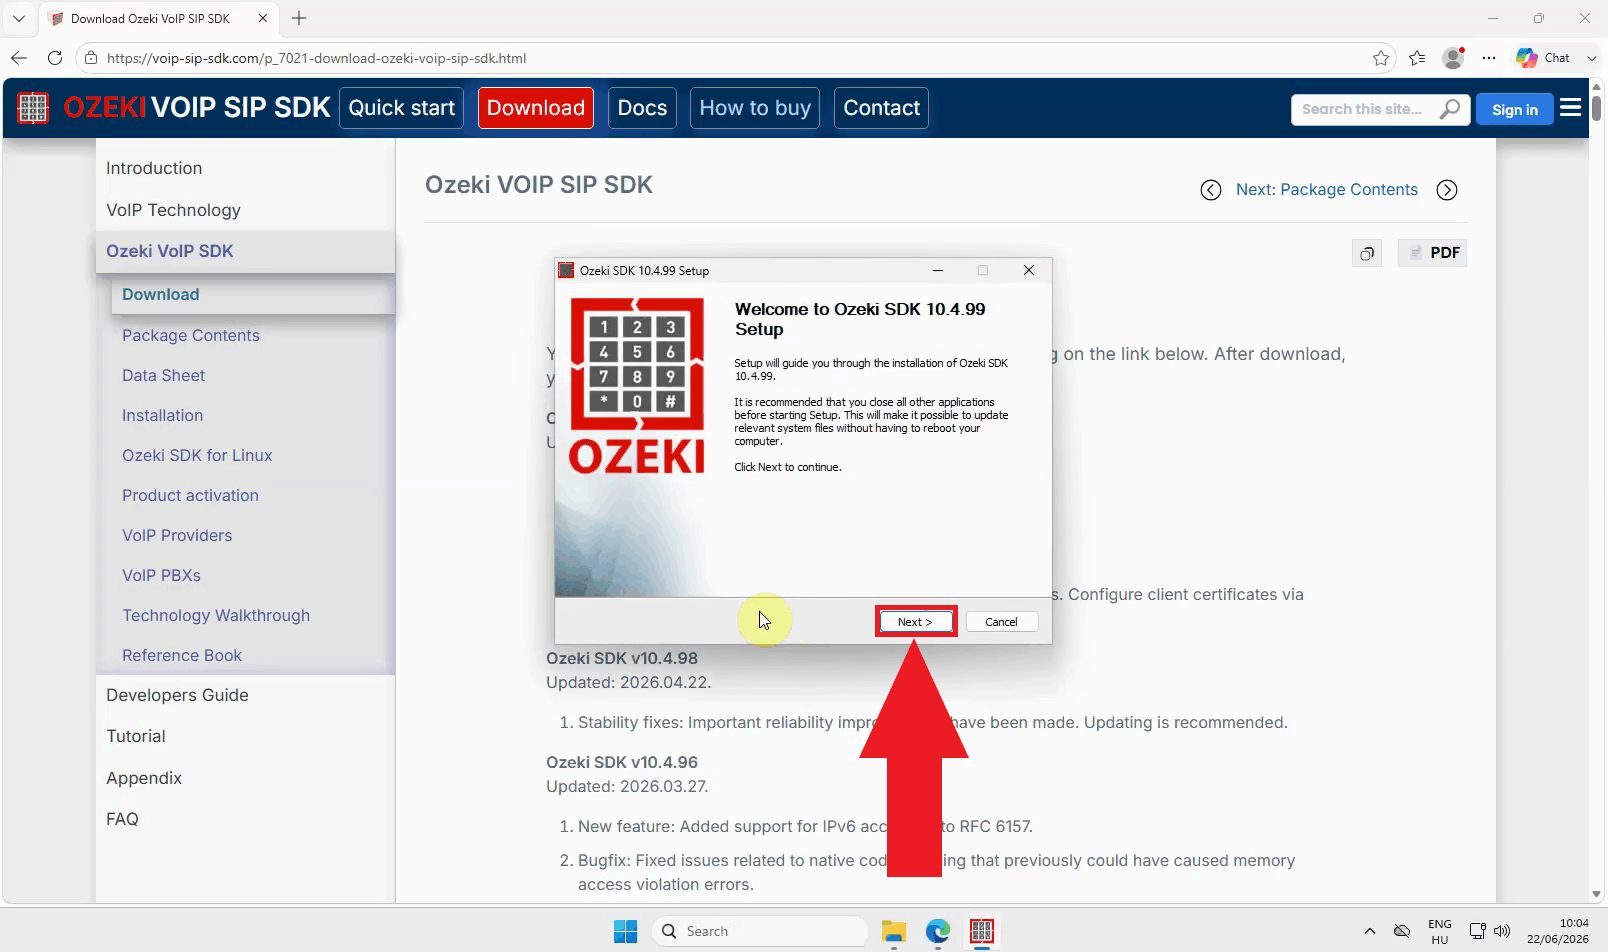
On the welcome screen, press Next to continue (Figure 18). This screen also recommends closing any other open applications first, since the installer may need to update shared system files along the way.
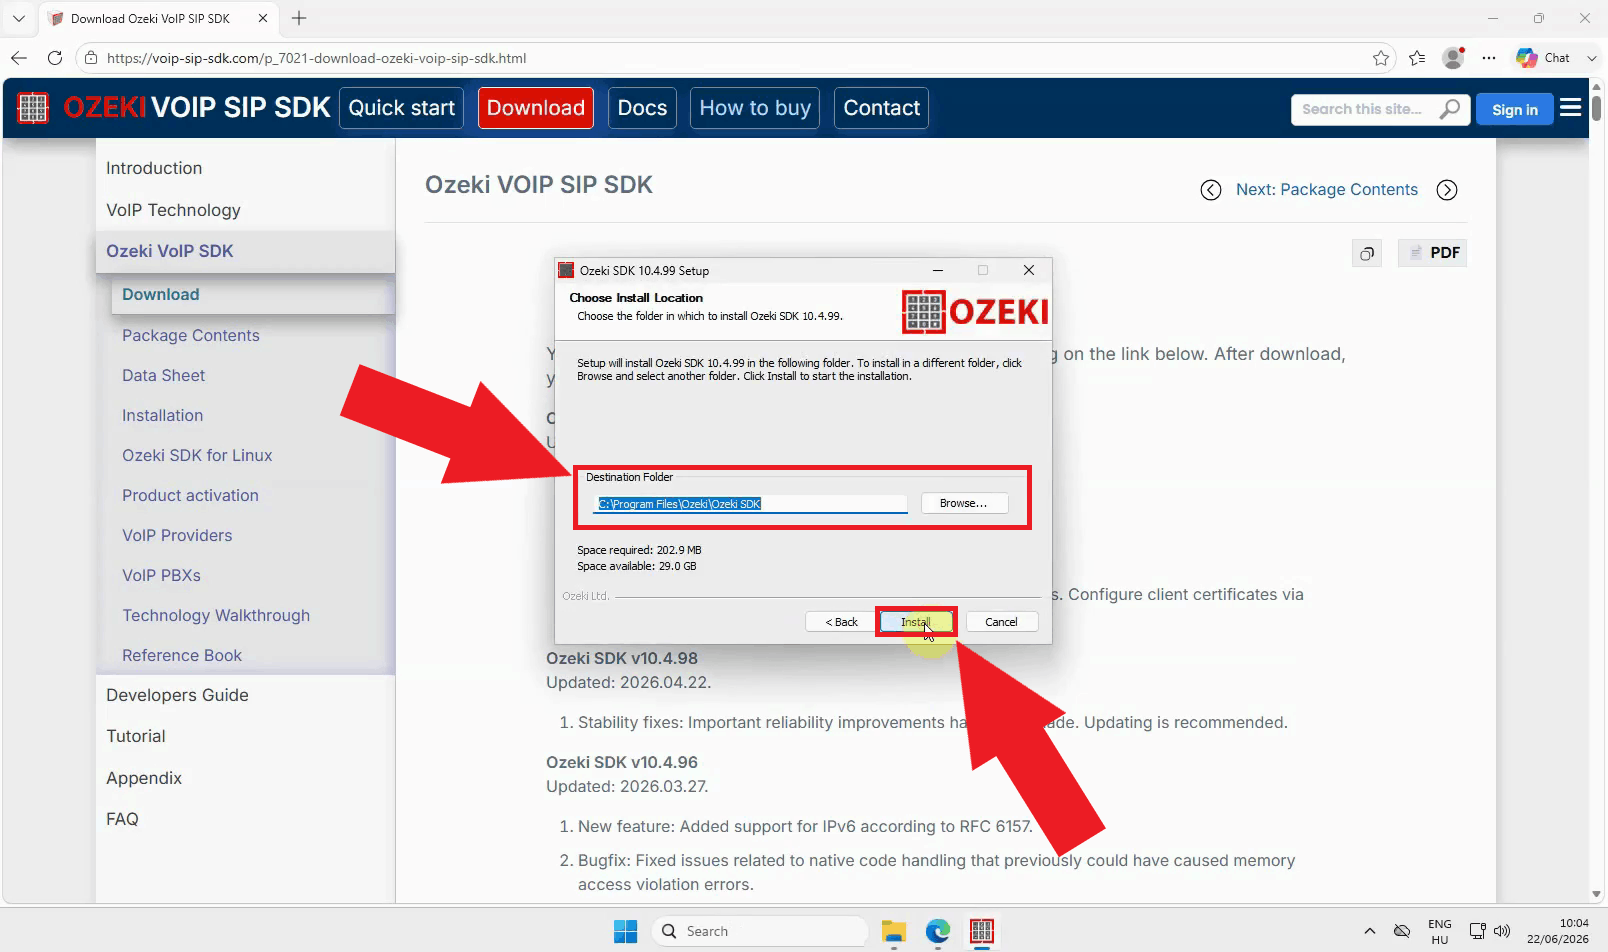
Choose the folder where the SDK should be installed, then press Install (Figure 19). The
default location is C:\Program Files\Ozeki\Ozeki SDK, and the setup shows how much
disk space the installation requires.
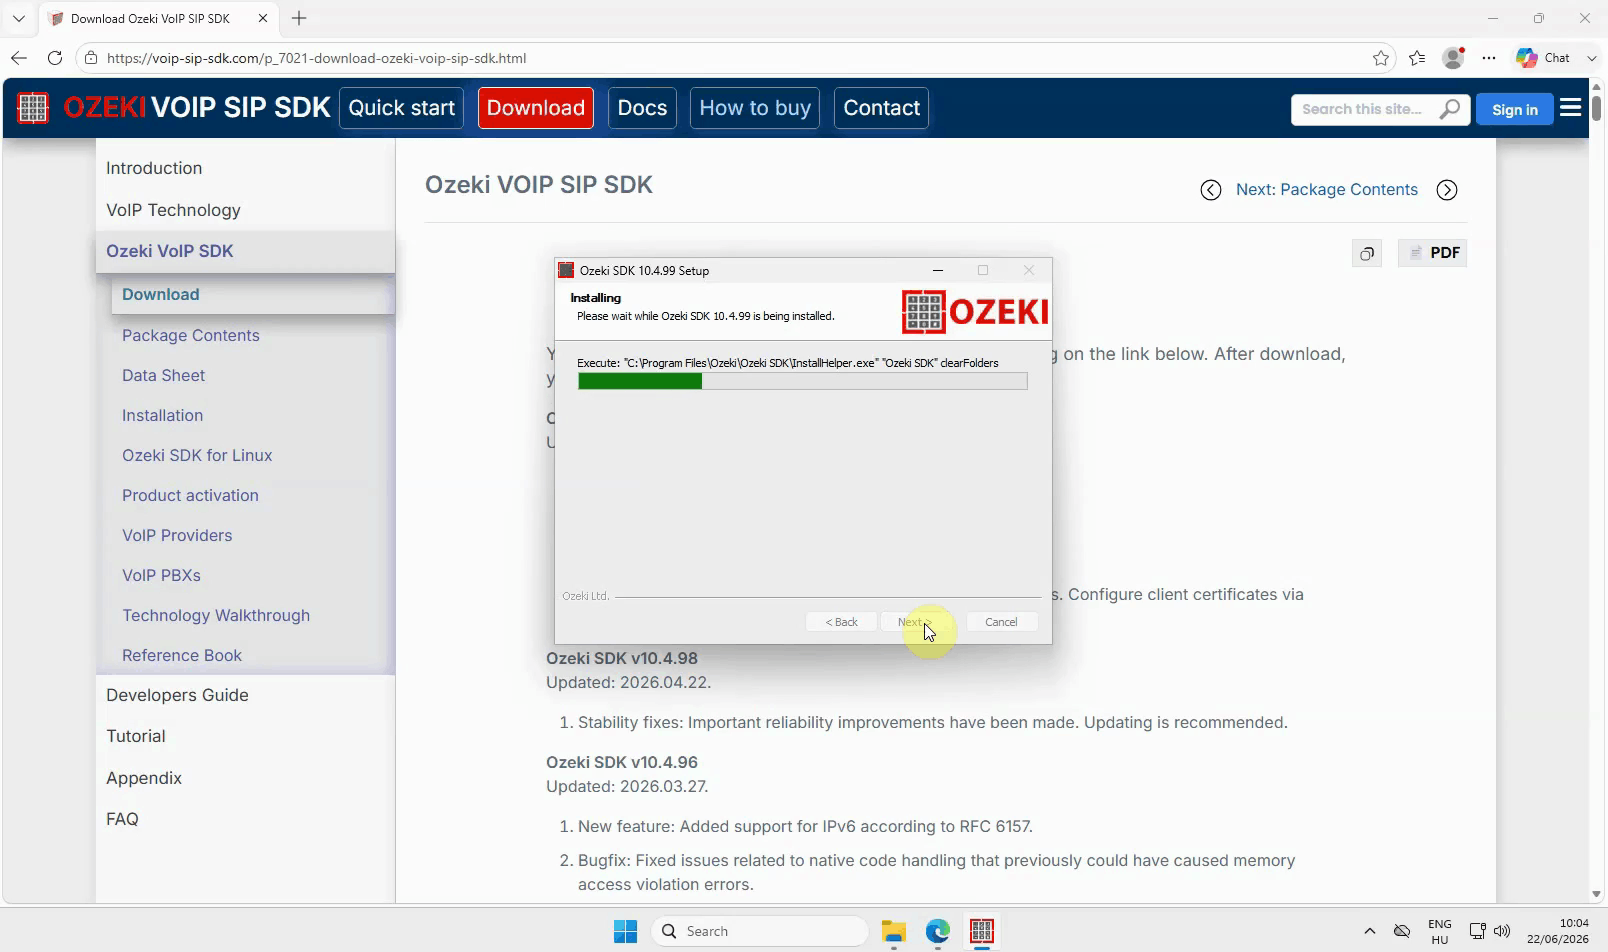
Wait for the installer to finish copying files (Figure 20). This step is quick and usually only takes a couple of minutes.
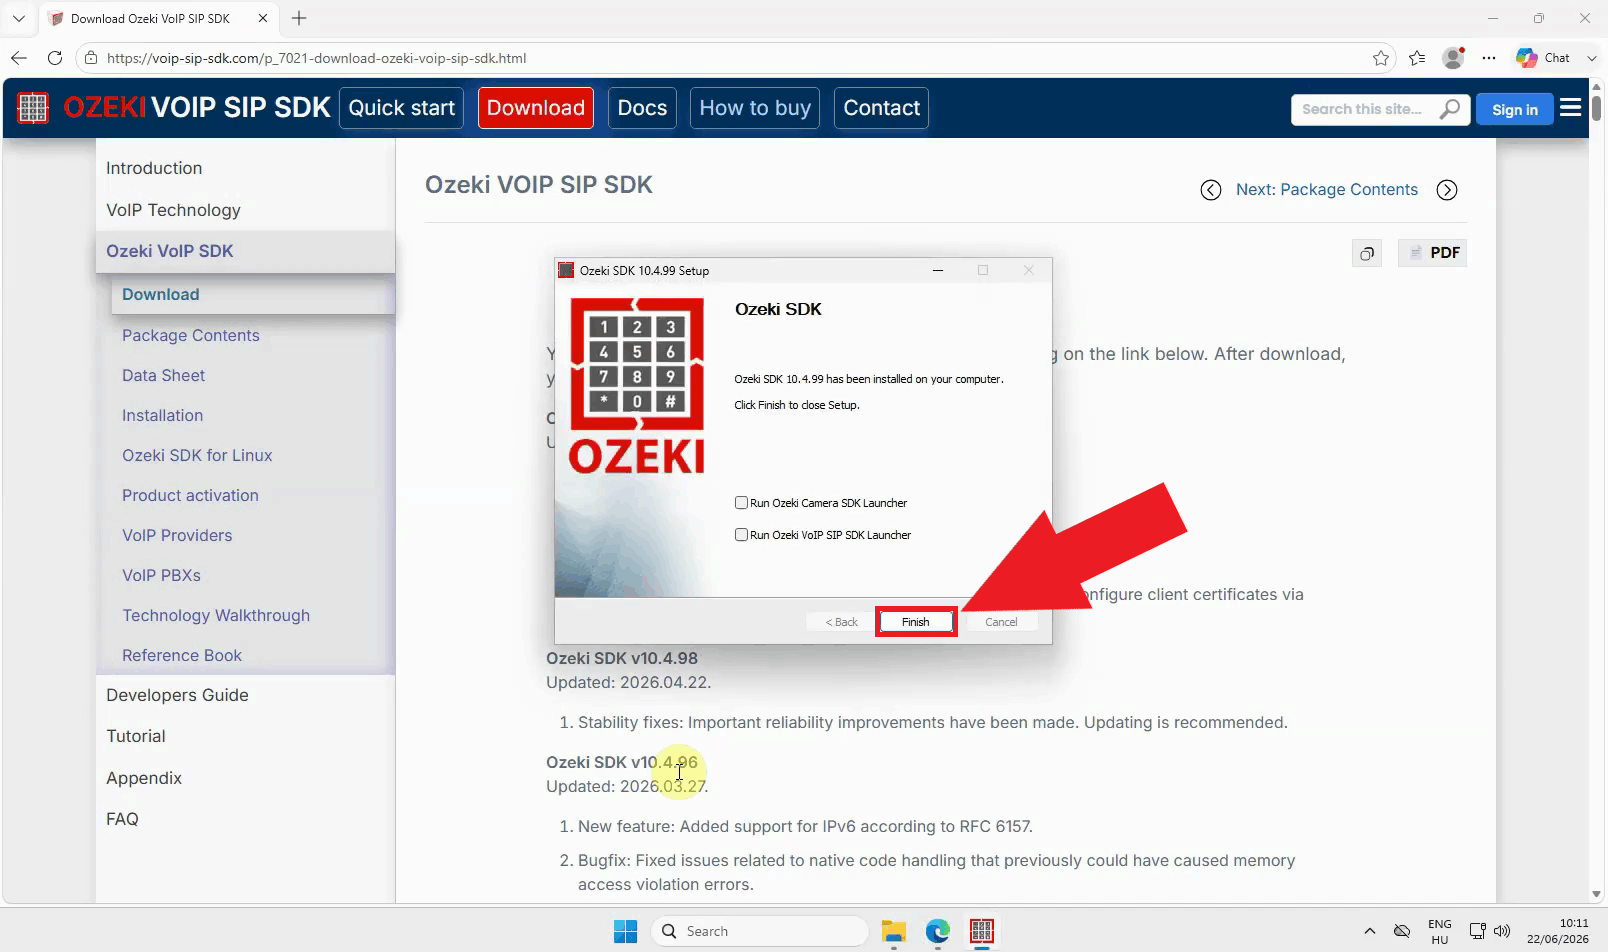
Once the installation completes, press Finish to close the setup wizard (Figure 21). You can leave the launcher checkboxes unchecked, since the next step opens the demo project directly from Visual Studio.
Build and run the Softphone example
The following video shows how to build and run the Softphone example.
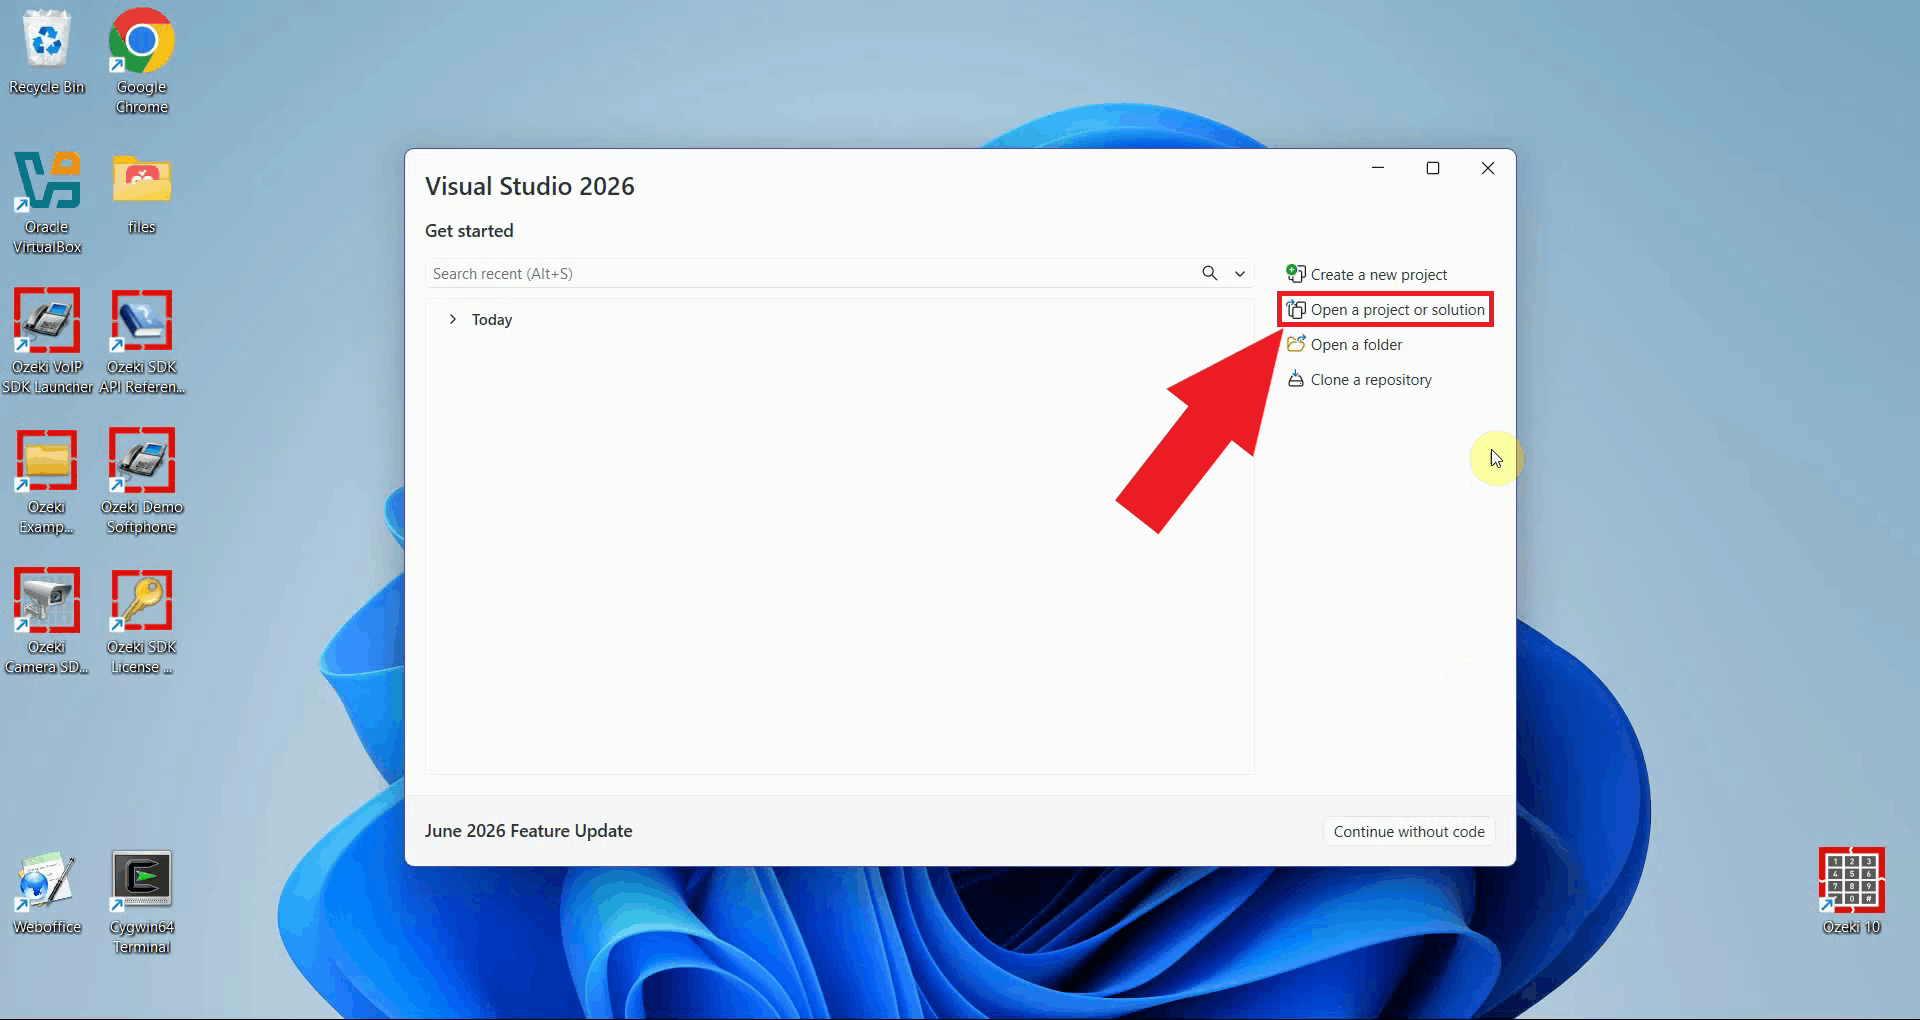
In Visual Studio, select Open a project or solution (Figure 22). This opens a file browser where you can navigate to the example project included with the SDK.
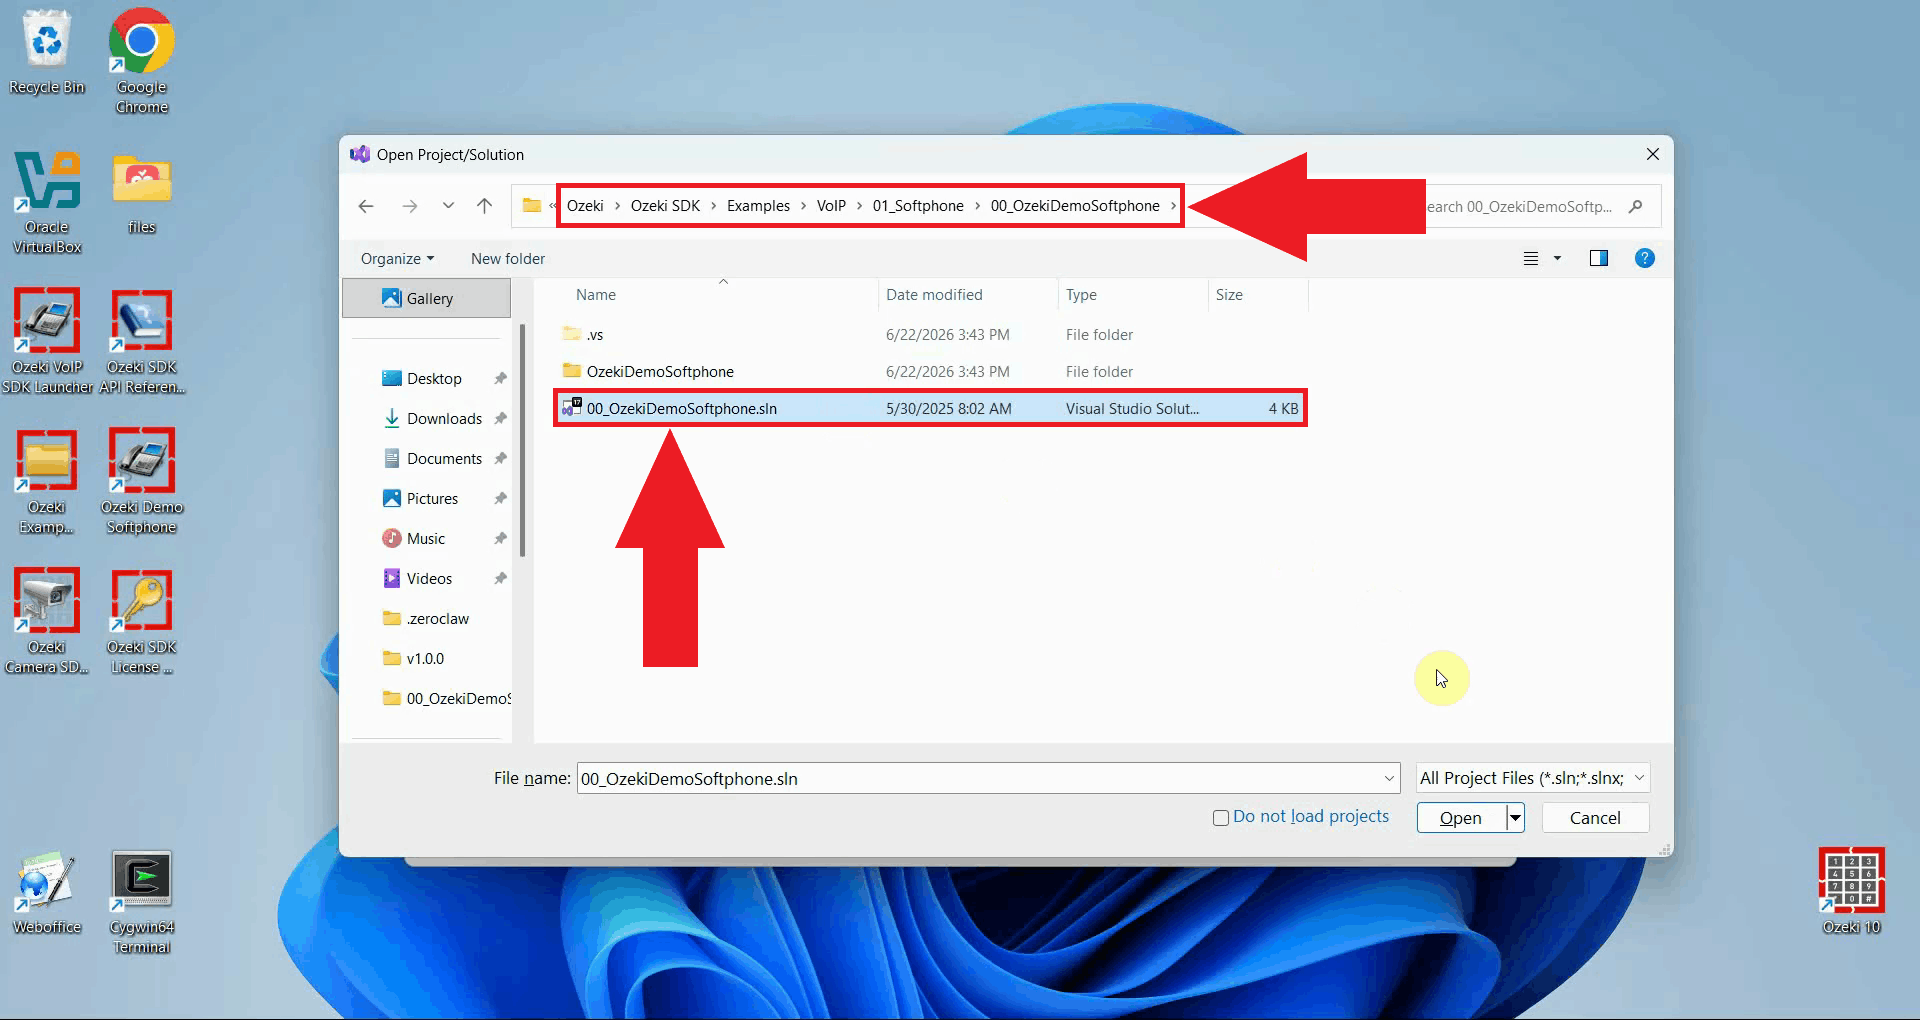
Navigate to the Softphone example folder and open 00_OzekiDemoSoftphone.sln
(Figure 23). By default, this solution file is located at %USERPROFILE%\Documents\Ozeki\Ozeki SDK\Examples\VoIP\01_Softphone\00_OzekiDemoSoftphone.
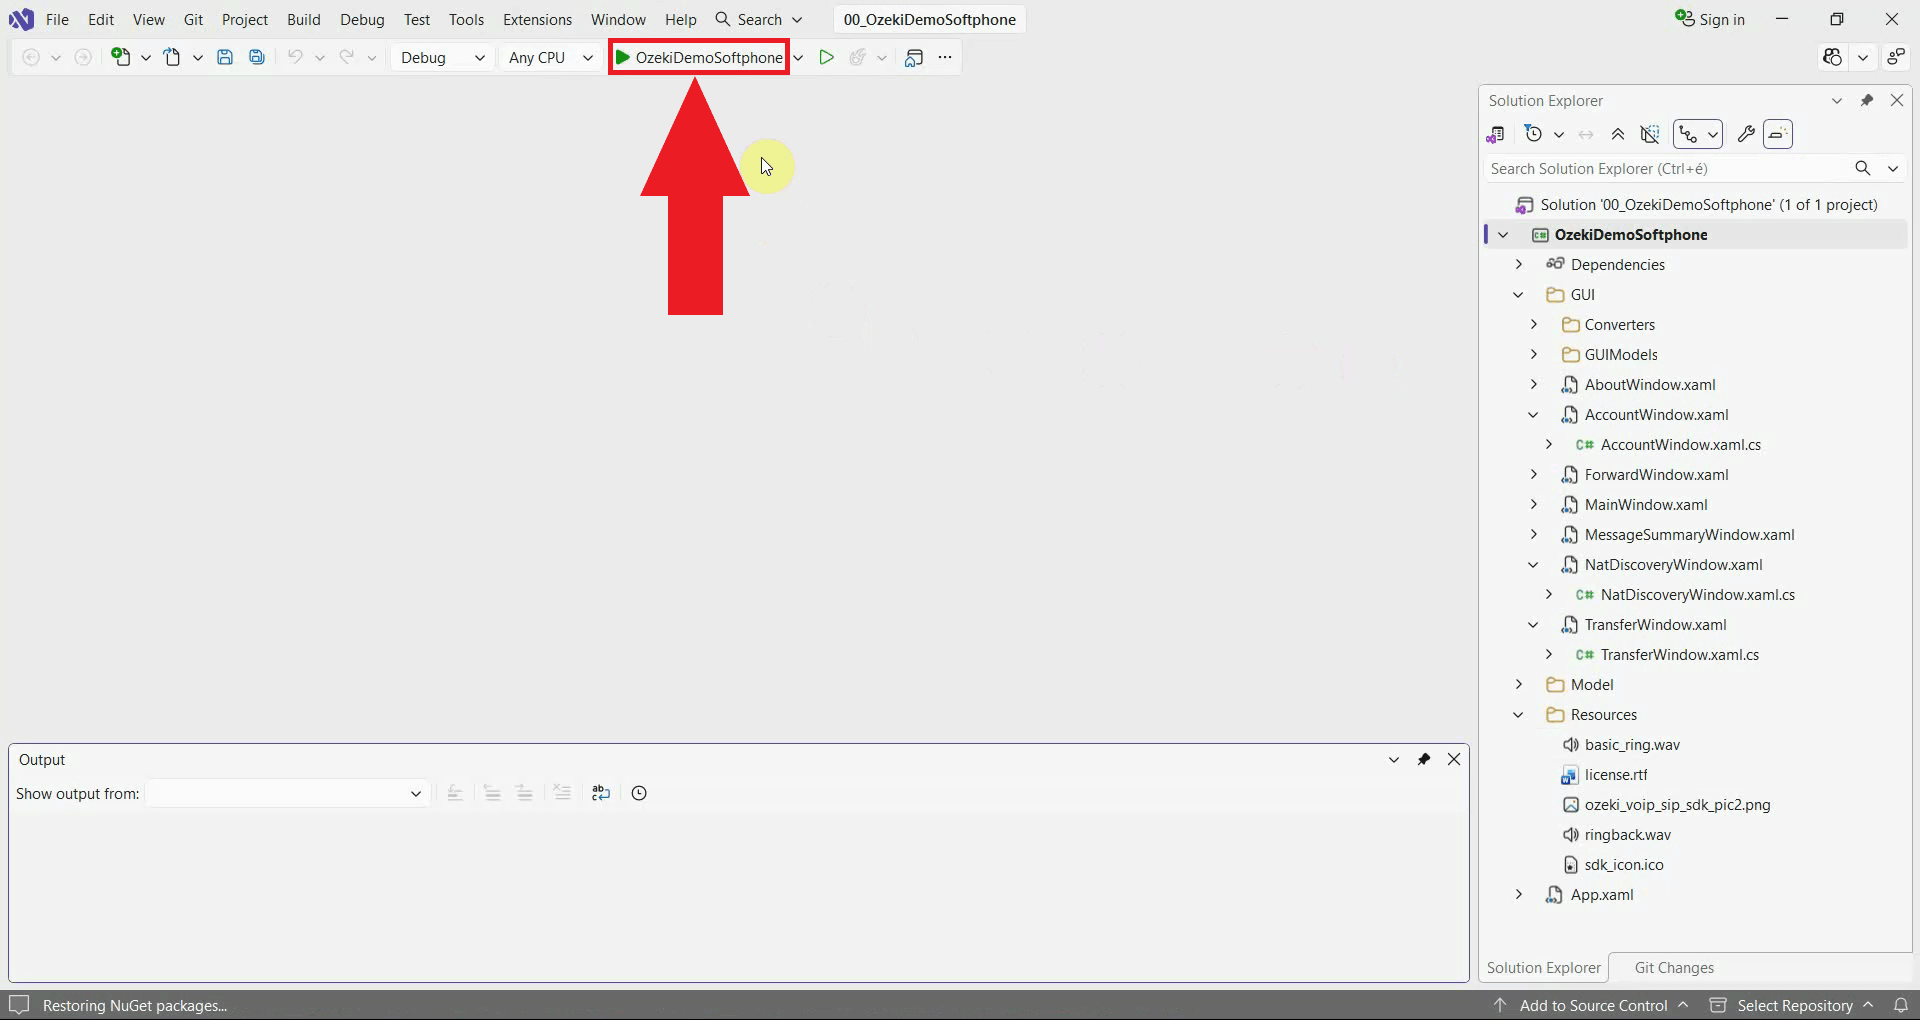
Press the Start Debugging button, or press F5, to build and start the example application (Figure 24). Visual Studio compiles the project and launches the Ozeki VoIP SIP SDK demo Softphone window.
Make a test call
The following video shows how to add a SIP account and make a test call.
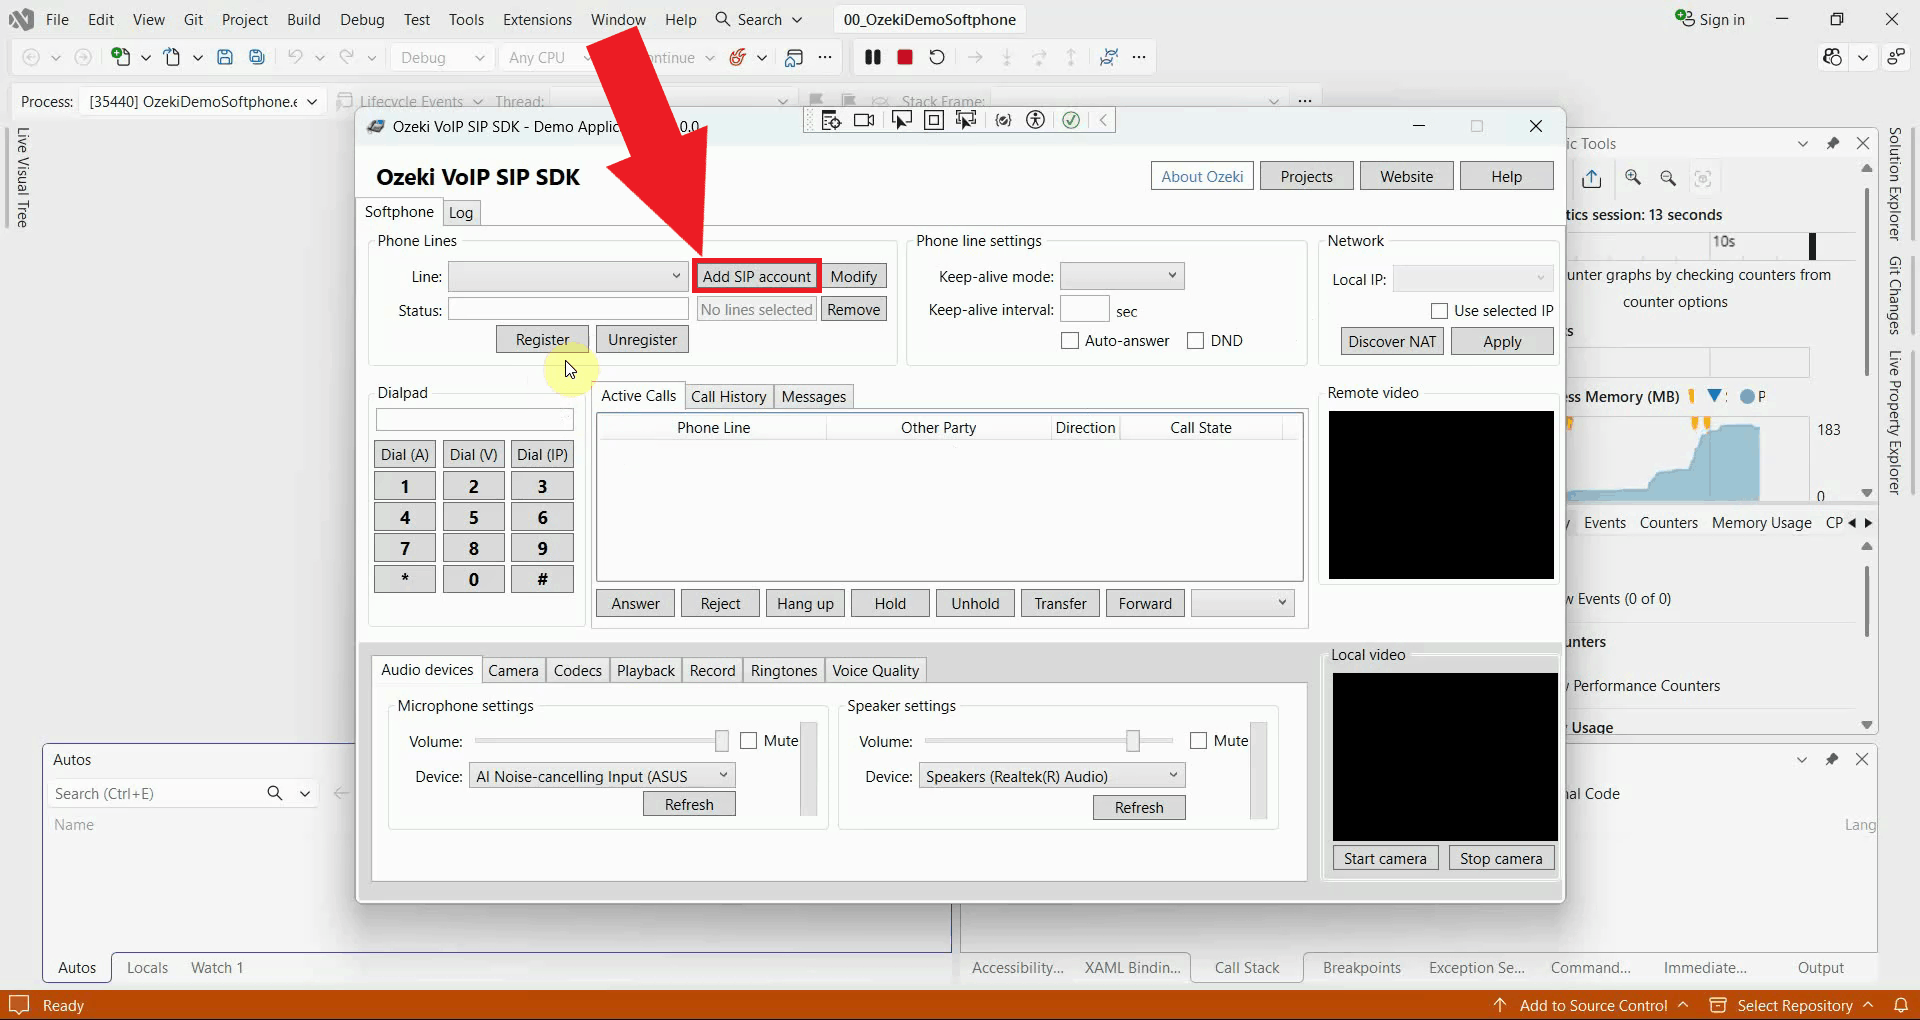
In the running Softphone application, press Add SIP account (Figure 25). This opens the SIP account settings dialog, where you'll register the first of the two extensions configured earlier in Asterisk.
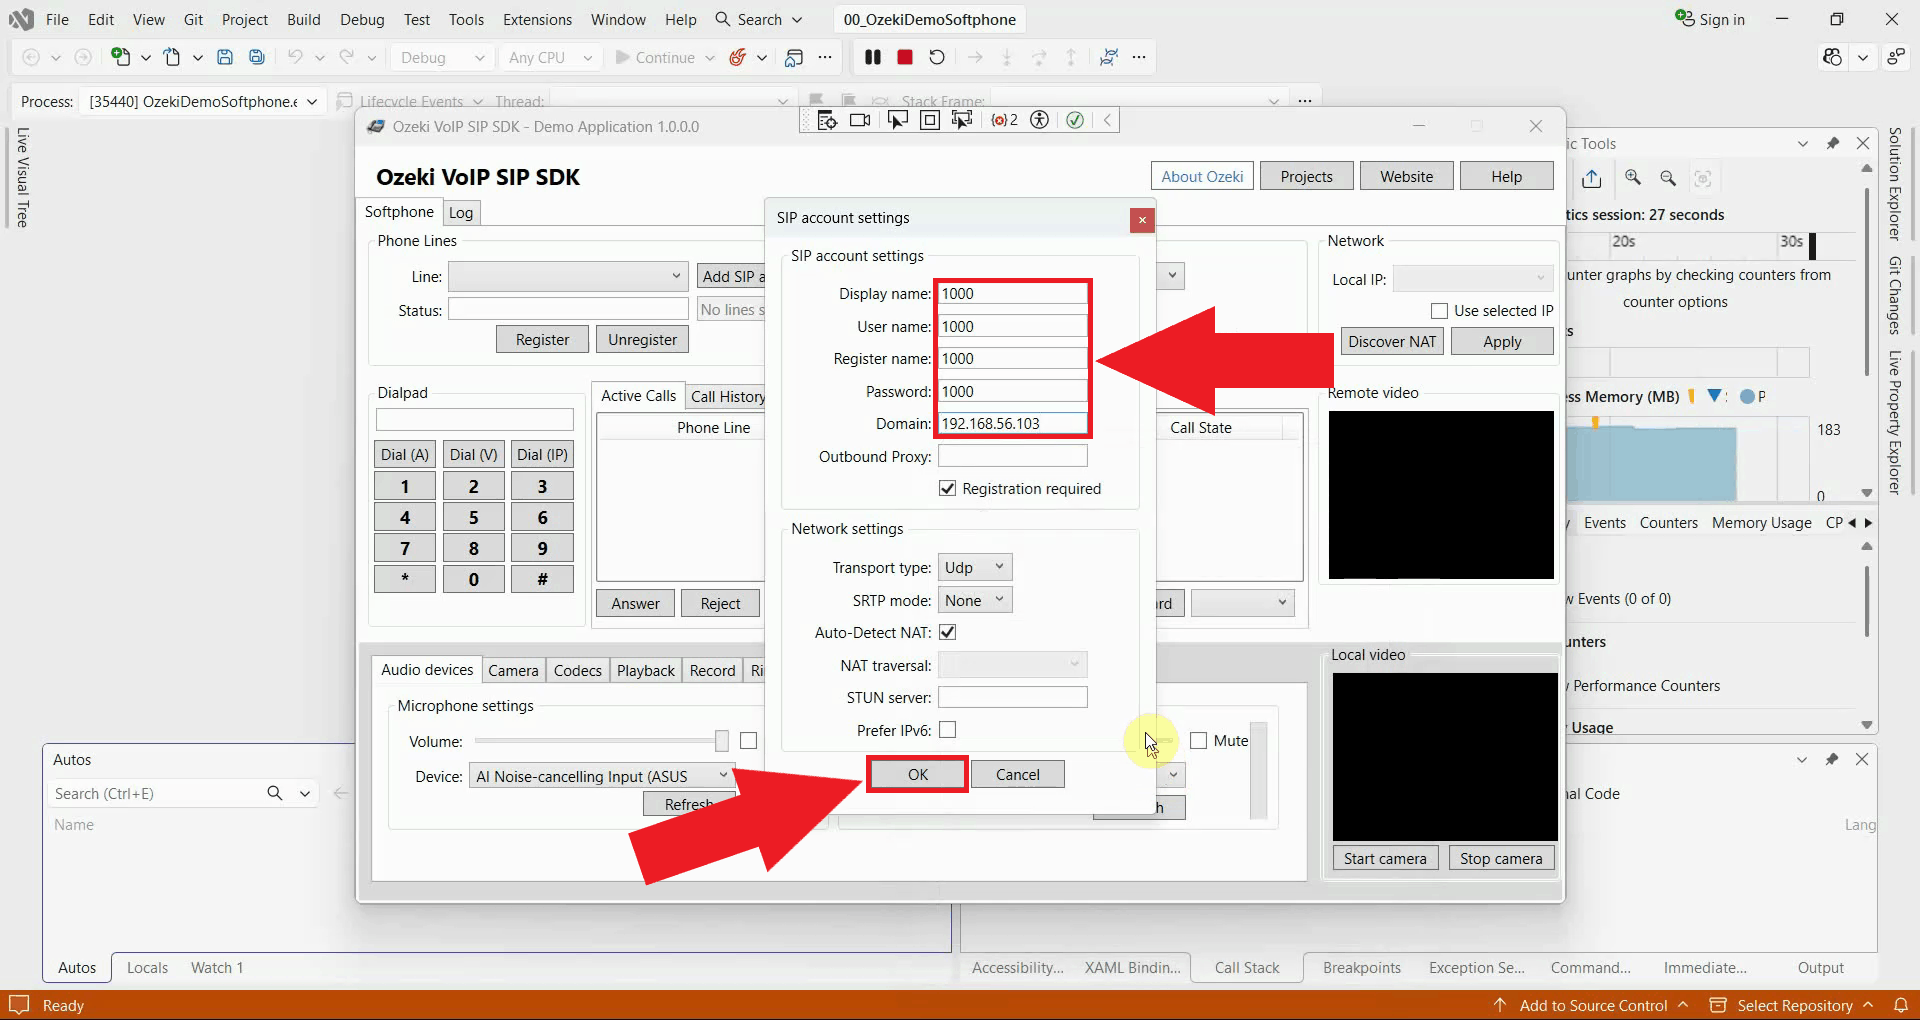
Fill in the account details for extension 1000 and press OK (Figure 26). The display name,
username, register name, and password should all be set to 1000, matching the
extension defined in sip.conf, with the domain set to the IP address of your
Asterisk server.
Display name: 1000
User name: 1000
Register name: 1000
Password: 1000
Domain: <your Asterisk server IP>
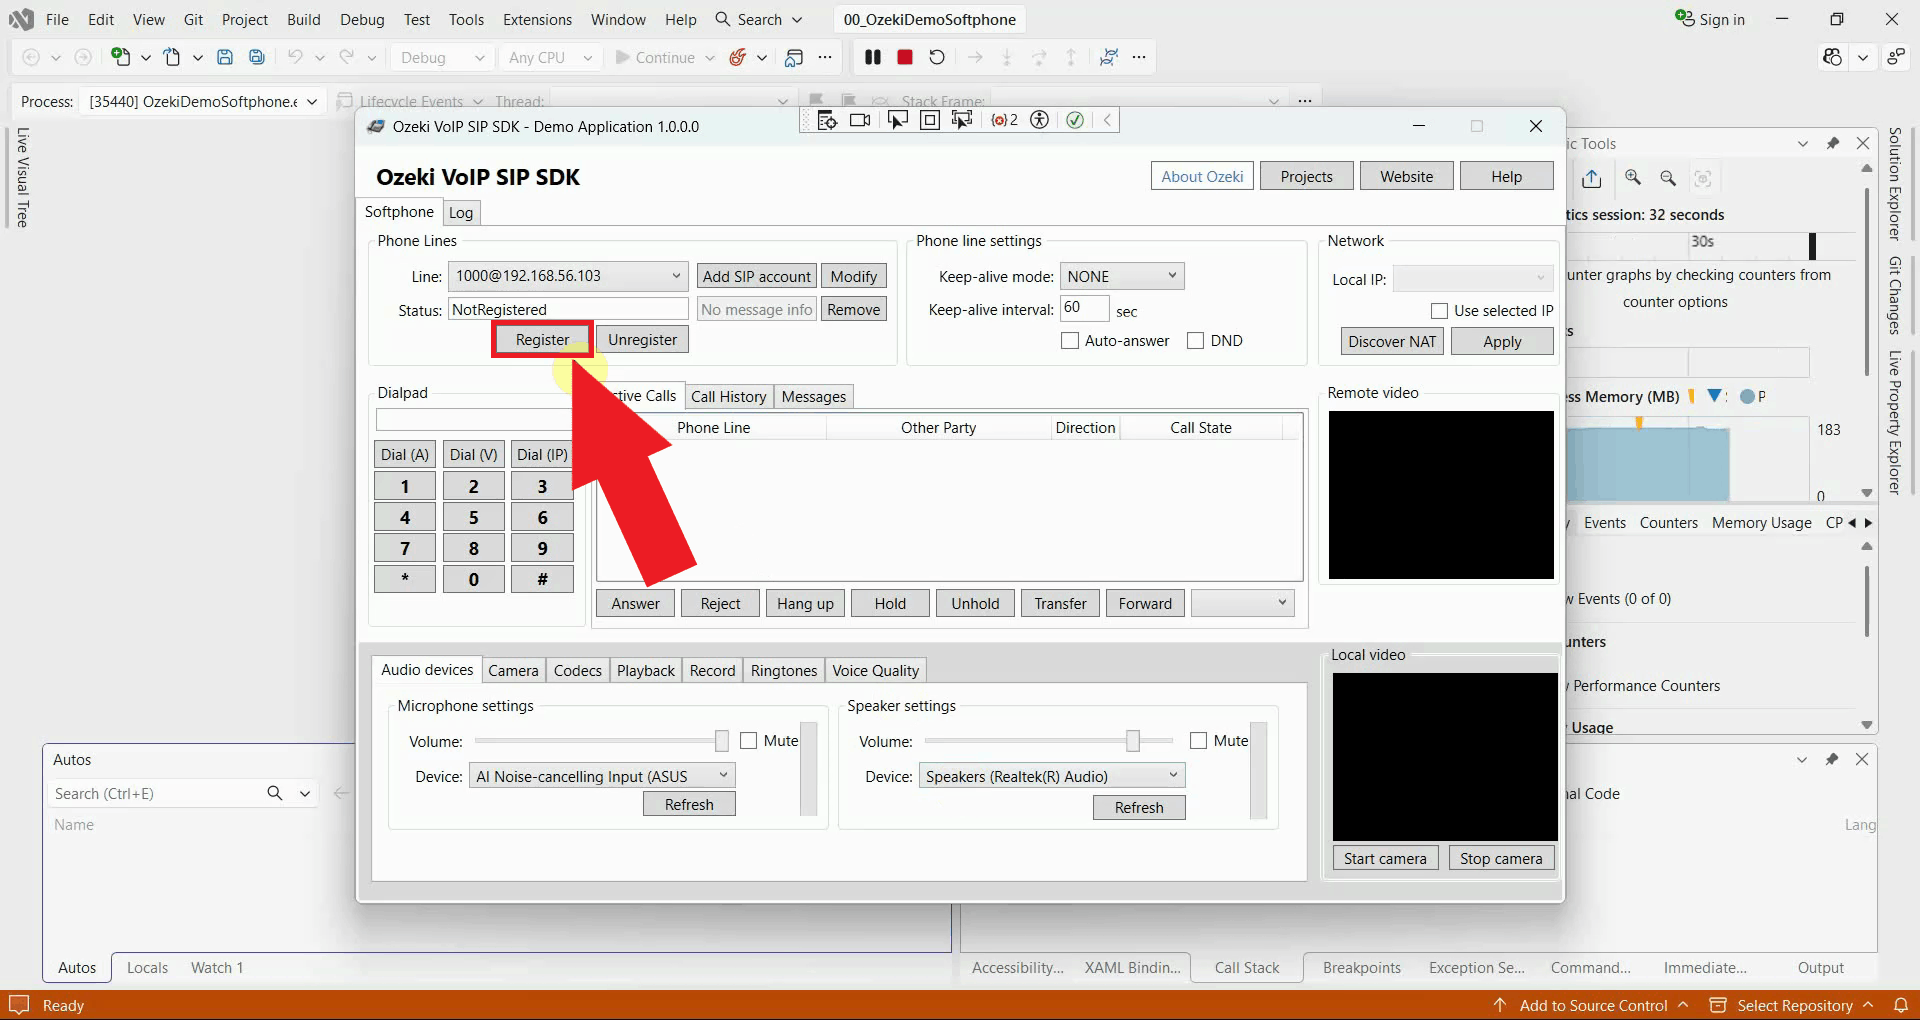
Select line 1000 and click Register to register the account with the PBX (Figure 27). Once registration succeeds, the Status field changes from "NotRegistered" to "RegistrationSucceeded".
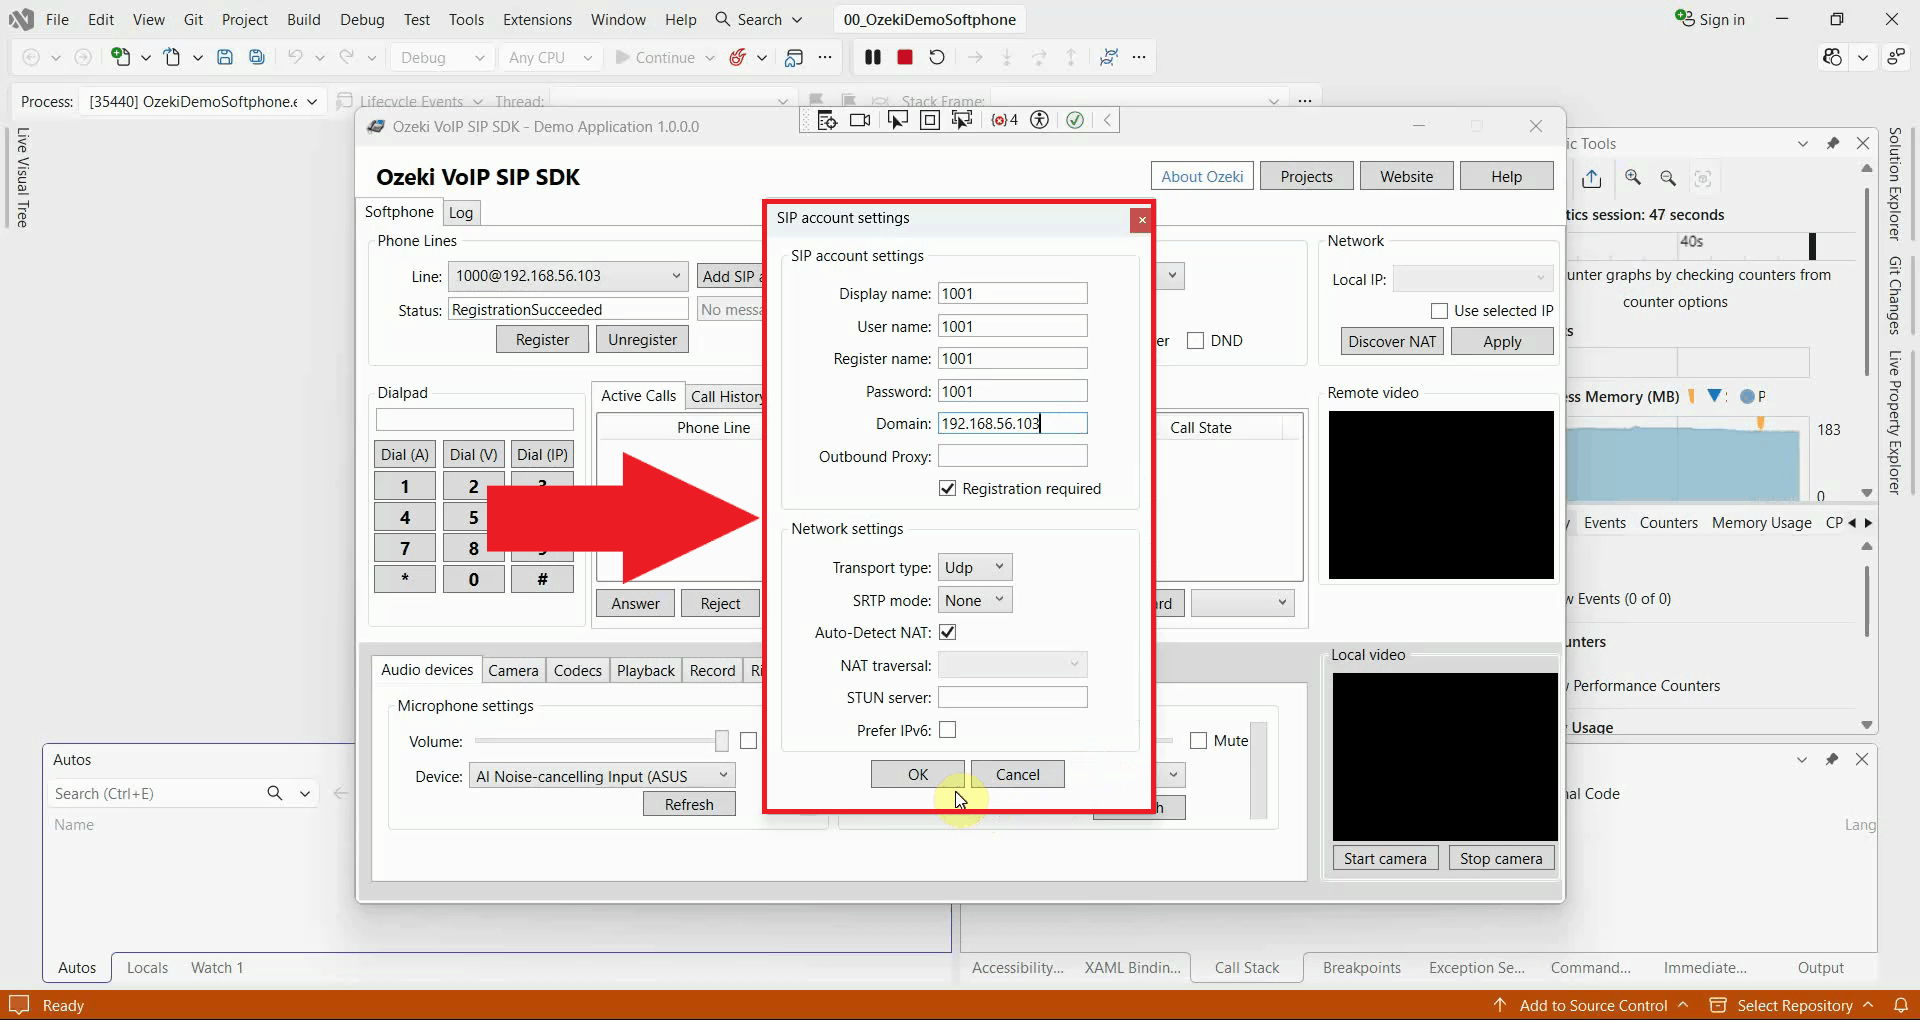
Repeat the same steps to add and register a second SIP account for extension 1001 (Figure 28). The Softphone application can hold multiple registered lines at once, which is what allows it to place a call between the two extensions in the next step.
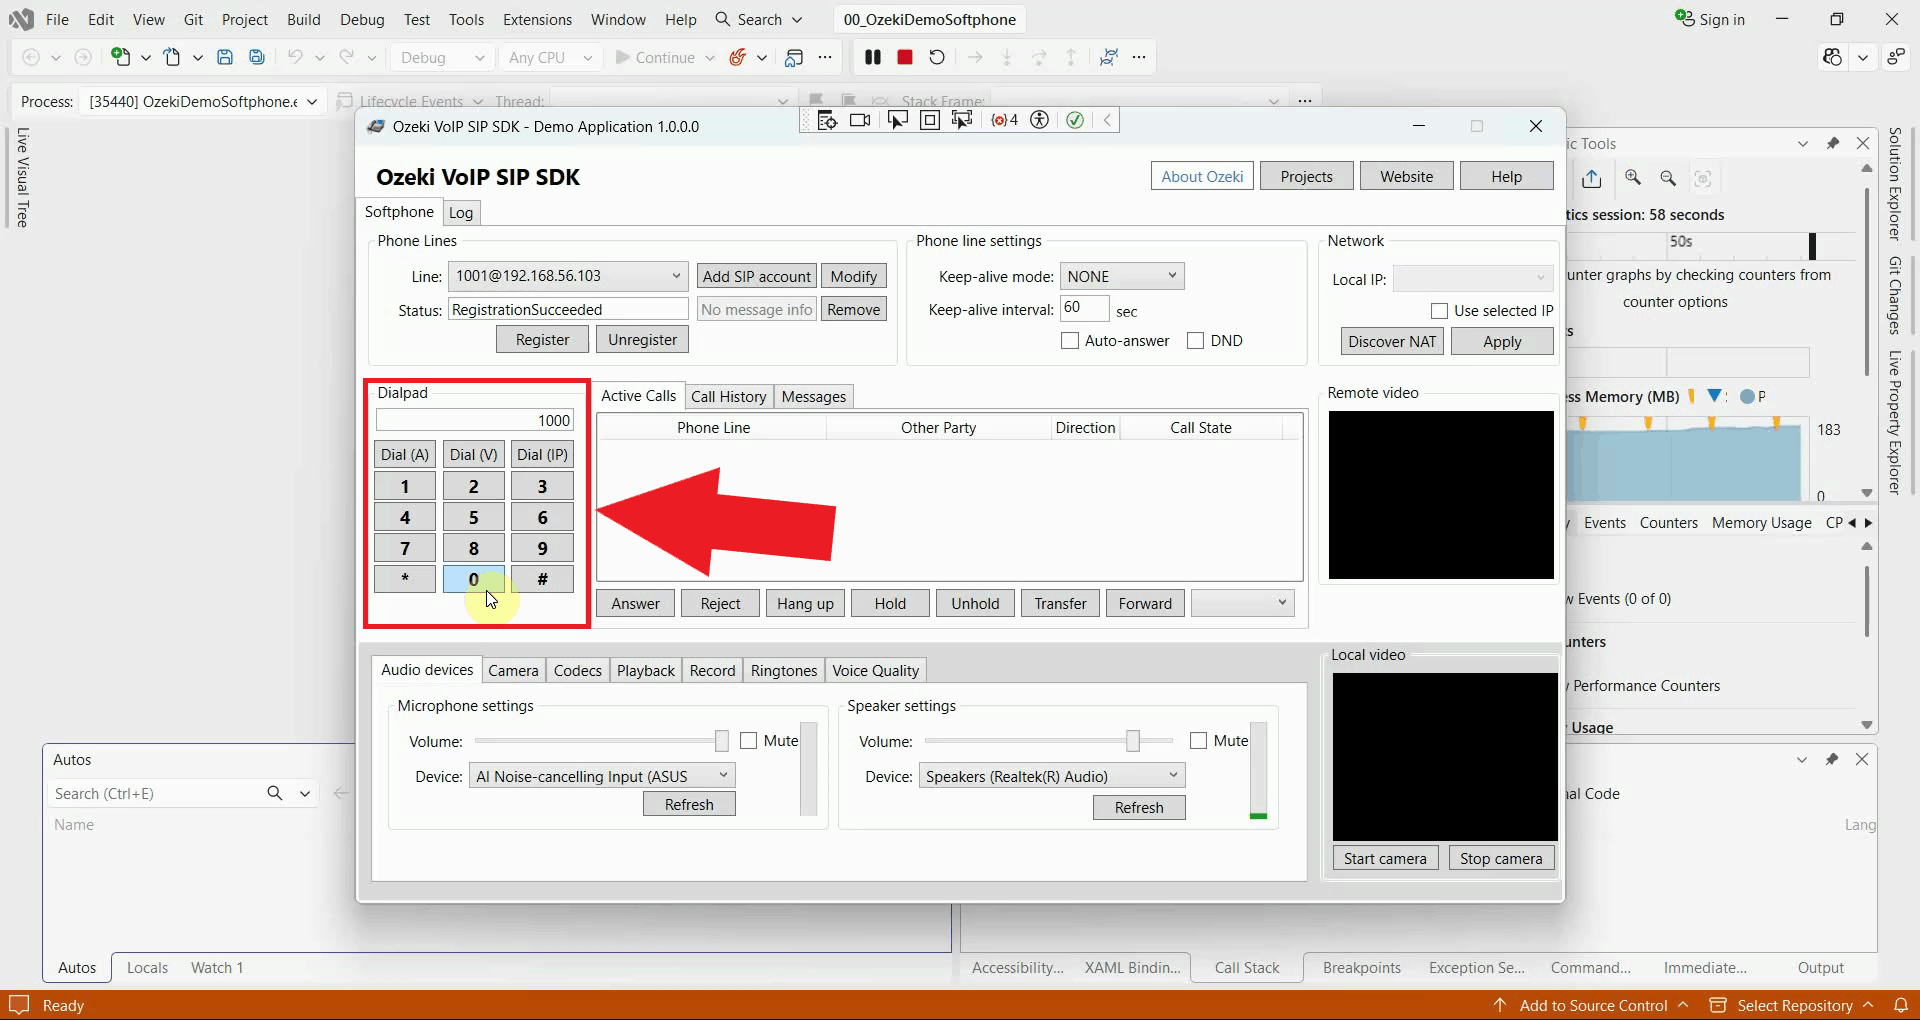
Select line 1001, type "1000" into the dialpad, and press Dial (A) to call the other extension (Figure 29). Since both extensions are registered to the same Softphone instance, this single application places the call to itself, alternating between its two registered lines.
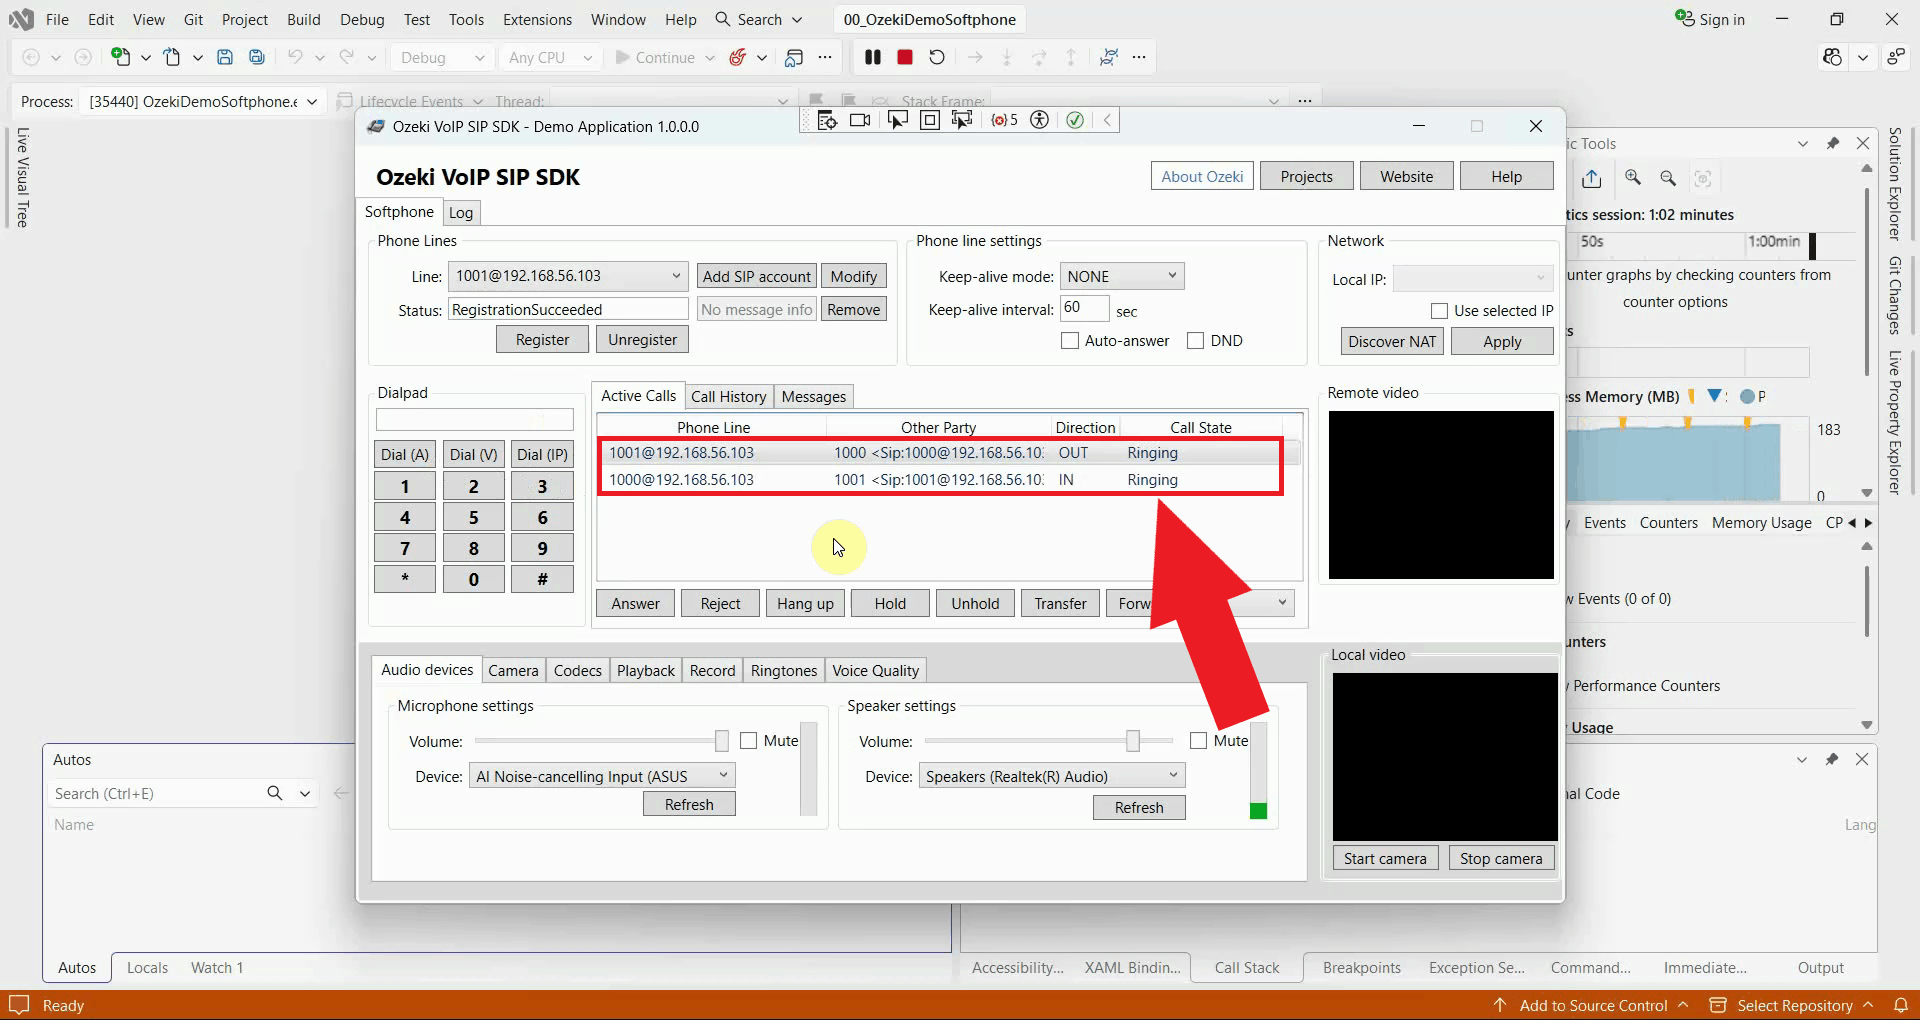
Once the call connects, it appears as two entries in the Active Calls list — one outgoing from line 1001, and one incoming on line 1000 (Figure 30). This confirms that call setup and signaling are working correctly between the Softphone application and the Asterisk PBX.
View logs in Asterisk
The following video shows how to check Asterisk logs and debug peers.
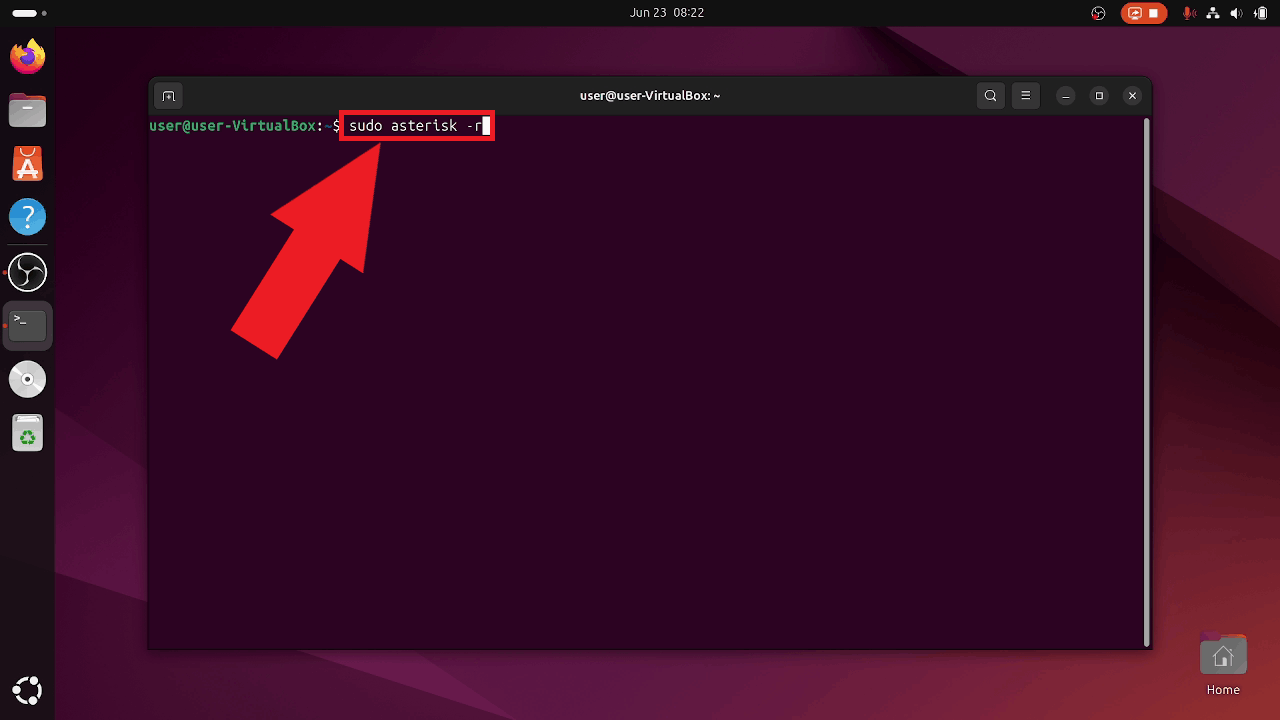
Connect to the Asterisk console from the Linux terminal (Figure 31). This opens an interactive CLI where you can run diagnostic commands and watch call activity as it happens.
sudo asterisk -r
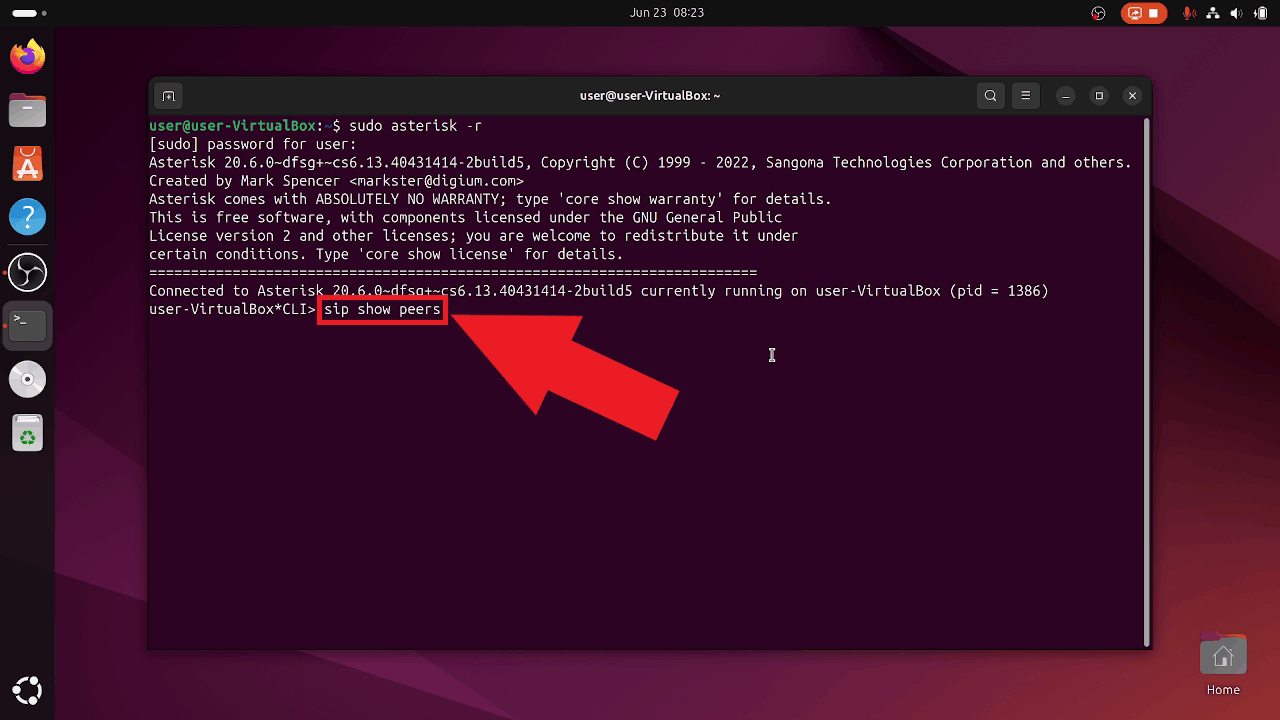
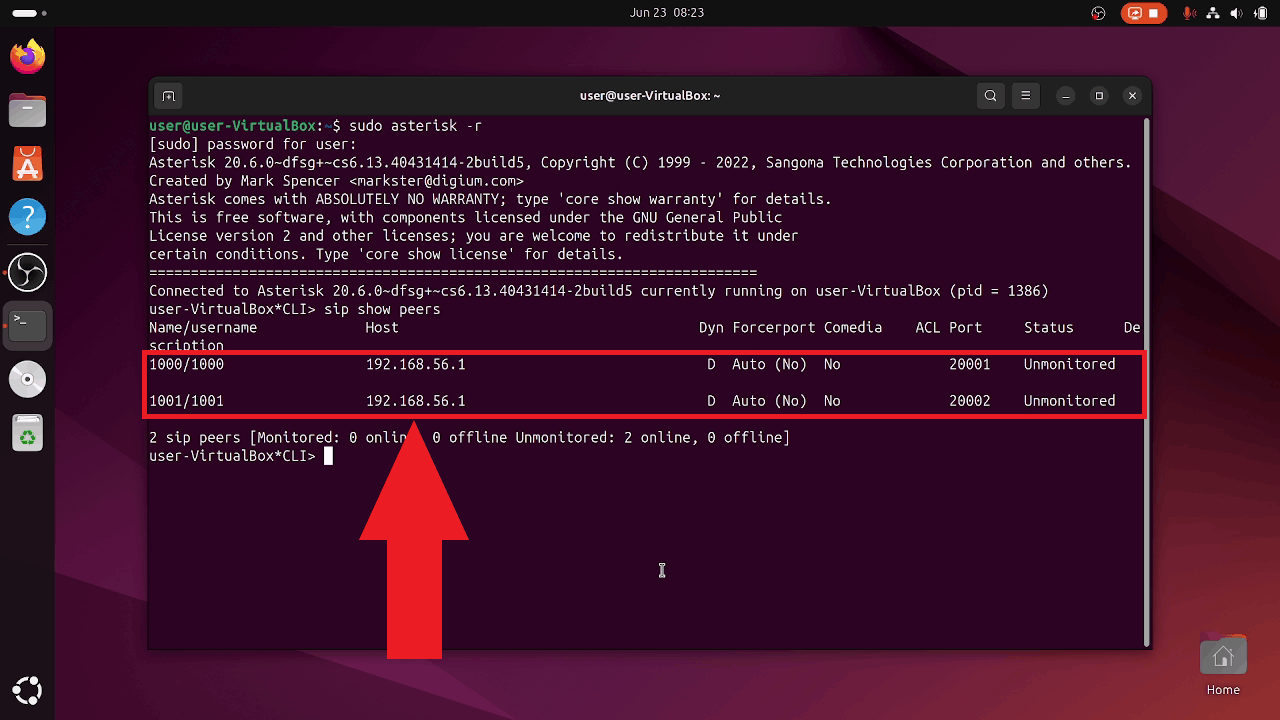
Run the following command to list all currently registered SIP peers (Figure 32). This is the quickest way to verify, from Asterisk's perspective, that the SIP accounts you registered are recognized by Asterisk.
sip show peers
The output lists each configured extension along with its registration status and IP address (Figure 33). Both extensions 1000 and 1001 should appear here.
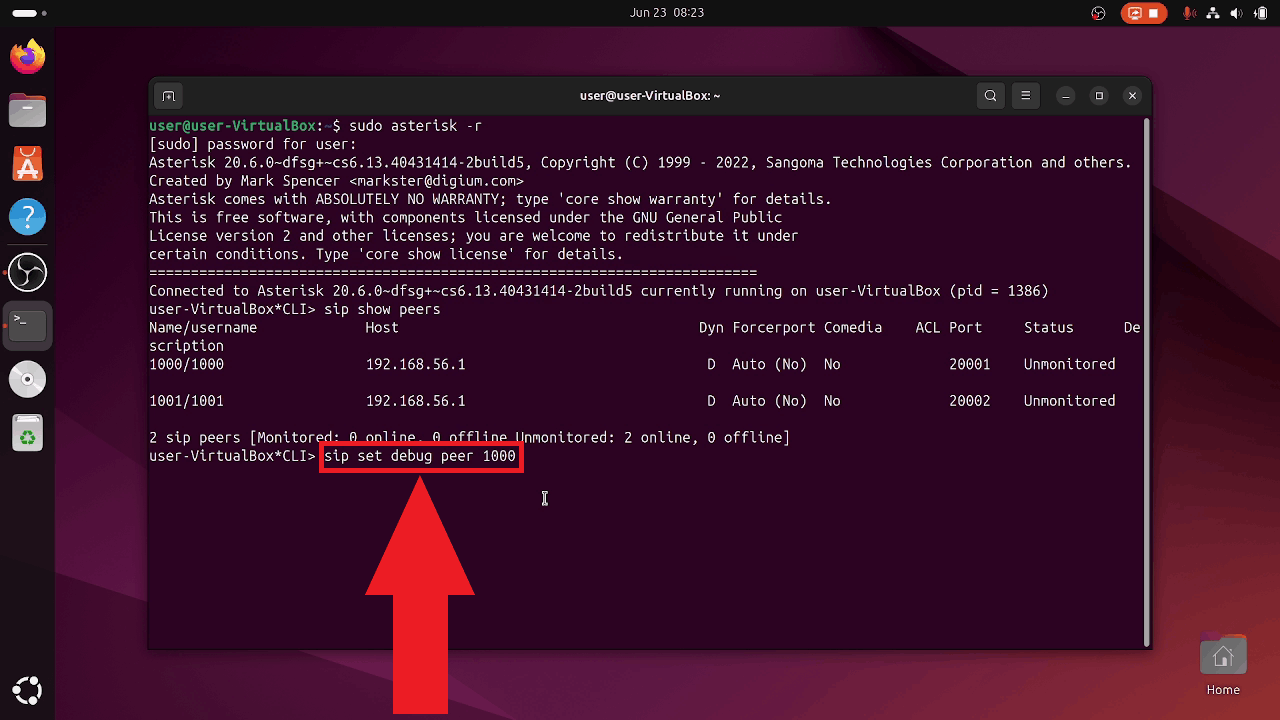
Enable verbose debugging for a specific peer to inspect its SIP traffic in detail (Figure 34). Enabling debugging for a single peer rather than the entire server, keeps the console output focused on the extension you're actually trying to troubleshoot.
sip set debug peer 1000
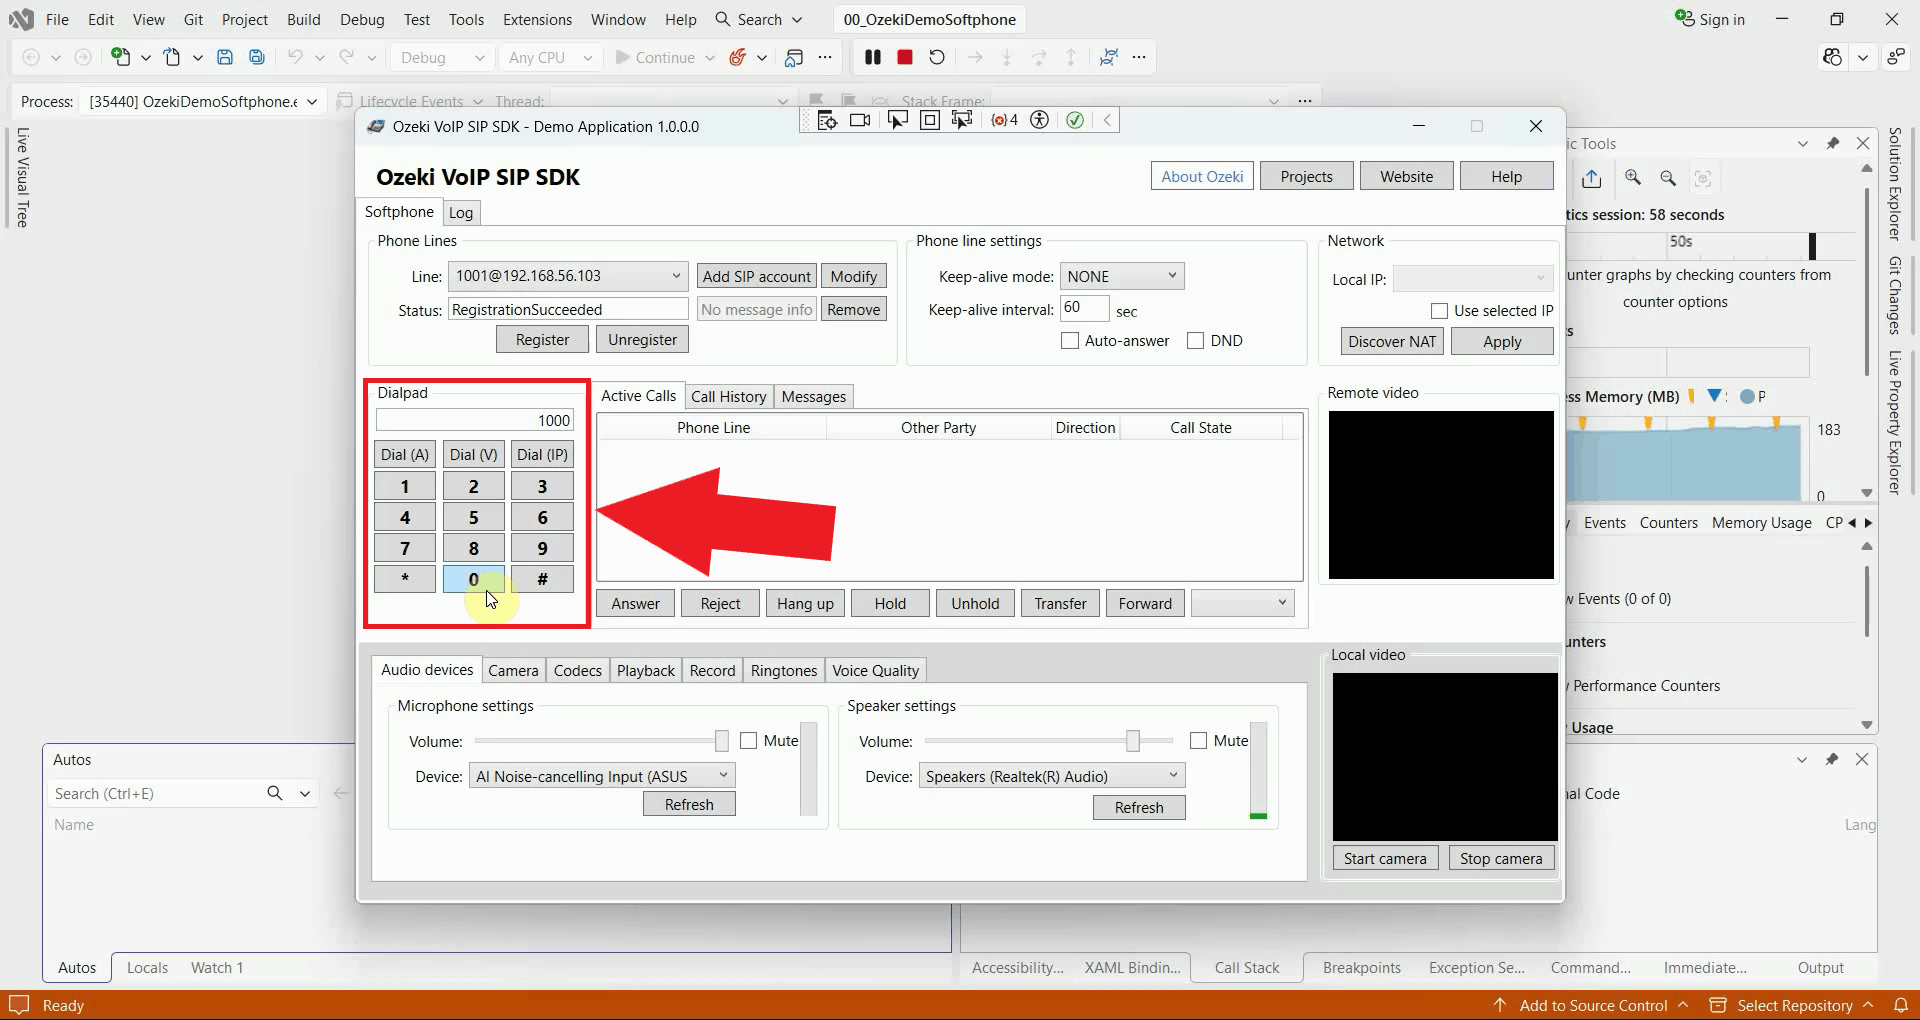
Use the dialpad in the Softphone application to place a call again, the same way as in the previous step (Figure 35). This generates fresh SIP traffic for the peer being debugged.
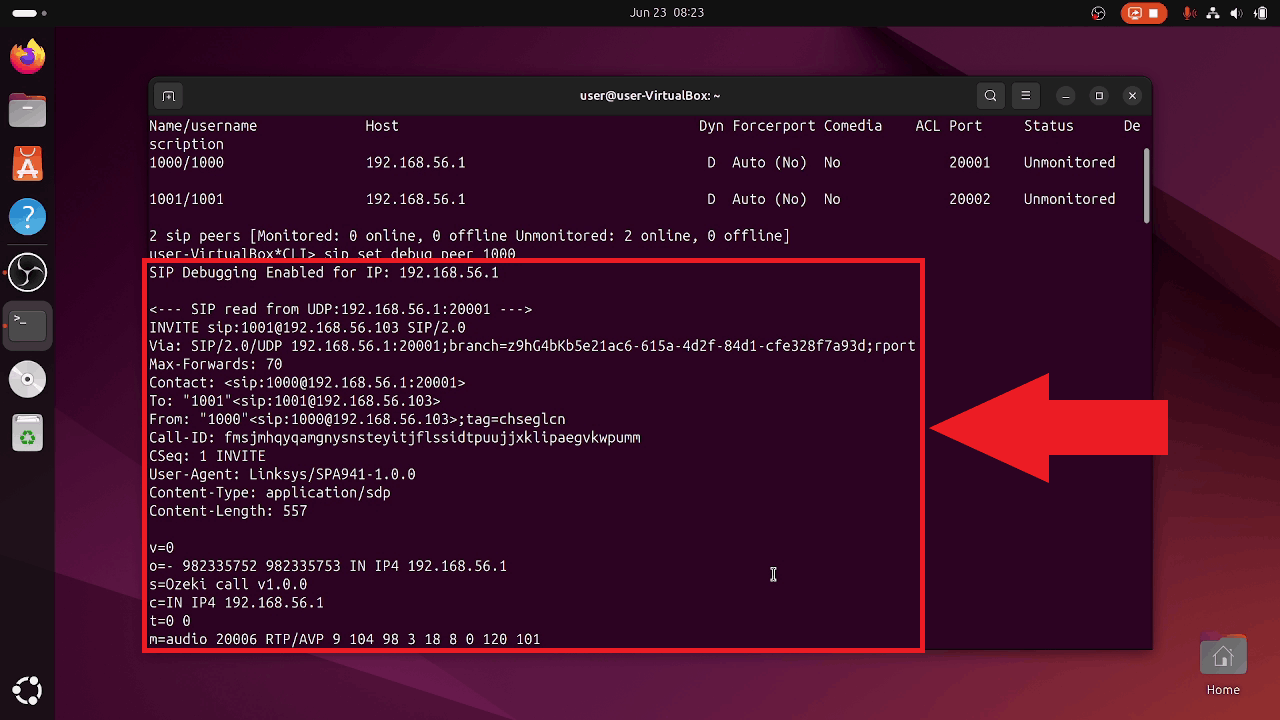
With debugging enabled, the Asterisk console prints each SIP message exchanged during the call, including the INVITE, registration, and response messages (Figure 36). Reviewing this output is useful for diagnosing connection issues, such as authentication failures or codec mismatches, between your Softphone application and the PBX.
Summary
You have now set up a complete softphone development environment, from installing and configuring an Asterisk PBX, through installing Visual Studio and the Ozeki VoIP SDK, to building, running, and debugging a working test call between two extensions. From here, the Ozeki demo Softphone project is a solid foundation to start customizing.