How to change language for AMD
This page explains how to change the language used by the Answering Machine Detector (AMD) in the Ozeki VoIP SIP SDK. It walks you through adding a new language to Windows, installing the required speech packages, and updating your C# code so the AMD uses the correct recognizer for accurate voice detection in your target locale.
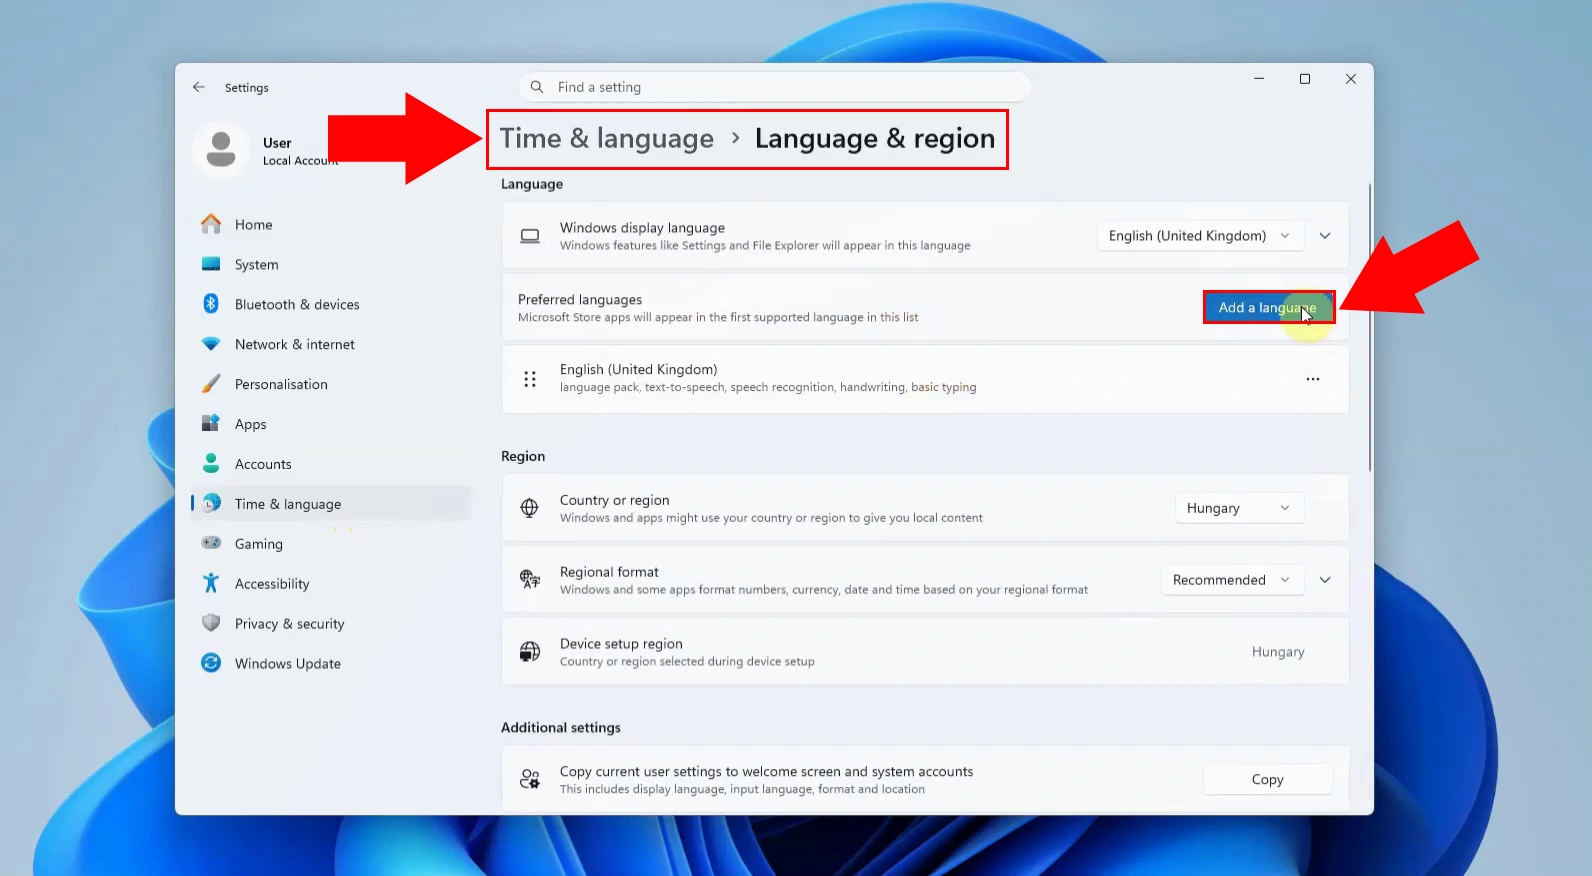
Open Windows Settings → Time & Language → Language, then click “Add a language” and select the target locale (e.g., es-ES for Spanish). Ensure the language is added to the user profile and set as preferred if needed, so Windows recognizes it system-wide for speech components.
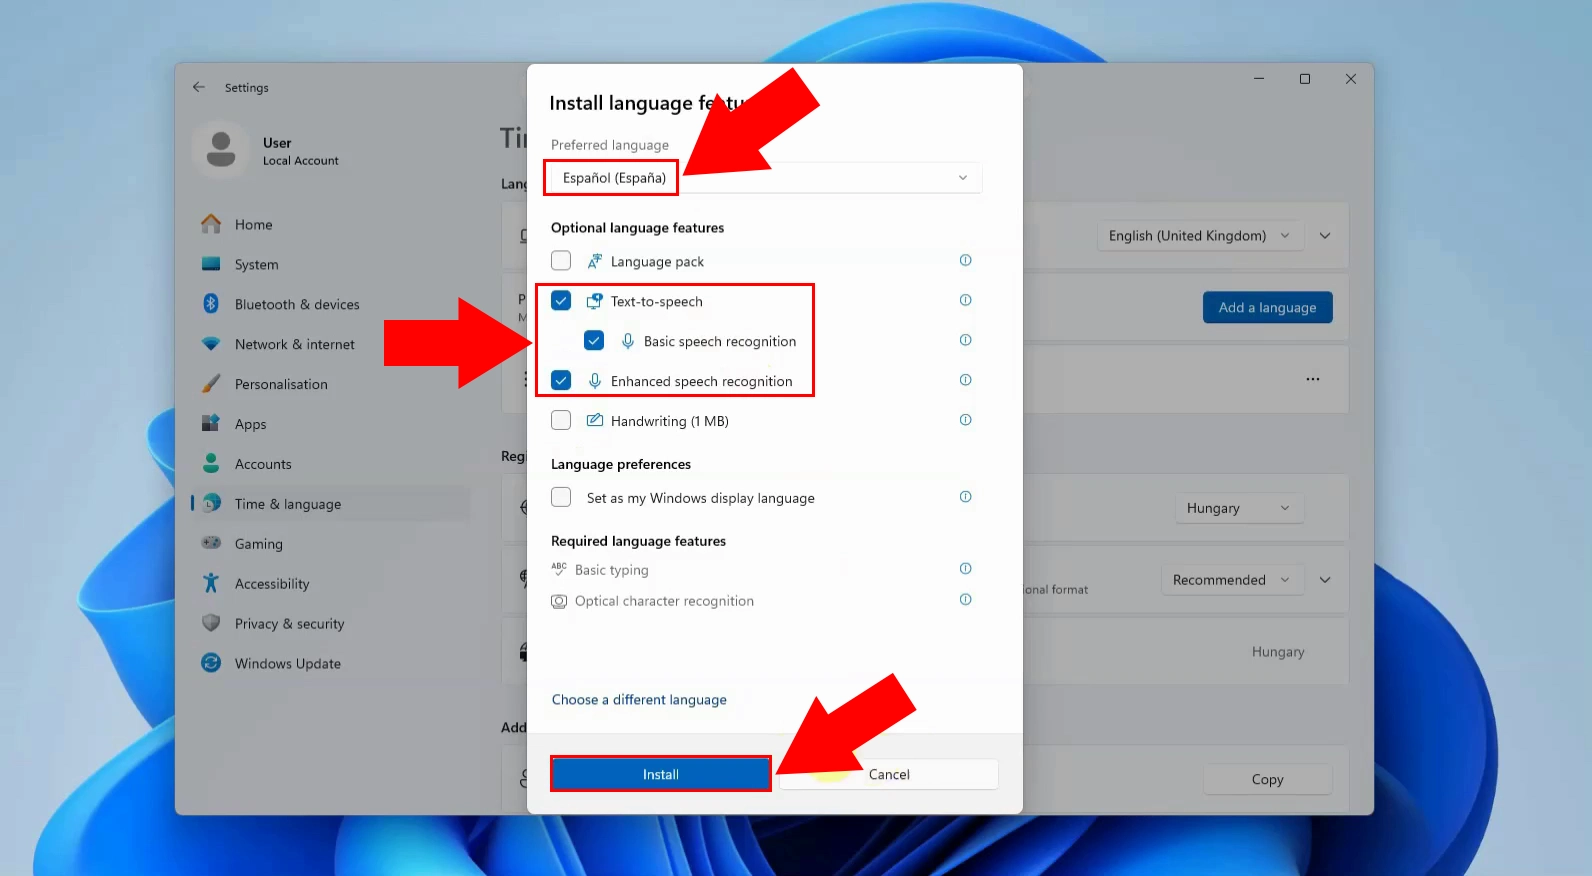
After adding the language, click its Options button and install all available Speech components (speech recognition, text-to-speech, and language data). These packages provide the recognizer engine AMD will use; without them, the language won’t appear in the recognizer dropdown in code.
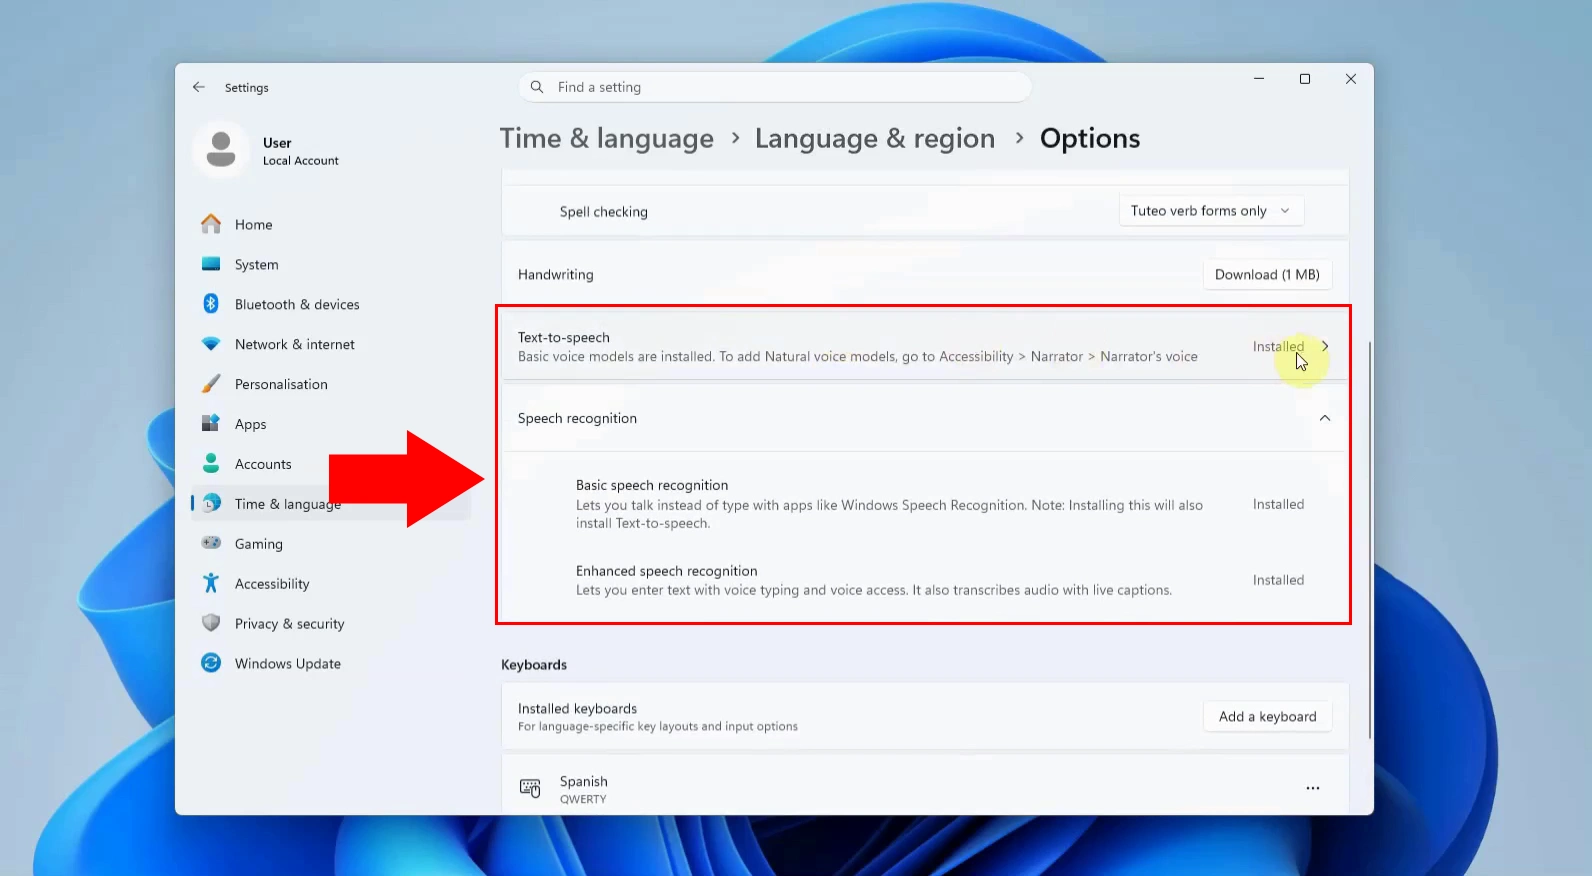
Verify installation by checking that the Speech section shows “Installed” status for the selected language. This confirms Windows has registered the recognizer, making it available to .NET System.Speech APIs used by Ozeki’s AMD module for voice analysis during call answering.
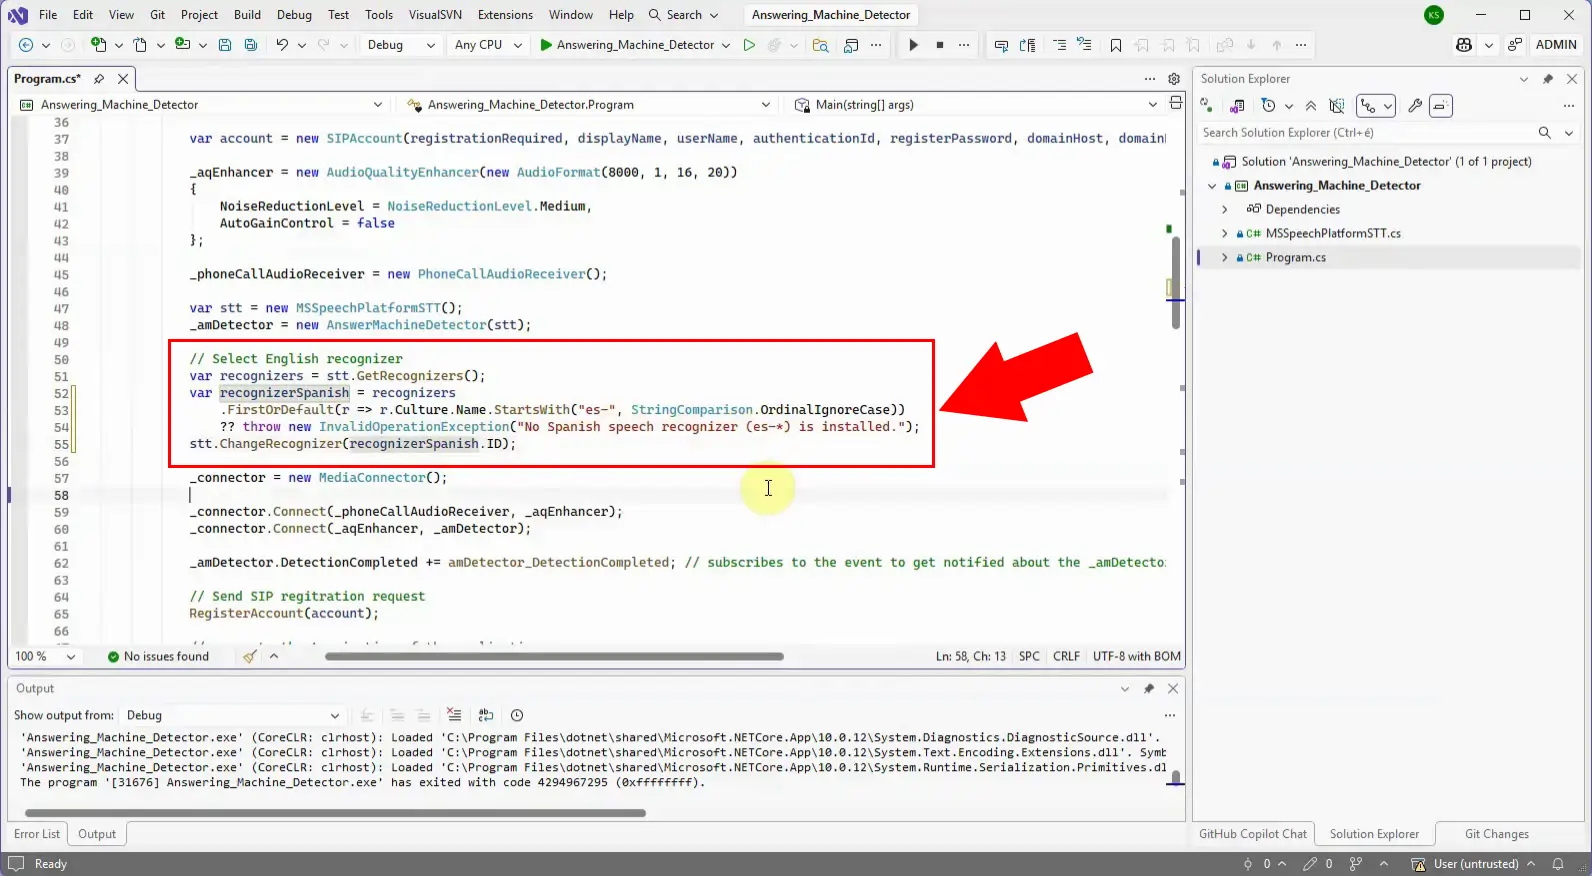
In your C# AMD implementation, set the recognizer’s Language property to the new locale code (e.g., recognizer.Language = "es-ES";). Recompile and run; the AMD will now analyze voice patterns using Spanish speech models, improving detection accuracy for Spanish-speaking callers.