How to setup Ozeki VoIP SIP SDK with Trixbox
Trixbox is a PBX software that is based on Asterisk. With Trixbox, you can place your phone calls using VoIP technology. If you use Ozeki VoIP SIP SDK you can build an efficient application with VoIP support. In this guide you can learn how to connect Ozeki VoIP SIP SDK to Trixbox.
VoIP technology is one of the continuously evolving technologies nowadays. It offers lower costs than traditional PSTN calls, and flexibility to use your existing network architecture to make phone calls.
VoIP is an acronym for Voice Over Internet Protocol, or in more common terms, phone service over the Internet. VoIP technology is based on converting voice data into network packets. Your existing network architecture can deliver these packages to the destination phone.
Ozeki VoIP SIP SDK offers the ability to utilize the advantages of VoIP technology, and place phone calls over the Internet.
In this guide you can read about how to make your first steps, and connect Ozeki VoIP SIP SDK to yout Trixbox PBX.
Overview
If you follow the steps of this guide, you will have a system which is connected to
Trixbox PBX and works as follows:
First, you need to install your Trixbox server. After the installation, you need to create
an extension which Ozeki VoIP SIP SDK can use to connect to it. After the registration
you can start to place your phone calls via Trixbox PBX. Figure 1 demonstrates the
process:

- Install Trixbox in your network environment.
- Login to Trixbox and create an extension for Ozeki VoIP SIP SDK.
- Ozeki VoIP SIP SDK will register to Trixbox using this extension.
- You can start calling your contacts.
- Ozeki VoIP SIP SDK will call your contacts via Trixbox PBX.
Configuration steps
Before you begin, it is assumed that you have already downloaded and installed Trixbox in your environment.
Step 1.) Configure Trixbox
In this example, I have installed Trixbox in a server which IP address is
192.168.91.99.
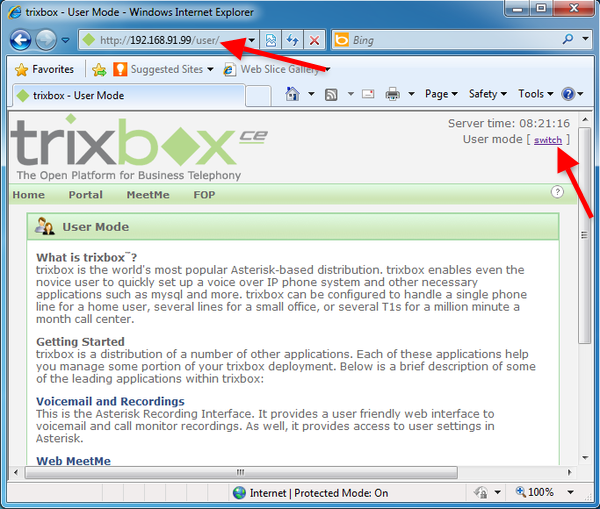
Open your web browser and navigate to the web interface of Trixbox.
In this guide it will be:
http://192.168.91.99/user/
Once it is done, click on switch next to User mode (Figure 2).
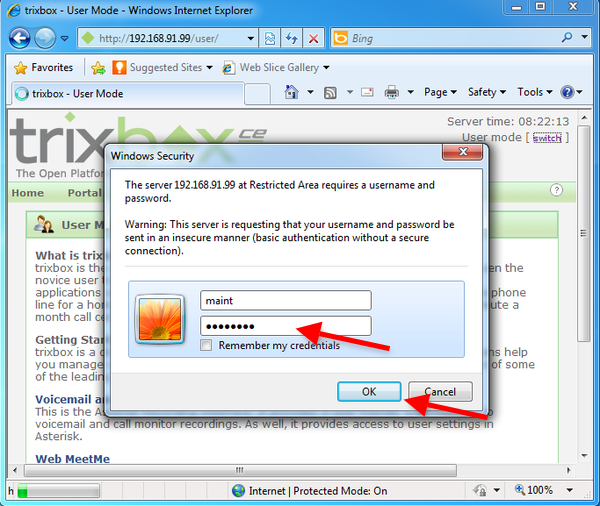
Enter the username and password to switch to Admin mode. By default, the username is maint and the password is password (Figure 3).
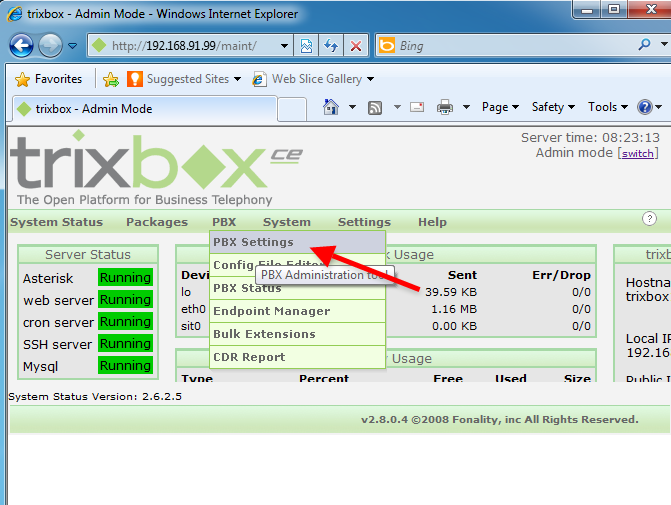
After login, click on PBX Settings at the PBX drop-down menu (Figure 4).
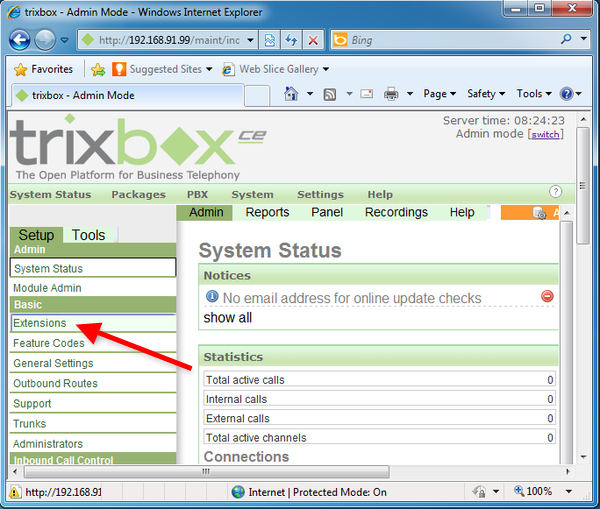
Click on Extensions at the Basic menu (Figure 5).
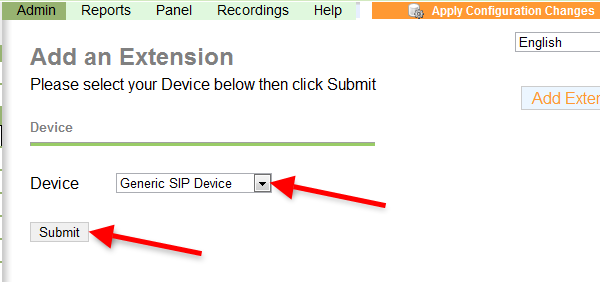
Select Generic SIP Device at the Device list, and click on Submit (Figure 6).
Provide the details of the extension you wish to create at the Add SIP Extension form. Enter the register name into the User Extension field, the display name into the Display Name field, and the password into the secret field (Figure 7). Once it is done, click on Submit.
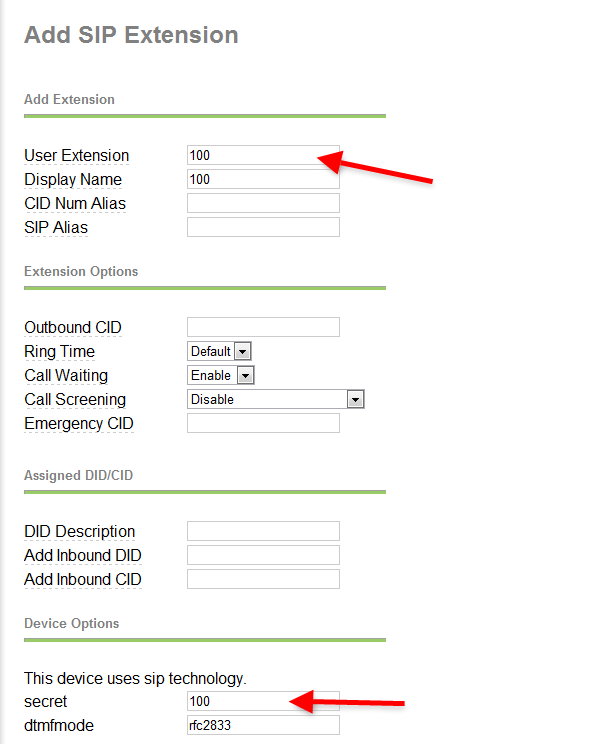
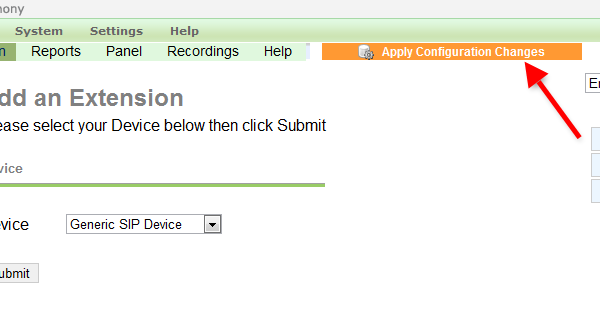
I will use extension 100 to register Ozeki VoIP SIP SDK into Trixbox. Click on Apply Configuration Changes to save the changes (Figure 8).
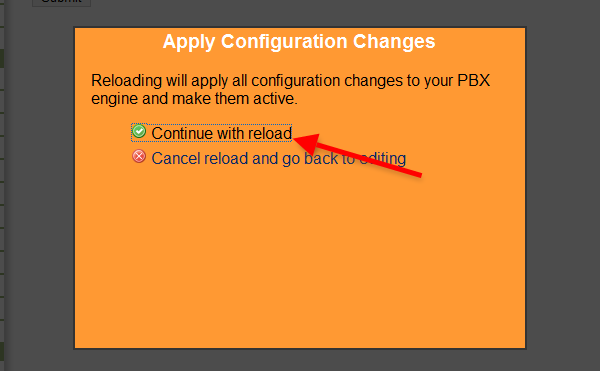
By reloading the config file, your settings will come to effect in Trixbox. Click on Continue with reload to apply your changes (Figure 9).
By reloading the configuration, the configuration of Trixbox is done, and you can start to configure Ozeki VoIP SIP SDK.
Step 2.) Configure Ozeki VoIP SIP SDK
Before you start to configure Ozeki VoIP SIP SDK, it is assumed that you have already downloaded Ozeki VoIP SIP SDK from the download page and installed in your computer.
By default, the Demo Application will be installed into your computer. Start the demo application and provide the extension details into the SIP Account Settings tab, and click on Register (Figure 10).

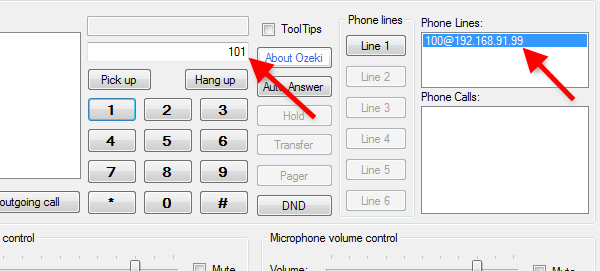
You can see the successfully registered line at the Phone Lines section. Dial an extension (e.g. 101) and click on Pick up (Figure 11). Extension 101 is a traditional desktop phone, which is registered to Trixbox PBX.
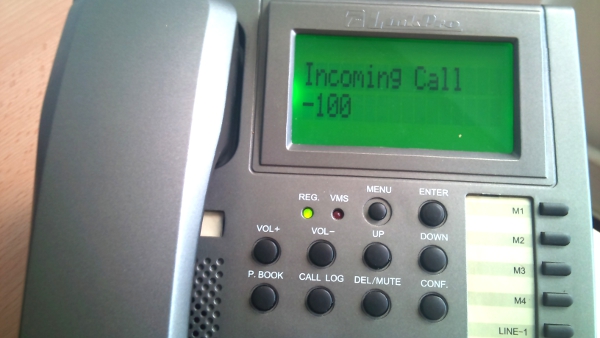
At the destination phone you can see an incoming call from Ozeki VoIP SIP SDK. The incoming call is routed through Trixbox PBX (Figure 12).
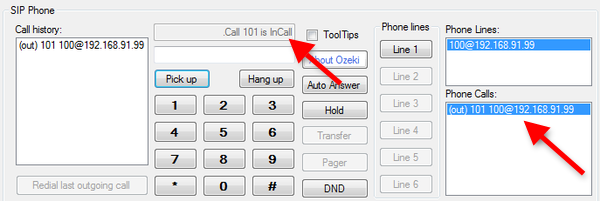
After the destination phone is picked up, the call state will change to InCall. The active phone call will be visible at the Phone Calls section (Figure 13).
Conclusion
Now the configuration is done, and you have a working system which is connected to Trixbox PBX.
If you have any questions, please contact us at: info@voip-sip-sdk.com
