How to setup Ozeki VoIP SIP SDK with AsteriskNow
In this guide you can read about how to connect Ozeki VoIP SIP SDK to your AsteriskNow server. All you need to do is to create an extension in AsteriskNow which Ozeki VoIP SIP SDK can use to connect to it.
VoIP or broadband phone is a phone service over your high-speed Internet connection. VoIP can turn a standard Internet connection into a way to place phone calls. Voice over Internet Protocol is based on convert your voice into packets, and transmitting these packets to the destination.
This page explains how you can setup Ozeki VoIP SIP SDK with your AsteriskNow server.
System architecture
On this page you can read about a system that works as follows: First, log into AsteriskNow and create a dialplan. Then create a user which Ozeki VoIP SIP SDK can use to register to the PBX. After the registration, you can start to call your contacts. The called party can be a VoIP phone, a land-line phone, or a mobile phone. Figure 1 demonstrates the process.

The configuration steps will be the following:
- Ozeki VoIP SIP SDK registers to AsteriskNow.
- Once you start your calls, the call will be forwarded to the destination phone via AsteriskNow PBX.
- The destination phone will be ringing.
Configuration steps
Before you start to follow the steps of this guide, it is assumed that you have already installed AsteriskNow into your linux server, and installed Ozeki VoIP SIP SDK to your computer. You can download Ozeki VoIP SIP SDK from the download page.
Step 1.) Configure AsteriskNow
As a first step, you need to configure a user to make phone calls via AsteriskNow.
I have already installed AsteriskNow PBX into my linux server, its IP address
is: 192.168.91.151. Open a browser and navigate to its web interface. The
example URL will be the following:
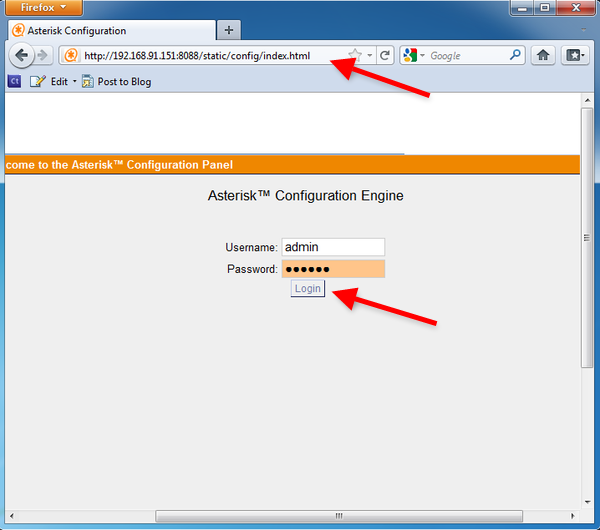
http://192.168.91.151:8088/static/config/index.html
Once you are at the login page, login as administrator (Figure 2).
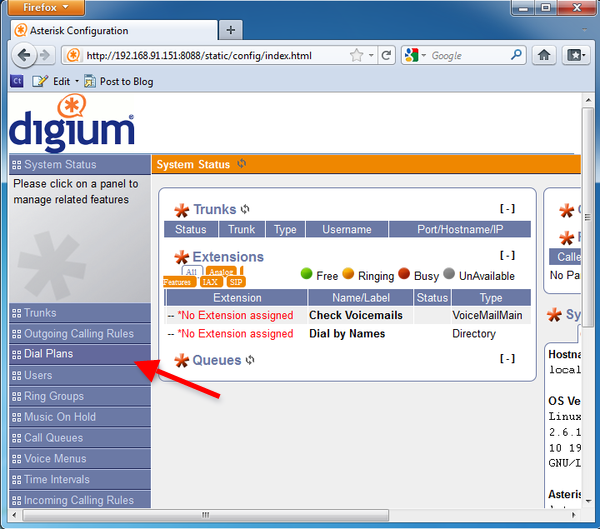
After login, click on Dial Plans menu item (Figure 3).
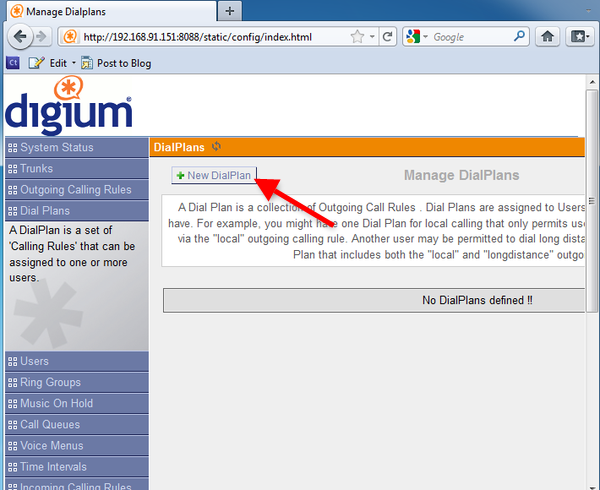
At the Dial Plans page, click on New DialPlan button to create a new dial plan (Figure 4).
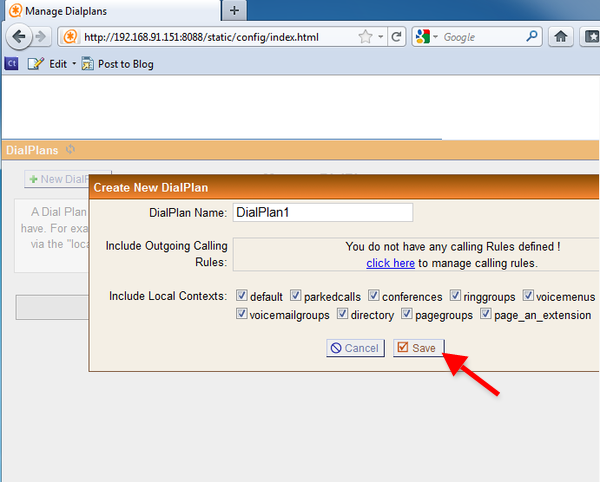
Enter a name for the dial plan (e.g. DialPlan1), and click on Save (Figure 5)
After the dialplan is created click on Users (Figure 6).
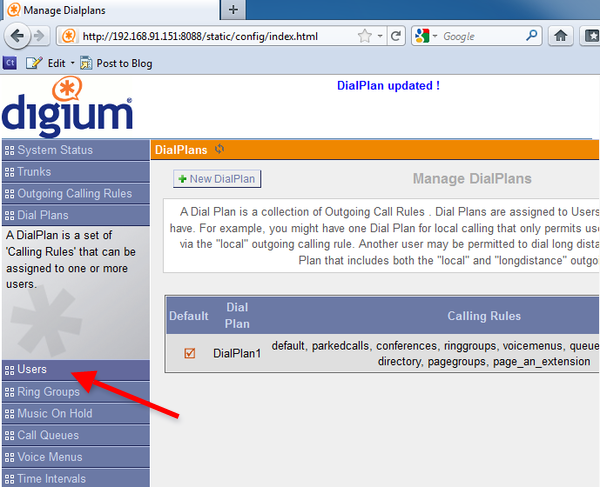
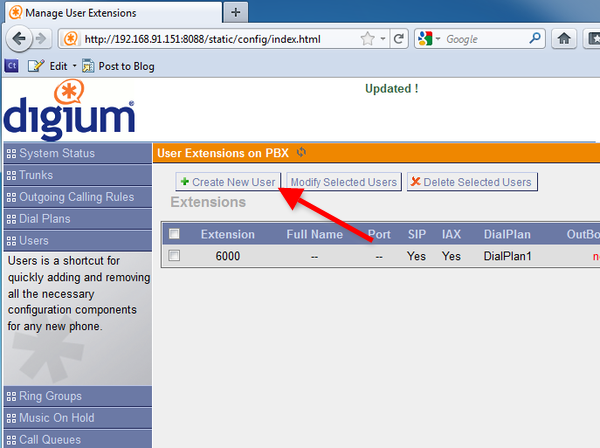
Create a new user for Ozeki VoIP SIP SDK by cicking on the Create New User button (Figure 7).
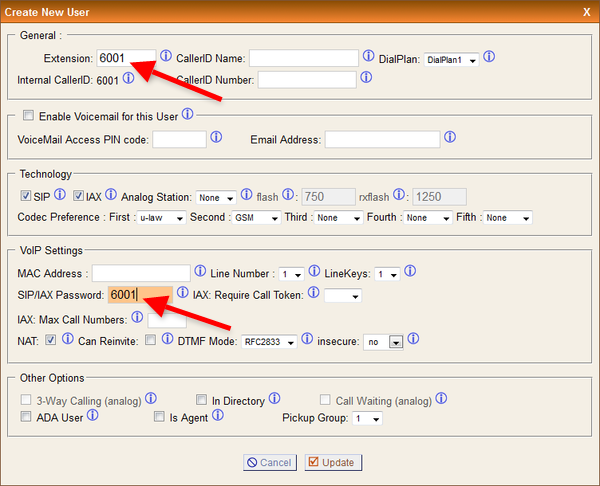
Provide an Extension number and a Password into the respective fields (e.g. 6001), and click on Apply Changes (Figure 8).
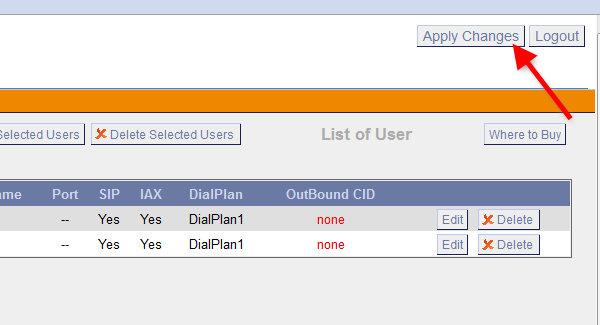
In order to apply the created changes, click on Apply Changes at the top of the screen (Figure 9).
Now the configuration of AsteriskNow is done and you can start to configure Ozeki VoIP SIP SDK.
Step 2.) Configure Ozeki VoIP SIP SDk
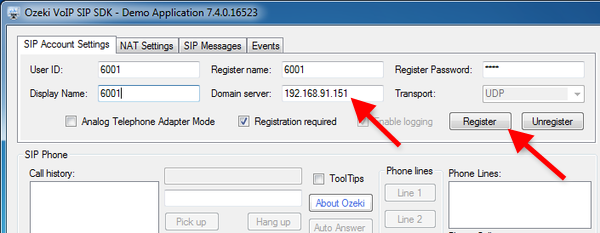
In this example I have already downloaded Ozeki VoIP SIP SDK from the download page and installed into my computer. After the installation, the Demo Application will start. Provide the details of the extension into the SIP Account Settings section and click on Register (Figure 10).
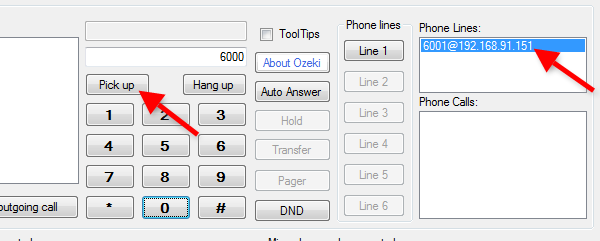
After the registration to AsteriskNow PBX is completed, you can see the registered phone line at the Phone Lines section. Enter the number of the extension you wish to call and click on Pick up (Figure 11).
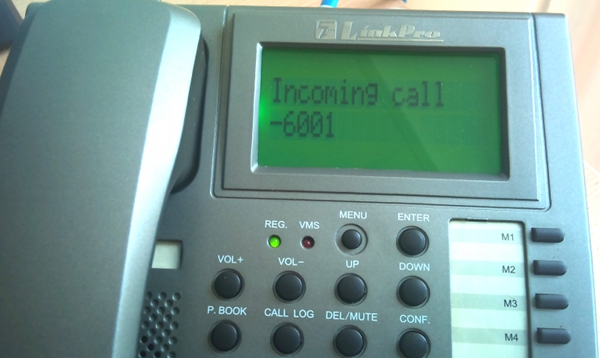
On the destination phone you can see there is an incoming call from Ozeki VoIP SIP SDK (Figure 12).
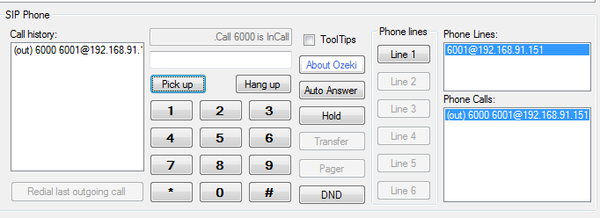
After the phone is picked up, you can see the active phone call at the Phone Calls section of the Demo Application (Figure 13).
Conclusion
If you followed the steps of this guide, you have a system which is connected to AsteriskNow and you can start to build your own application.
If you have any questions please contact us at: info@voip-sip-sdk.com
