How to setup Ozeki VoIP SIP SDK with Kamailio
Ozeki VoIP SIP SDK offers an efficient way to contact your customers or start a marketing call campaign. On this page you can learn how to do the first steps to achieve your goals. As a start, you need to connect Ozeki VoIP SIP SDK to your PBX. You can learn how to connect Ozeki VoIP SIP SDK to your Kamailio PBX with the help of this guide.
Voice over Internet Protocol (VoIP) is a generally used term for transmission technologies that deliver voice communications over the Internet or other packet-switched networks. It is also referred to as IP telephony, Internet telephony, voice over broadband (VoBB), broadband telephony and broadband phone.
Ozeki VoIP SIP SDK utilizes the advantages of VoIP technology and places phone calls using VoIP technology.
On the following steps you can learn about how to get started if you use Kamailio PBX.
System overview
If you follow the configuration steps below, you will have a system which
works as follows:
First, you need to install Kamailio PBX on your Linux server. Once you installed Kamailio,
you can use the default configuration of it to connect Ozeki VoIP SIP SDK.
Ozeki VoIP SIP SDK will register to the PBX, and will make phone calls using this
registration. The destination phone could be a VoIP phone, a land line phone or a
mobile phone. Figure 1 demonstrates this process.

The final system will work as follows:
- Install Kamailio PBX into your linux distribution. You can use the default configuration of Kamailio PBX.
- Ozeki VoIP SIP SDK will register to Kamailio PBX.
- You can start calling your contacts using the registered account.
- Ozeki VoIP SIP SDK will call your contacts via Kamailio PBX.
Configuration steps
Before you start to configure this solution, it is assumed that you have already installed your linux distribution and downloaded Ozeki VoIP SIP SDK from the download page.
1.) Configure Kamailio PBX
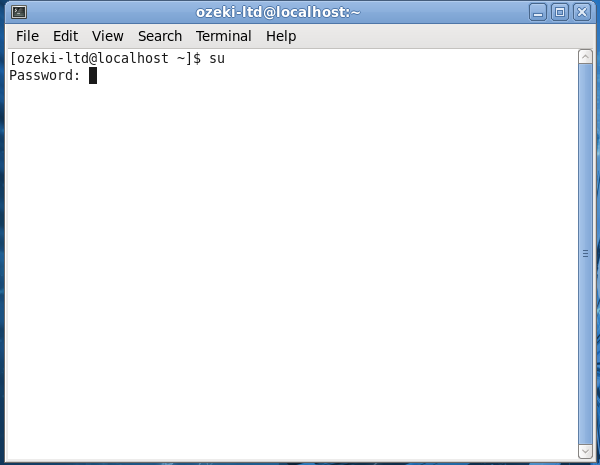
First, login to your linux distribution, start a terminal and type su to login as administrator (Figure 2).
su
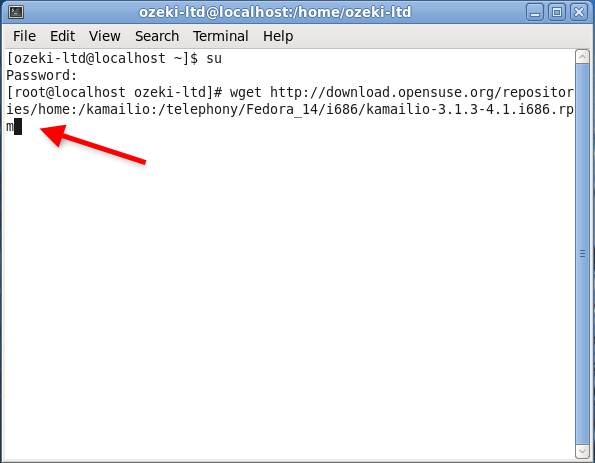
Next, download the Kamailio installation package. Since I use a Fedora distribution in this example, I will need the .rpm package. Download the package with wget in the following way (Figure 3):
wget http://download.opensuse.org/repositories/home:/kamailio:/telephony/Fedora_14/i686/kamailio-3.1.3-4.1.i686.rpm
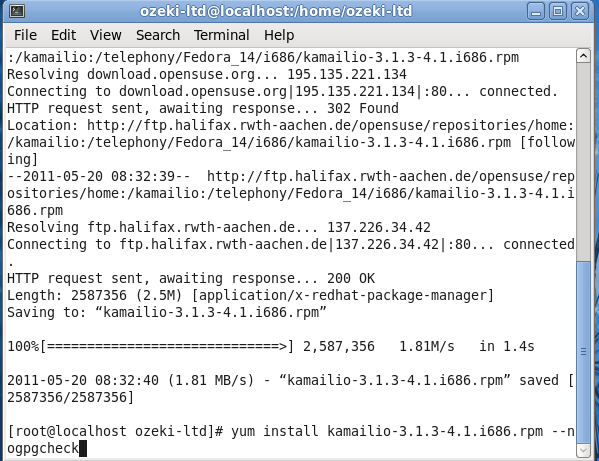
When the package is downloaded, you need to install it. Please note that you will have to skip the gpg check for this package (Figure 4).
yum install kamailio-3.1.3-4.1.i686.rpm --nogpgcheck
Once Kamailio is installed, you can start using it with its default settings. By default, you don't need to define any extension in Kamailio, and you can register to it with any username or password. All you need to do is to start the Kamailio service in your distribution (Figure 5).
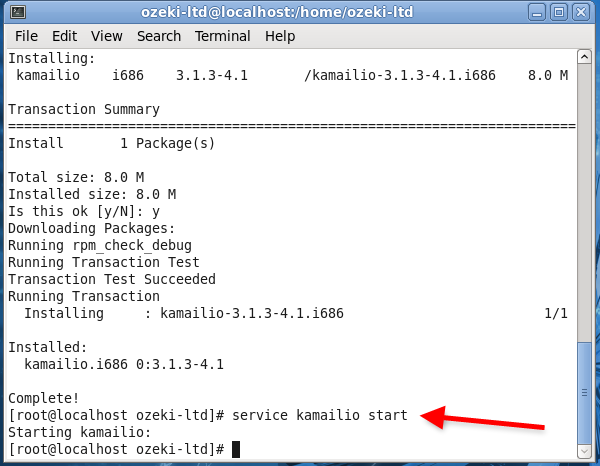
service kamailio start
Now the configuration of Kamailio is done and you can start to configure Ozeki VoIP SIP SDK.
2.) Configure Ozeki VoIP SIP SDK
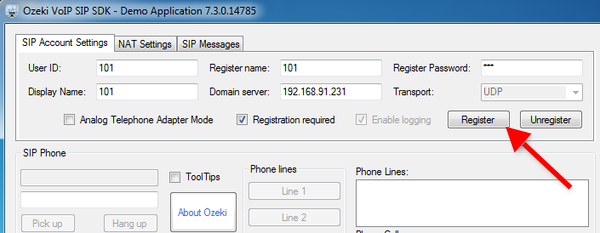
Download and install Ozeki VoIP SIP SDK in your computer. After installation, the Demo Application will start automatically. Enter the IP address of the computer where Kamailio is installed (e.g. 192.168.91.231), and fill the registration settings. By default, you can register with any account to Kamailio. In this example I fill all of the fields with 101 (Figure 6). Click on Register to register to the PBX.
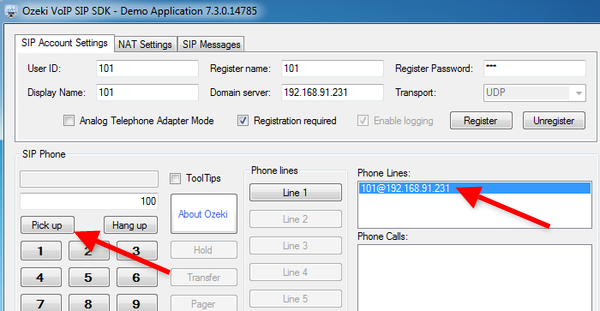
You can see the registered phone line in the Phone Lines section. Enter an extension number using the buttons of the Demo Application and click on Pick up (Figure 7).
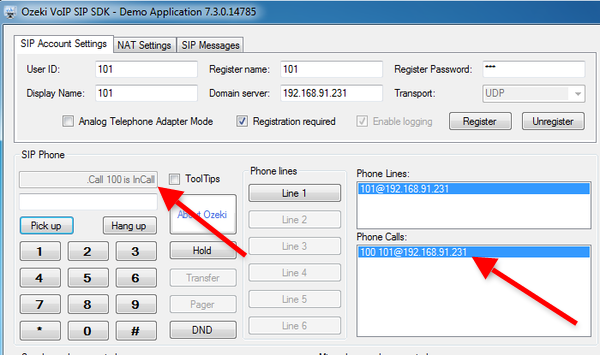
You can see that there is an incoming call from Ozeki VoIP SIP SDK in the destination phone (Figure 8).

In the Demo Application, you can see the active call in the Phone Calls section (Figure 9).
Conclusion
Now the configuration is complete, and the testing is successful, you can start to call your contacts and build your own application.
If you have any questions, do not hesitate to contact us: info@ozekidialer.com
