How to setup Ozeki VoIP SIP SDK with FreeSWITCH
FreeSwitch is an open-source PBX application, which is more and more popular every day because of its flexibiity and richness in VoIP features. Now you can build your own application with VoIP support using FreeSwitch PBX. In this guide you can read about how to setup Ozeki VoIP SIP SDK with FreeSwitch PBX.
VoIP technology is one of the continuously evolving technologies nowadays. It offers cheaper prices and higher flexibility than PSTN lines. With VoIP technology, you can even use your existing network to enable voice capability in your company. It converts the voice data into packages and uses the existing network to deliver these packages to the recipient phone.
Ozeki VoIP SIP SDK utilizes the advantages of this technology and uses VoIP technology to place phone calls over the network.
In this guide you can read about how to get started and setup your system with Ozeki VoIP SIP SDK and FreeSwitch.
Overview
If you follow the configuration steps of this guide, you will have a system
which is connected to FreeSwitch PBX. The system will work as follows:
First, you need to install your FreeSwitch server. After the installation is done,
you can use one of its built-in extension to test the functionality. Ozeki VoIP SIP SDK
can use this extension to register to FreeSwitch server.
After the registration you can start making calls. Figure 1 demonstrates the process.

- Install FreeSwitch and use a pre-defined extension for Ozeki VoIP SIP SDK.
- Ozeki VoIP SIP SDK will register to FreeSwitch using this extension.
- You can start to call your contacts.
- Ozeki VoIP SIP SDK will call your contacts via FreeSwitch.
Configuration steps
Before you start to configure FreeSwitch PBX, it is assumed that you have already prepared your Linux distribution for installing. In this guide I will use an Ubuntu linux distribution.
Step 1.) Install FreeSwitch
First, you need to log in to your linux distribution, and start a terminal. Since it is an Ubuntu distribution, I will put sudo in front of each command, which I want to run with Administrator privileges.
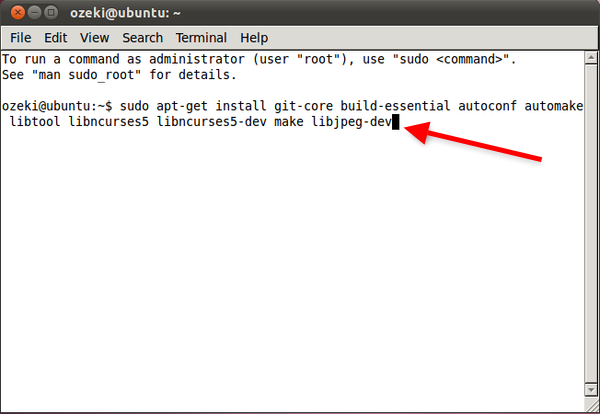
First, you need to install the mandatory prerequisite packages into your linux distribution. For this, type the following into your terminal (Figure 2):
sudo apt-get install git-core build-essential autoconf automake libtool libncurses5 libncurses5-dev make libjpeg-dev
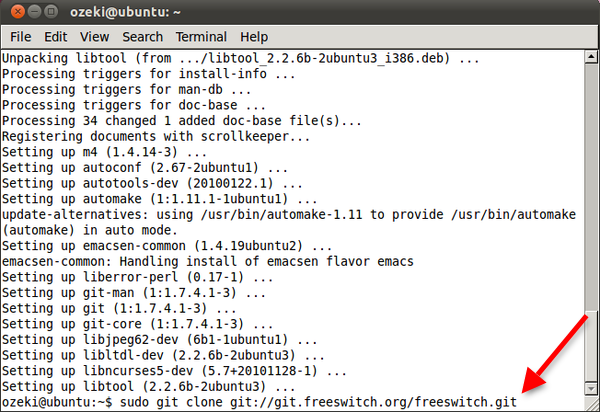
In this guide I will install the Git version of the FreeSwitch PBX. For this, I will type the following (Figure 3):
sudo git clone git://git.freeswitch.org/freeswitch.git
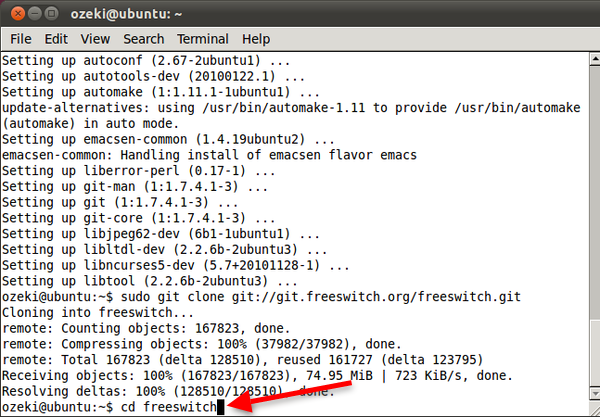
Next, enter into the downloaded freeswitch directory (Figure 4).
cd freeswitch
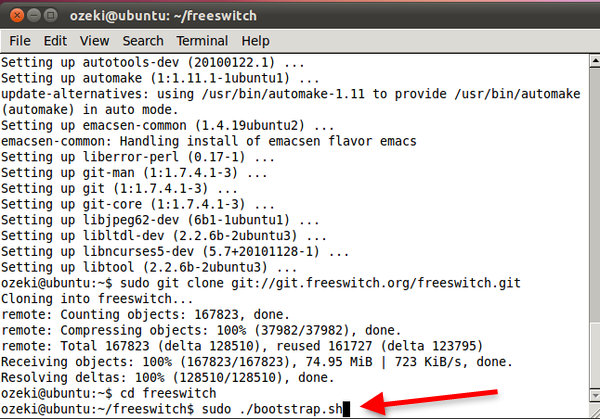
Execute the bootstrap script (Figure 5).
sudo ./bootstrap.sh
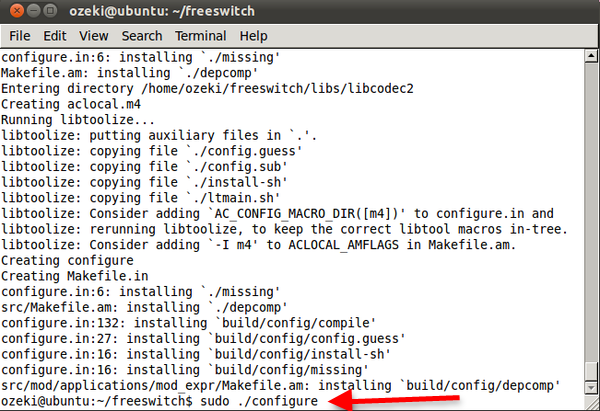
Configure the source code by executing the configure script (Figure 6).
sudo ./configure
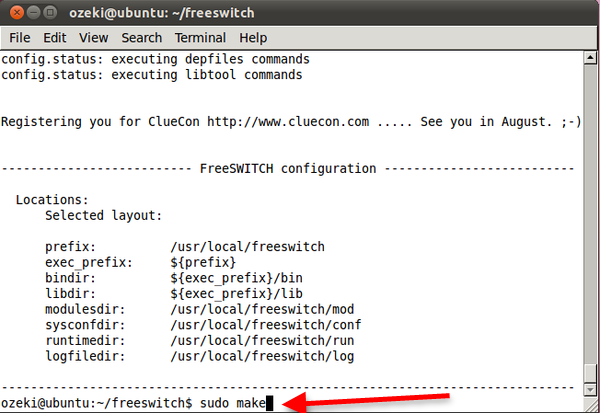
Compile the source code (Figure 7).
sudo make
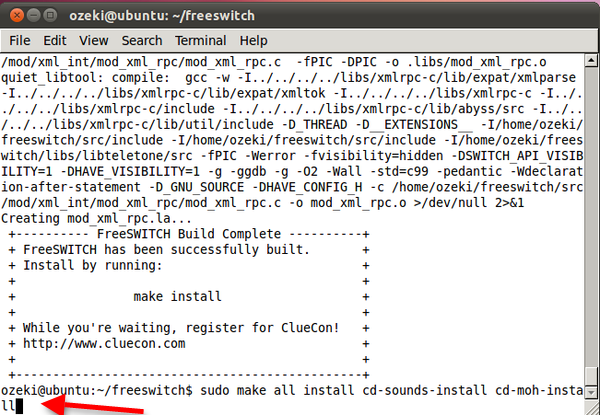
Install FreeSwitch (Figure 8).
sudo make all install cd-sounds-install cd-moh-install
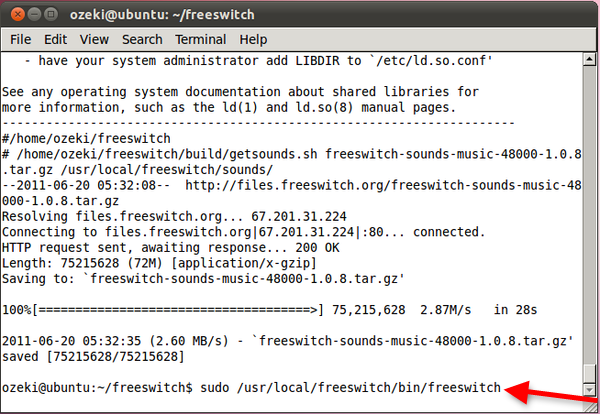
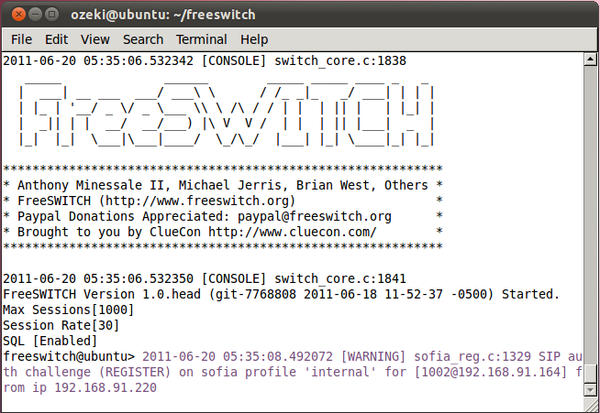
Now FreeSwitch is installed to the /usr/local/freeswitch directory. Start FreeSwitch PBX (Figure 9).
sudo /usr/local/freeswitch/bin/freeswitch
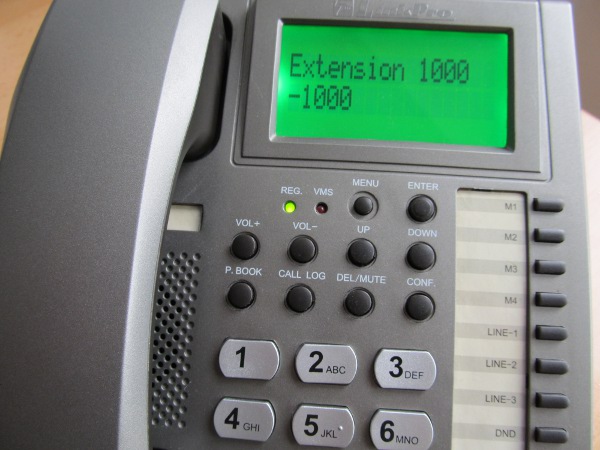
I will use a desktop telephone for testing purposes. In Figure 10 you can see that this desktop telephone is registered to line 1002.
There are several pre-defined extensions in FreeSwitch PBX. You can use extensions from 1000 to 1019 with password 1234 for testing purposes. I will use these extensions to demonstrate the functionality of Ozeki VoIP SIP SDK with FreeSwitch PBX. Now you can configure Ozeki VoIP SIP SDK.
Step 2.) Configure Ozeki VoIP SIP SDK
Before you begin, it is assumed that you have already downloaded Ozeki VoIP SIP SDK from the download page and installed it into your computer.
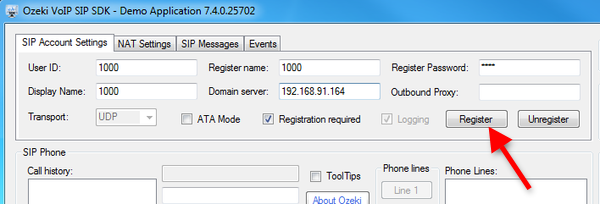
Execute the Demo Application of Ozeki VoIP SIP SDK and fill the SIP Account Settings with the data of a pre-defined extension of FreeSwitch and click on Register. I will use extension 1000 in this guide (Figure 11).
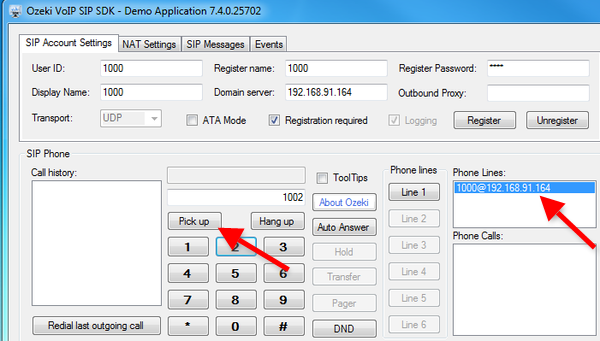
After the registration, a Phone Line is created. You can see this created phone line at the Phone Lines section of the Demo Application (Figure 12). Dial an extension (e.g. 1002) and press Pick up.
At the destination phone you can see an incoming call from Ozeki VoIP SIP SDK (Figure 13).
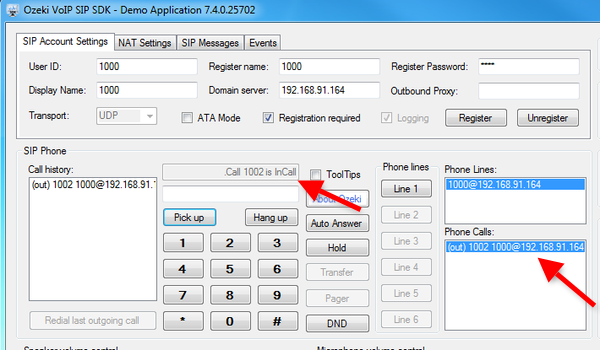
You can see the status of the Phone Call in the Demo Application (Figure 14).
Conclusion
If you followed the steps of this guide, you have a system with Ozeki VoIP SIP SDK connected to FreeSwitch PBX. Now you can start to build your own application with FreeSwitch support in them.
If you have any questions, do not hesitate to contact us at: info@voip-sip-sdk.com
