How to setup Ozeki VoIP SIP SDK with Cisco Unified Communications Manager 8
Ozeki VoIP SIP SDK offers the ability to use VoIP services in your own application. You can use it to create an autodialer, a custom softphone or a webphone, for example. To get started, you need to connect it to a PBX first. In this guide you can read about how you can connect Ozeki VoIP SIP SDK to the one of the most powerful PBX application, Cisco Unified Communications Manager.
Cisco Systems is one of the industry-leading solution providers nowadays. They provide networking and voice solutions and services. Their former PBX application, named Cisco Call Manager evolved and extended into an industry standard communication server. Cisco Call Manager became Cisco Unified Communications Manager, and its main innovation is the ability to integrate video support in voice communication.
Ozeki VoIP SIP SDK utilizes the advantages of VoIP technology, which allows you to make phone calls over your existing network infrastructure. You can connect Ozeki VoIP SIP SDK to Cisco Unified Communications Manager to build your own application with voice support.
In this guide you can learn about how to connect Ozeki VoIP SIP SDK to your Cisco Unified Communications Manager and how to start your calls and build your own application.
Overview
If you follow the steps of the configuration guide below, you will have a system which is connected
to Cisco Unified Communications Manager. The system will work as follows:
Before you start, it is assumed that you have already set up your Communications Manager in your
environment. First, you need to set up a Phone Security Profile. Then you need
to create a Phone and a Directory Number for the phone. After these, you need
to create an End User and assign the Phone for this user. Then Ozeki VoIP SIP SDK
can use this created user to connect to Cisco Unified Communications Manager and to make
phone calls. Figure 1 demonstrates the process.

After the setup, your system will work as follows:
- Login to Cisco Unified Communications Manager and setup the user and the device
- Ozeki VoIP SIP SDK will register to Cisco Unified Communications Manager using the created user
- You can start to call your contacts via Cisco Unified Communications Manager.
Configuration steps
Step 1.) Configure Cisco Unified Communications Manager
In order to begin the configuration of Cisco Unified Communications Manager, you
need to log into its web interface. In this example, it
has the following IP address: 192.168.91.89
This case, the URL of its web interface will be:
https://192.168.91.89/ccmadmin/showHome.do
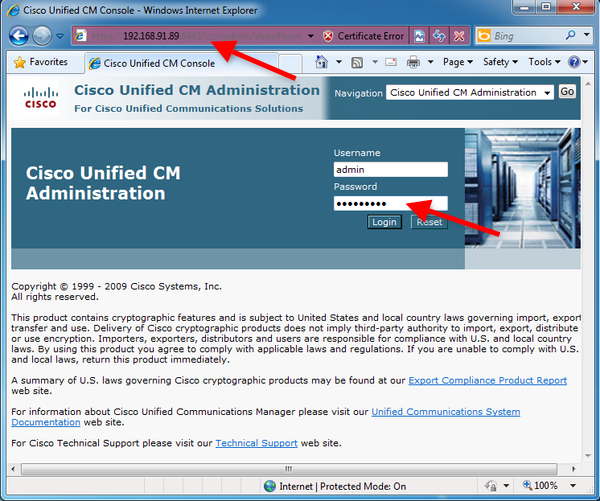
Open a web browser, navigate to its web interface, and login as Administrator (Figure 2).
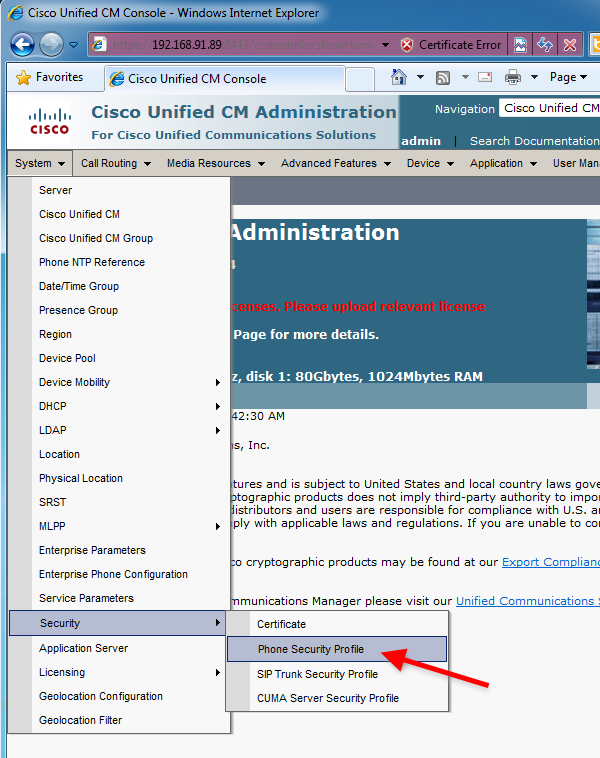
Once logged in, you need to enable Digest Authentication for SIP devices. To do so, I will setup a new Phone Security Profile. Click on the System menu, open the Security sub-menu and select Phone Security Profile (Figure 3).
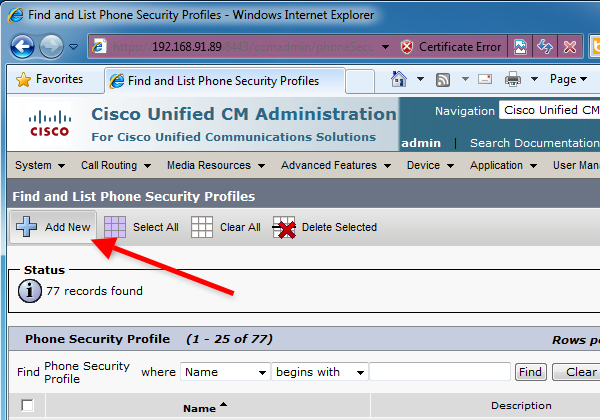
There are several pre-defined security profiles in Cisco Unified Communications Manager 8. In order to create a new one, click on the Add New button at the toolbar (Figure 4).
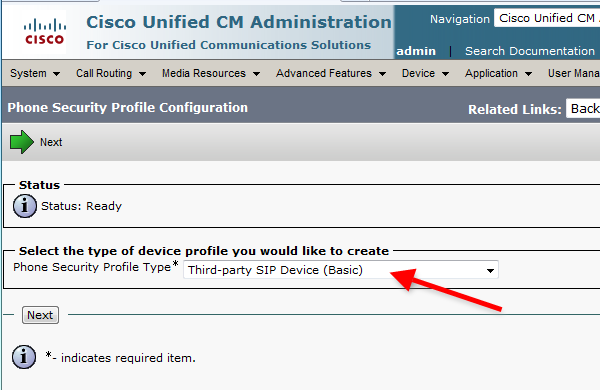
Set the Phone Security Profile Type to Third-party SIP Device (Basic) and click on Next (Figure 5).
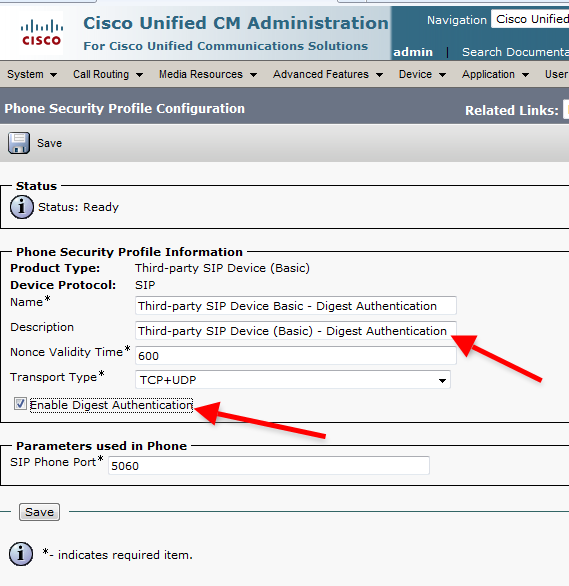
Provide a Name and a Description for this profile, e.g.: "Third-party SIP Device Basic - Digest Authentication". It is important to check the Enable Digest Authentication checkbox and click on Save (Figure 6).
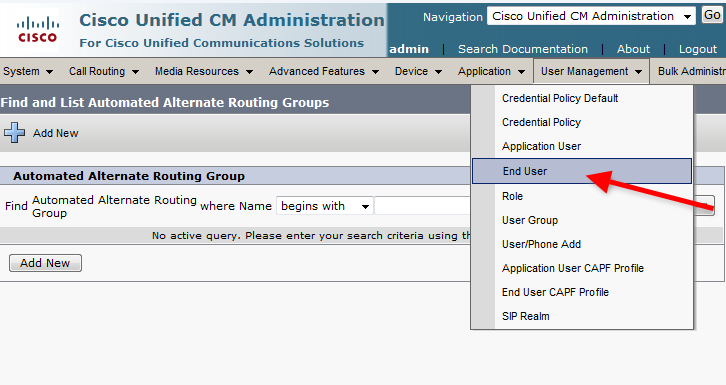
Now create a new user in Cisco Unified Communications Manager. For this, click on End User entry at the User Management menu (Figure 7).
Create a new user by clicking on the Add New button (Figure 8).

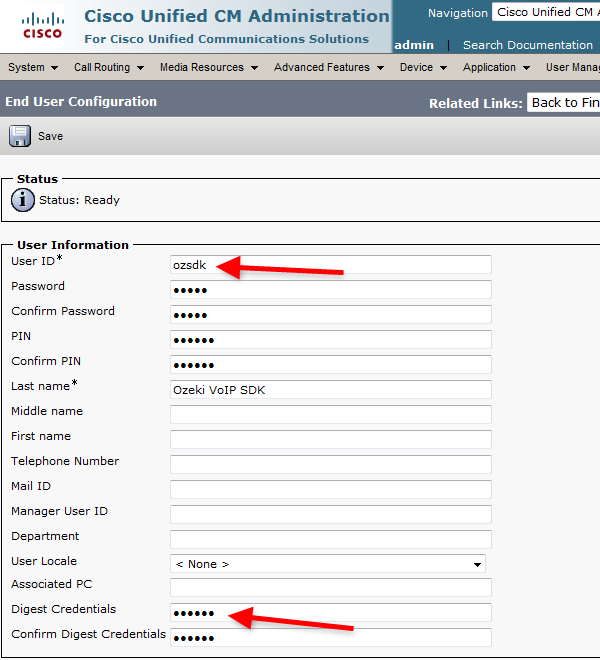
Now enter the necessary information into the respective fields to create new user. User ID and Digest Credentials will be needed for Ozeki VoIP SIP SDK to establish the registration. Once it is done, click on Save (Figure 9).
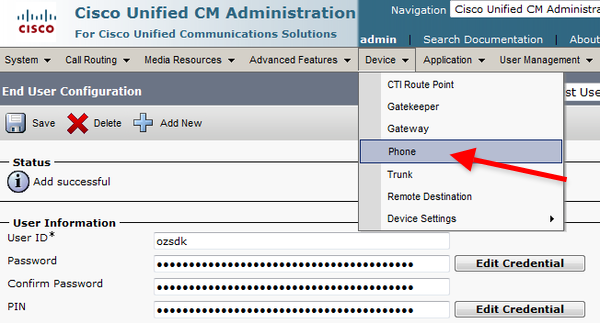
After the user is created, create a new phone device. Click on Phone in the Device menu (Figure 10).
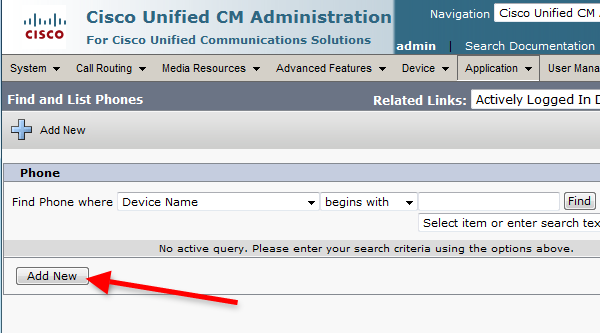
Click on Add New at the Phone List screen (Figure 11).
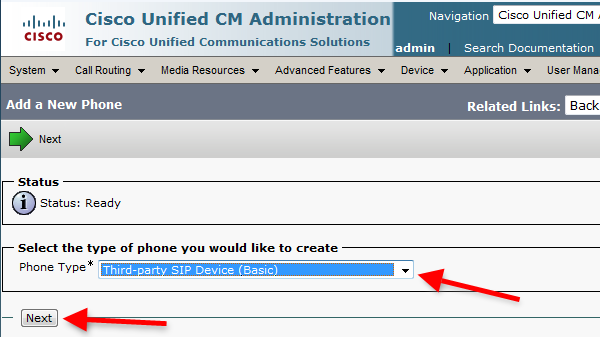
Set the Phone Type to Third-party SIP Device (Basic) and click on Next (Figure 12).
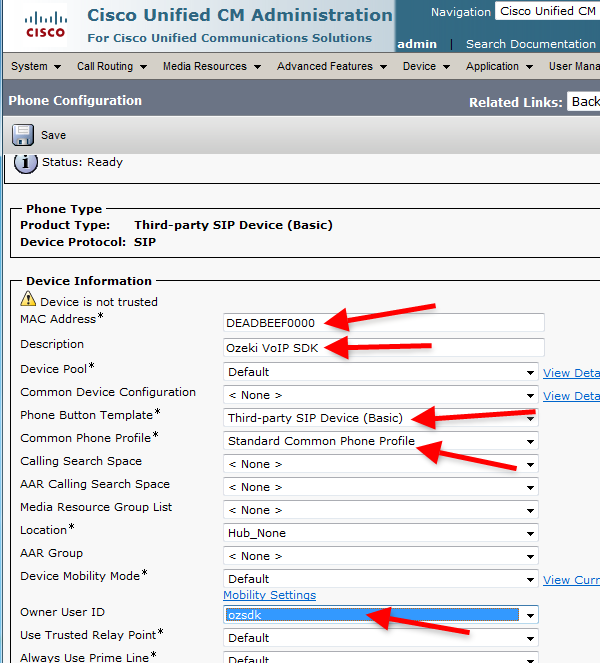
Set the fields according to the follows (Figure 13):
- MAC Address: Set it to a unique address
- Description: Enter a description for this phone
- Device pool: Set it to a default value
- Phone Button Template: Set it to Third-party SIP Device(Basic)
- Owner User ID: set it to the created user's name.
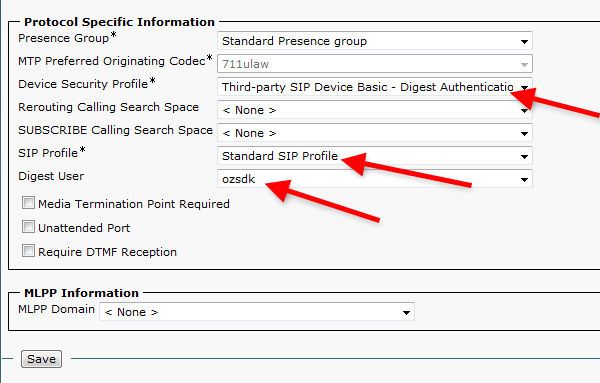
Scroll down to the bottom of the page and specify the protocol information (Figure 14):
- Device security profile: Set it to the created profile
- SIP Profile: Set it to Standard SIP Profile
- Digest user: Select the created user
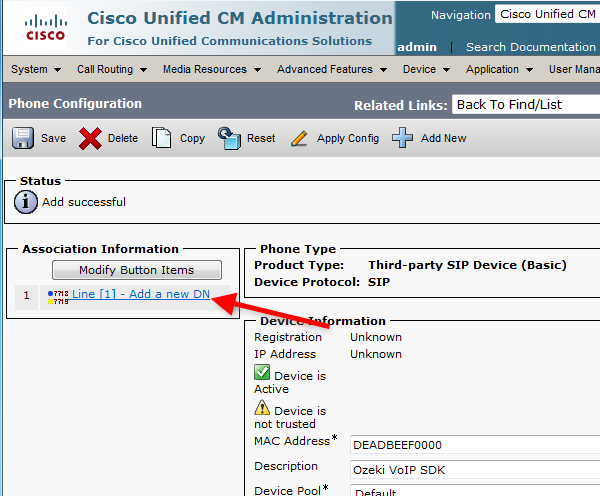
After the phone is created, the Phone Configuration page will show up.
On this page you can see that there is no Directory Number set for this phone.
Click on Line [1] - Add new DN to create a directory number (Figure 15).
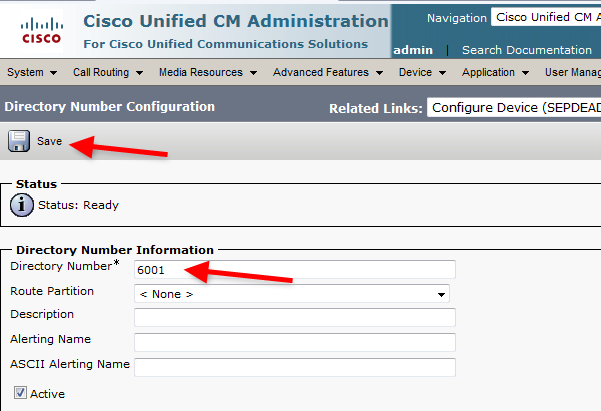
Provide a directory number, e.g.: 6001 and click on Save (Figure 16).
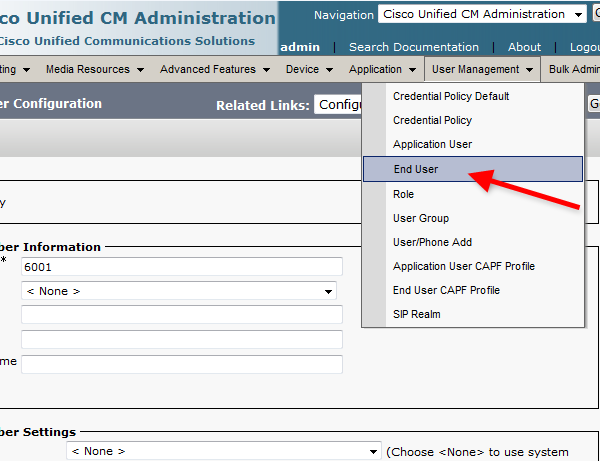
After the Directory Number is created, you can assign the created Phone device to a specific End User. In this example, I will assign it to the previously created user. To do so, click on End user at the User Management menu.
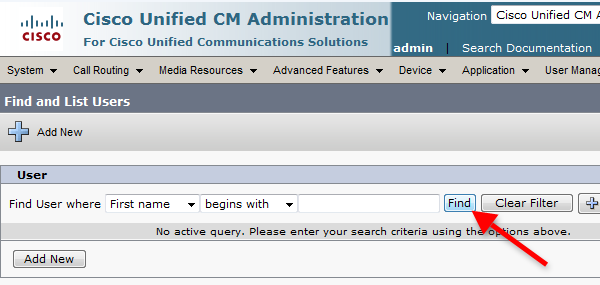
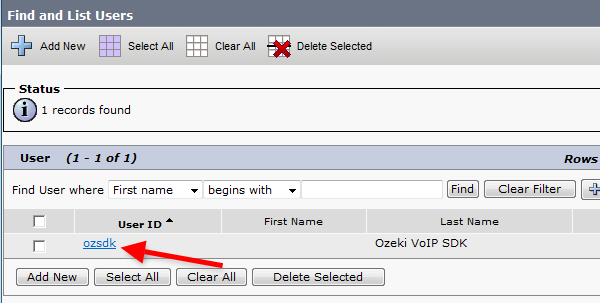
Click on Find to search for the created user (Figure 18).
Once the user is found, click on the user name to view its details (Figure 19).
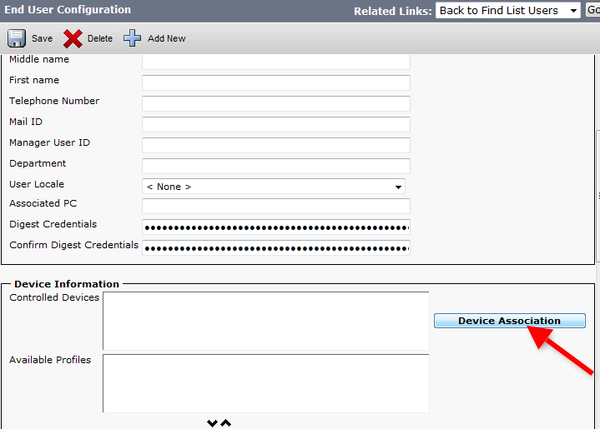
Scroll down the End User Configuration page and find the Device Information section. By default, no device is associated to this user. To associate a device to this user, click on Device Association (Figure 20).
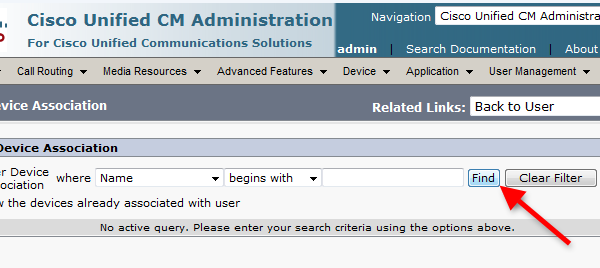
You will get to the User Device Association page. Click on Find to search for the created device (Figure 21).
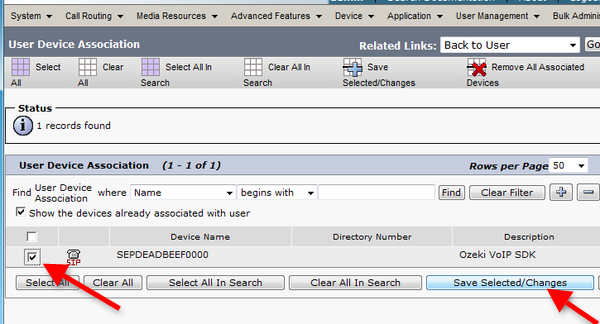
Select the previously created device by clicking on the checkbox before its device name and click on Save Selected/Changes (Figure 22)
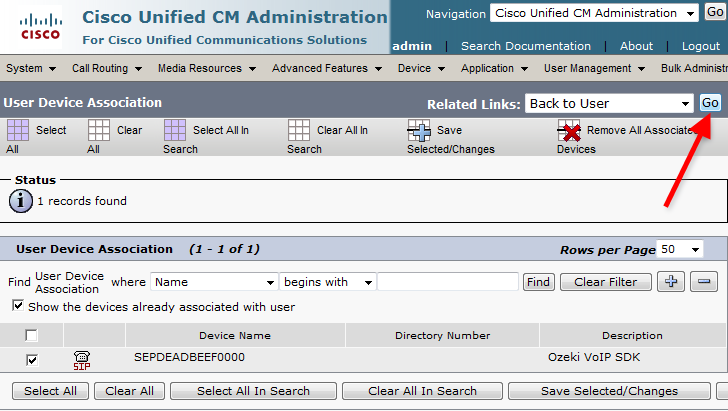
Now you need to go back to the user settings page. At the related links section you can choose which page you want to jump to. Select the Back to User option to step back to the user's settings and click on Go (Figure 23).
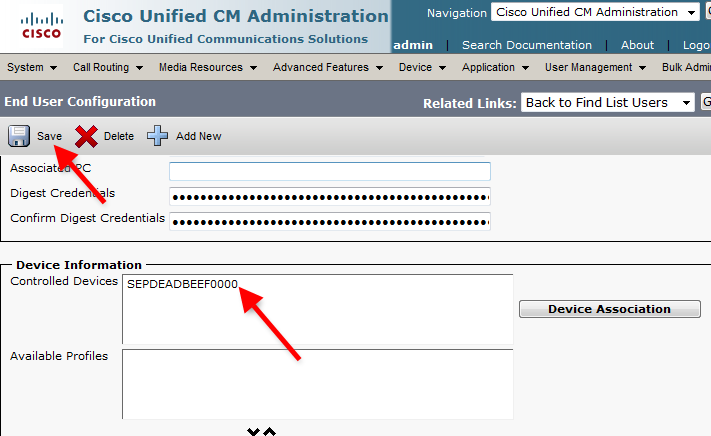
At the End User Configuration page you can see the assigned device name at the Controlled Devices list. Click on Save to save the settings (Figure 24).
Now the configuration of Cisco Unified Communications Manager is done and you can start to configure Ozeki VoIP SIP SDK.
Step 2.) Configure Ozeki VoIP SIP SDK
It is assumed that you have already downloaded Ozeki VoIP SIP SDK and installed it into you computer.
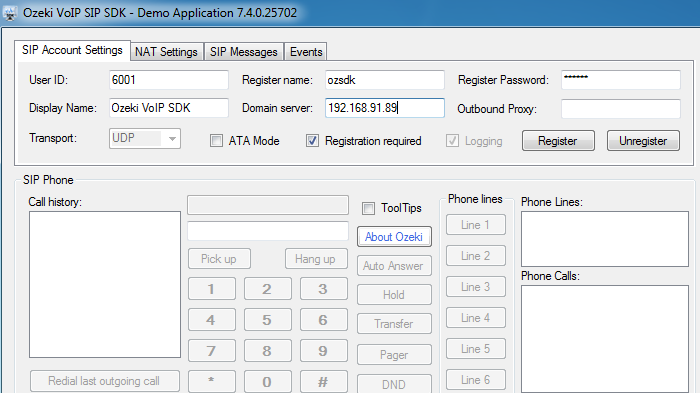
Start the Demo Application of the SDK. Provide the settings of the created user and device into the SIP Account Settings field:
- User ID: The Directory Number of the device. e.g.: 6001
- Register Name: The created user's Name. E.g.:ozsdk
- Register Password: The Digest Credential of the created user.
- Display Name: This name will be displayed on the destination phone
- Domain server: The IP address of Cisco Unified Communications Manager. e.g.: 192.168.91.89
Once it is done, click on Register (Figure 25).
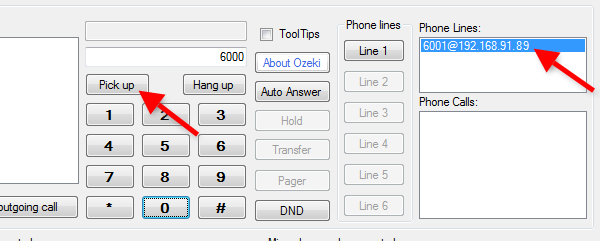
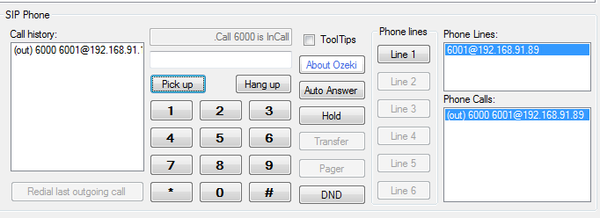
You can see the registered phone line at the Phone Lines section of the Demo Application. Dial an extension and click on Pick up (Figure 26).
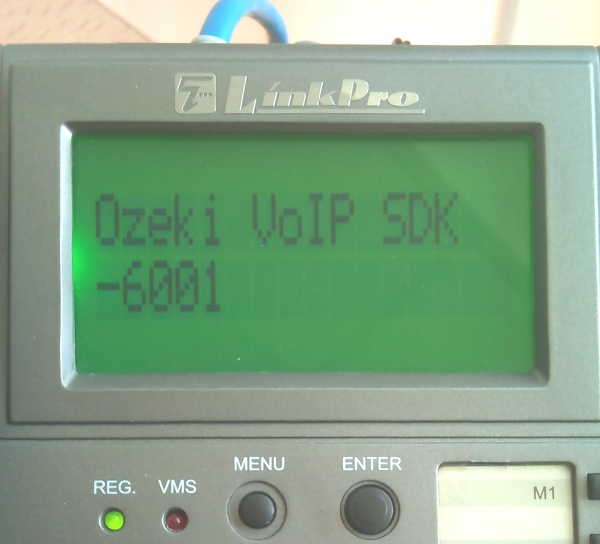
In figure 27 you can see an incoming call from Ozeki VoIP SIP SDK via Cisco Unified Communications Manager.
You can see the active phone call at the Phone Calls section of the Demo Application (Figure 28).
Conclusion
If you followed the steps of this page, you have a working system with Ozeki VoIP SIP SDK connected to Cisco Unified Communications Manager.
If you have any squestions, do not hesitate to contact us at: info@voip-sip-sdk.com
