How to setup Ozeki VoIP SIP SDK with VoIPtalk
For making VoIP calls first you need to sign up to the service of a service provider (or connect to a PBX). In this guide you will learn how to connect to VoIPtalk when you use Ozeki VoIP SIP SDK. After following this tutorial you will be able to make VoIP calls via VoIPtalk with the Ozeki SIP SDK effectively.
This setup guide explains in detail how you can use a SIP account provided by an Internet based VoIP telephone provider (namely VoIPtalk).
VoIP telephone service providers offer a telephone service over the Internet. They can forward calls to traditional telephone networks and to Internet users signed up to their network. When you sign up for the service, you will receive a SIP account (an IP address, a username and a password, plus some other details). To make voice calls from Ozeki VoIP SIP SDK, you need to configure the SIP account details.
Download VoIP SIP SDK
The first thing to do if you wish to work with Ozeki VoIP SIP SDK, is to download and install it on your Windows computer. Once installed, you can use Visual Studio to add Voice and Video call capabilities to your project.
Link: Download Voip SIP SDK for Windows
After signing up for the service of VoIPtalk and following the configuration steps of this guide you will have a system that works in the way as Figure 1 demonstrates:
With the help of Ozeki VoIP SIP SDK you will be able to initiate VoIP calls from your application via the SIP account of VoIPtalk. Then calls can be forwarded toward mobile phones or any landline phones.

Step by Step Configuration
So it is assumed that you already have a registered account at www.voiptalk.org.
To start the configuration, open your browser and navigate to the website of VoIPtalk. At the frontpage, click on Login menu item in the menu (Figure 2).

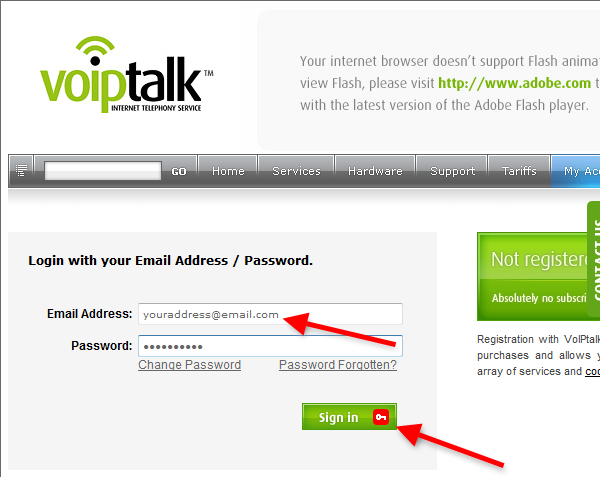
Enter your email address and password in login window to sign into your VoIPtalk account (Figure 3).
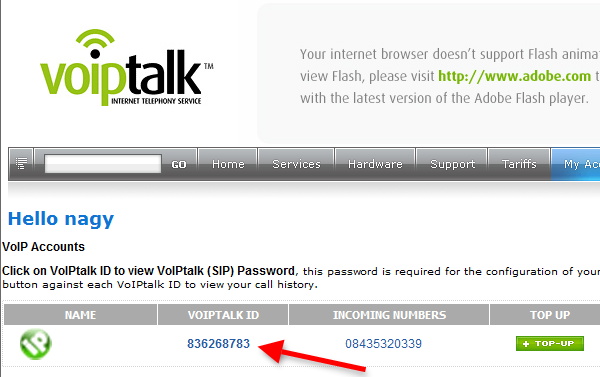
After login, click on VoIPtalk ID to view your VoIPtalk SIP password (Figure 4).
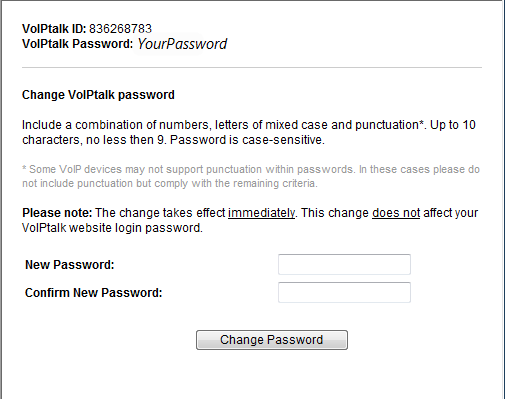
In the next window you can view your VoIPtalk ID and password (Figure 5). You will need these values during the configuration of Ozeki VoIP SIP SDK.
In SIP Account Settings tab of Ozeki VoIP SIP SDK you need to specify the following parameters:
User ID: Enter your VoIPtalk ID.
Register name: Enter your VoIPtalk ID.
Register password: Enter your VoIPtalk SIP password.
Display name: Enter your VoIPtalk ID.
Domain server: Enter voiptalk.org.
Outbound proxy: Enter nat.voiptalk.org:5065.
Finally, click on Register (Figure 6).

After I have customized SIP account settings and the application is registered to VoIPtalk, I make a test call. In Phone Lines section the active phone lines can be seen. So I dial the phone number to be called and click on Pick Up (Figure 7).
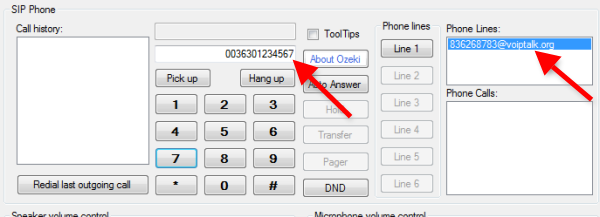
Figure 7 demonstrates that after initiating a call there is a successful incoming call (Figure 8).
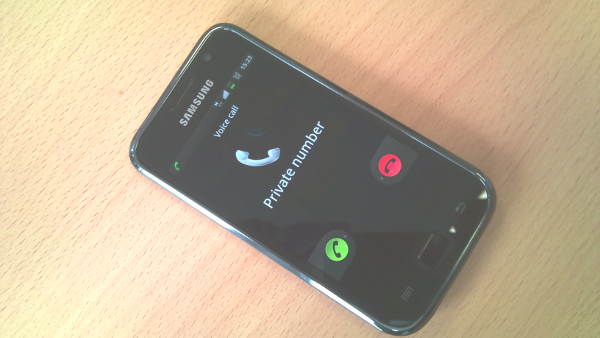
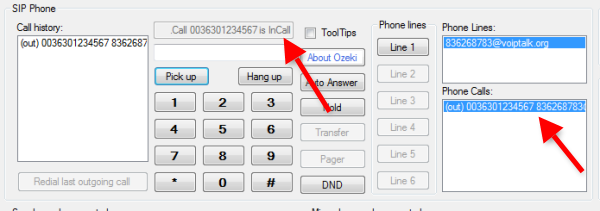
As a result, the state of the call will be changed to InCall. In Phone Calls section you can see the active phone calls (Figure 9).
As you can see with only a few simple and quick steps you can setup VoIP functionality to your application by using Ozeki VoIP SIP SDK! For improving sound quality you can choose from various codecs. Click here for checking the supported codecs. For more features please check theData sheet.
Download VoIP SIP SDK
The first thing to do if you wish to work with Ozeki VoIP SIP SDK, is to download and install it on your Windows computer. Once installed, you can use Visual Studio to add Voice and Video call capabilities to your project.
Link: Download Voip SIP SDK for Windows
For more information, please do not hesitate to contact us at info@voip-sip-sdk.com
