How to setup Ozeki VoIP SIP SDK with Gafachi
Follow this step by step configuration guide to setup Ozeki VoIP SIP SDK to make VoIP calls from your application. It is simple and quick to get started.
In order to setup your system, first you need to download and install Ozeki VoIP SIP SDK. You also need to create a Gafachi account if don't have one. After these basic steps please follow the configuration steps below.
Download VoIP SIP SDK
The first thing to do if you wish to work with Ozeki VoIP SIP SDK, is to download and install it on your Windows computer. Once installed, you can use Visual Studio to add Voice and Video call capabilities to your project.
Link: Download Voip SIP SDK for Windows
Figure 1 demonstrates the simple operation of Ozeki VoIP SIP SDK with Gafachi. After you configured the connection your system is ready to start VoIP calls from Ozeki VoIP SIP SDK via Gafachi to any cellphone or landline phone.

- Register a Gafachi account and add credit to your account.
- Ozeki VoIP SIP SDK will register to your Gafachi account.
- Start calling your phone numbers.
- Ozeki VoIP SIP SDK will call your contacts via the registered Gafachi account.
Configuration guide
Before you begin it is assumed that you already have a Gafachi account and you have credit on your account. You can use this account to make phone calls via Gafachi.
Step 1.) Configure Gafachi
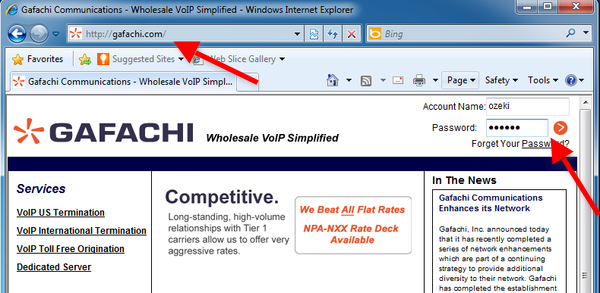
First, open your web browser and navigate to the website of Gafachi.
Type http://gafachi.com/
Once the website is loaded in your browser, you can login with your Gafachi
account (Figure 2).
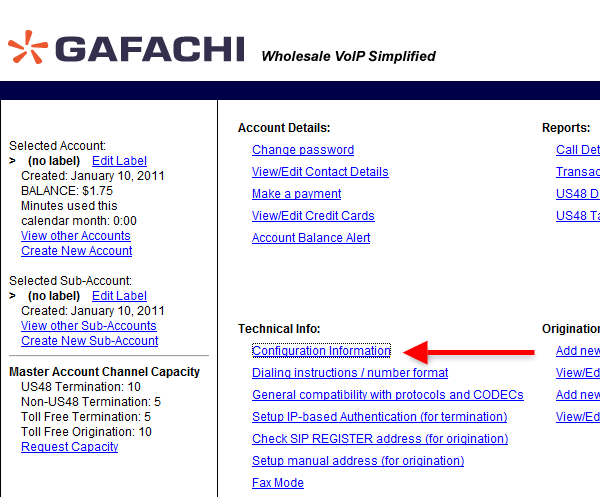
Click on Configuration information under Technical info to view your SIP settings (Figure 3).
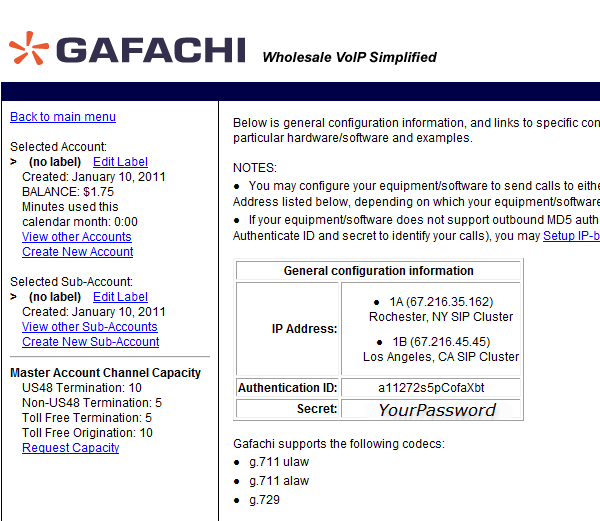
Now you see your SIP information in your Gafachi account. You can use this information to connect Ozeki VoIP SIP SDK to your Gafachi account (Figure 4).
The next step is to configure your Ozeki VoIP SIP SDK to connect to your Gafachi account.
Step 2.) Configure Ozeki VoIP SIP SDK
Before you begin to configure Ozeki VoIP SIP SDK, it is assumed that you have already downloaded Ozeki VoIP SIP SDK from the download page and installed it into your computer.
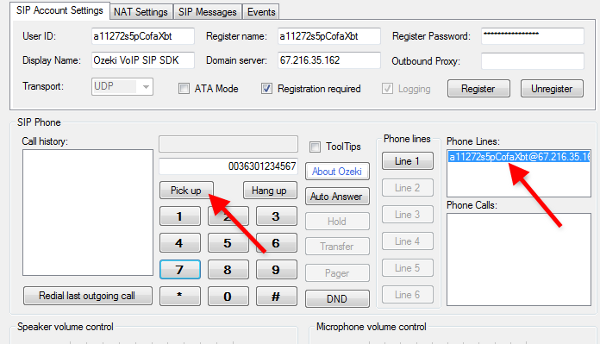
With the default installation, the Demo Application will be installed into your computer. Start the Demo Application and provide the SIP information - you can see SIP information in your Gafachi account - into the SIP Account Settings tab and click on Register (Figure 5).

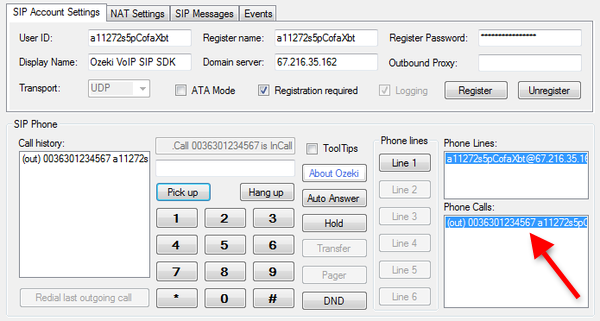
You can see the successfully registered line at the Phone Lines section. Dial a phone number, e.g.0036301234567, and click on Pick up (Figure 6).
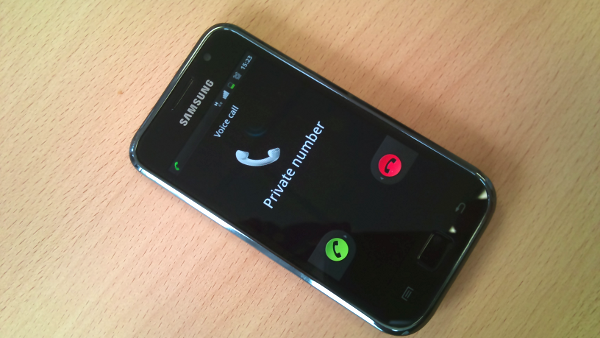
At the destination phone you can see an incoming call from Ozeki VoIP SIP SDK. The call is established via your Gafachi account (Figure 7).
If you pick up the destination phone, the call state will change to InCall. The active phone call will be visible at the Phone Calls section (Figure 8).
Conclusion
Now the configuration is done, and you have a working system which is connected to your Gafachi account. You can build your own VoIP application by using your Gafachi account.
If you have any questions, do not hesitate to contact us at: info@voip-sip-sdk.com
