
Your First VoIP project
This article is a step by step guide about how you can create your first Visual Studio project using Ozeki VoIP SIP SDK. After reading through this page you will be fully familiar with all the essential terms concerning Visual Studio projects and what you will need for creating your own solution using Ozeki VoIP SIP SDK.
Introduction
Before starting to work on your first project you should think about the product you would finally like to have. What is on your mind? What is your plan? Also think about how Ozeki VoIP SIP SDK fits into that picture in your imagination. How would you like to use it for your project? After getting clear on these issues you can start to search for the possibilities to realize your ideas. You will find lots of useful descriptions and guides on every subject.
Ozeki VoIP SIP SDK is a software development kit that can be used to create a softphone or SIP VoIP call services like IVR, autodialer, webphone or a voice conference room. After download you can customize the SDK to provide seamless and efficient VoIP services. Without spending time with implementing SIP basics you can instantly start your project.
Steps to follow
Video tutorial
The video below walks you through the entire process of setting up a new VoIP project from scratch: creating a Windows Forms application in Visual Studio, targeting .NET 8.0, and then adding the Ozeki VoIP SIP SDK to the project through NuGet.
Create a new project in Visual Studio
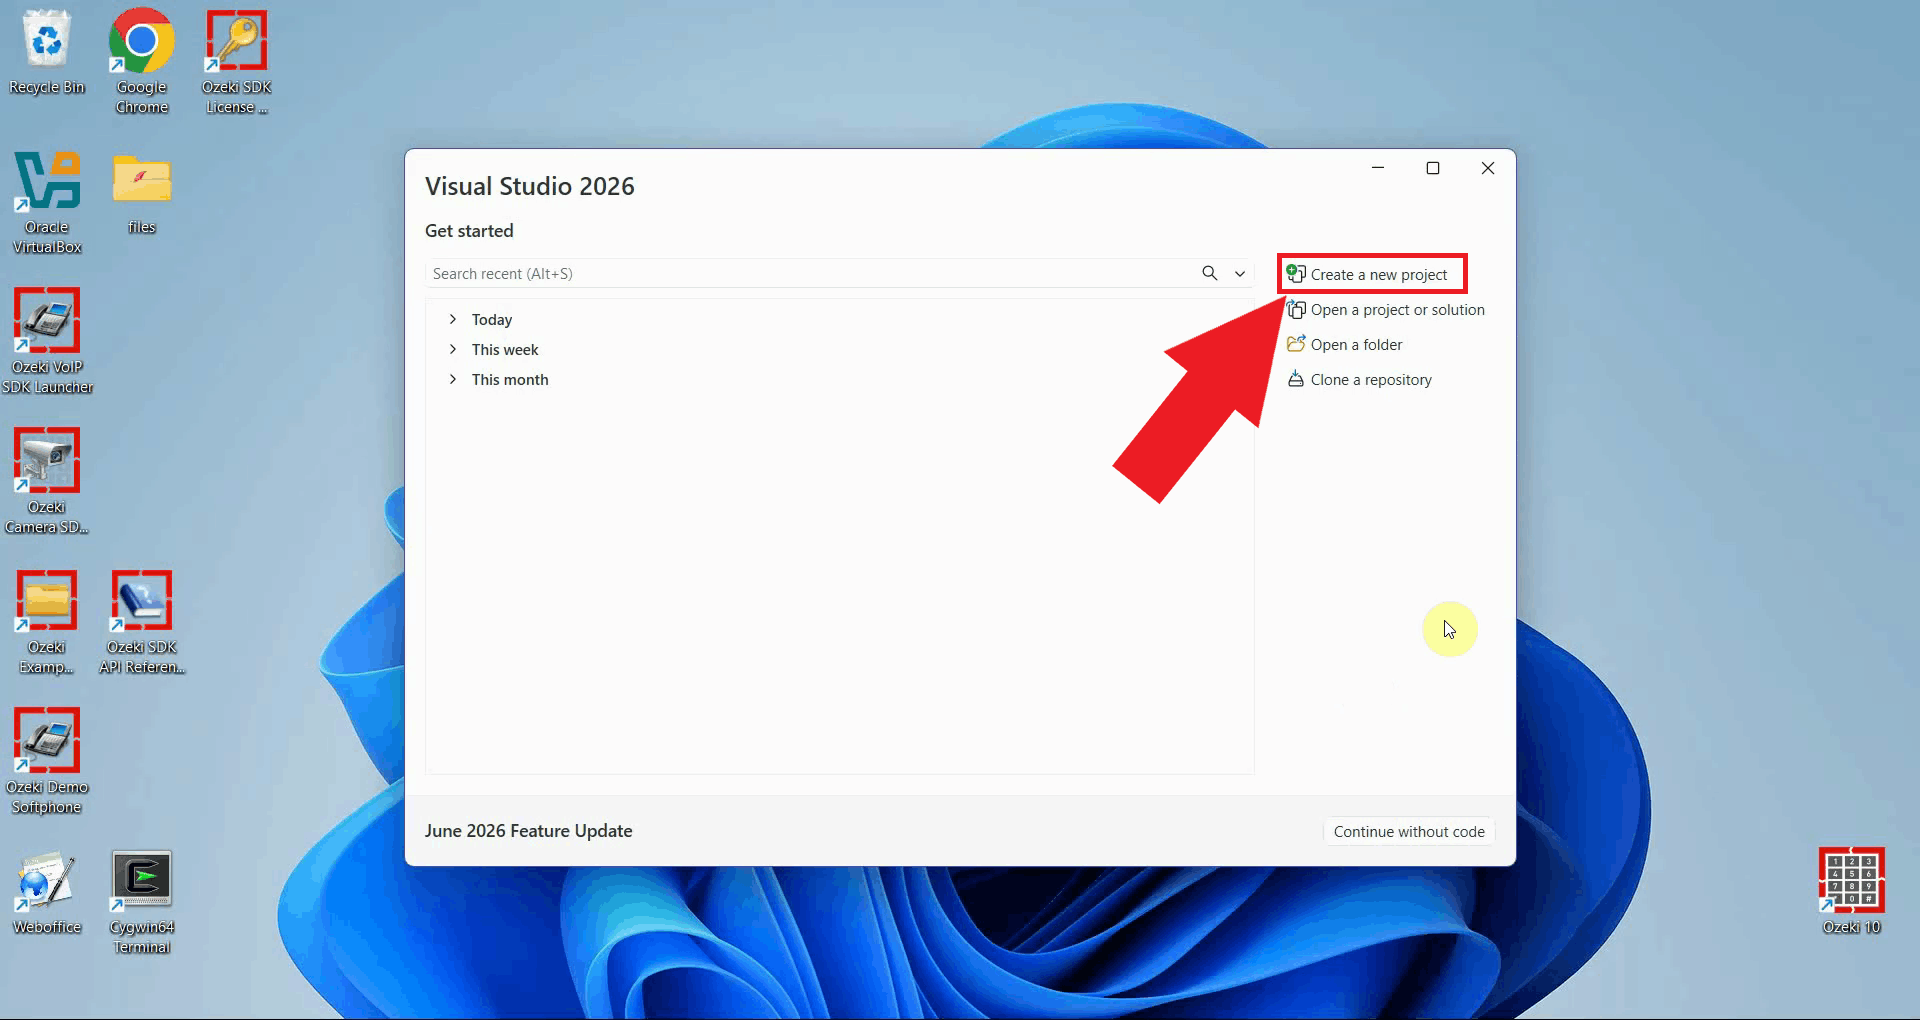
Open Visual Studio and select Create a new project from the start window (Figure 1).
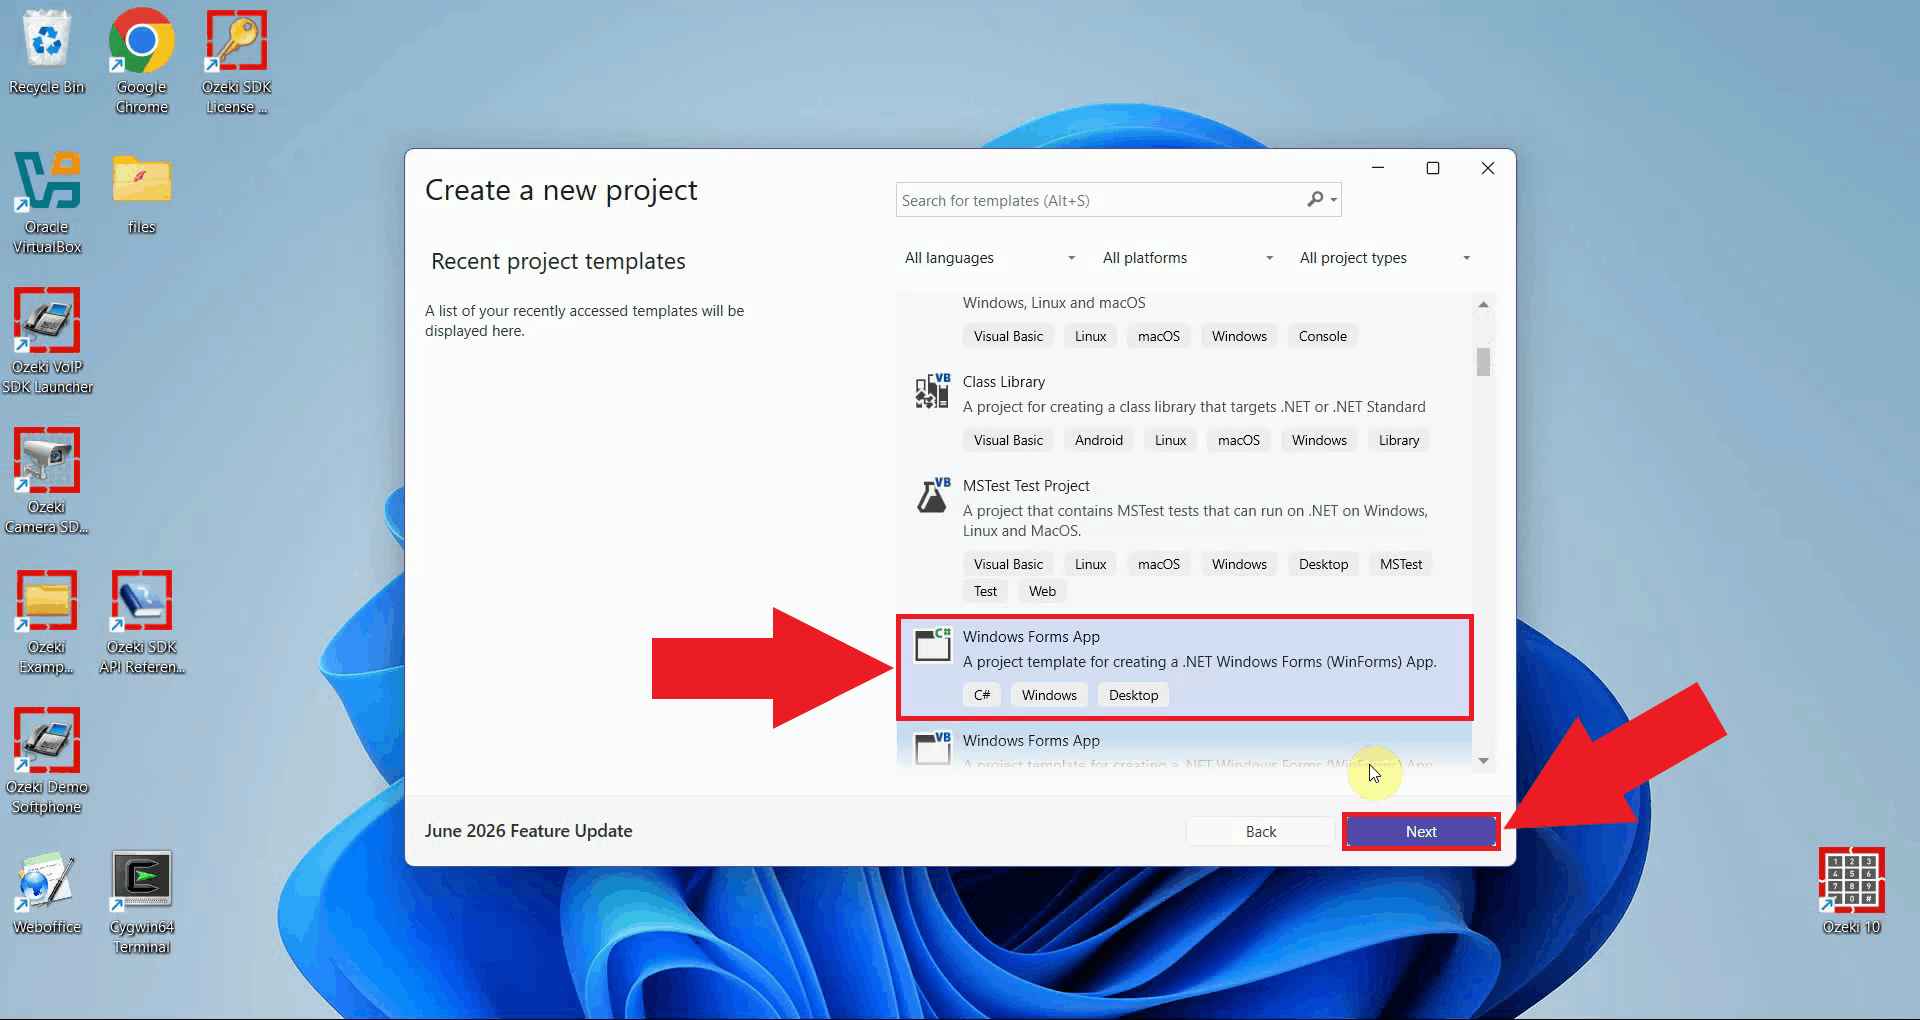
Select the Windows Forms App template (C#) and press Next (Figure 2).
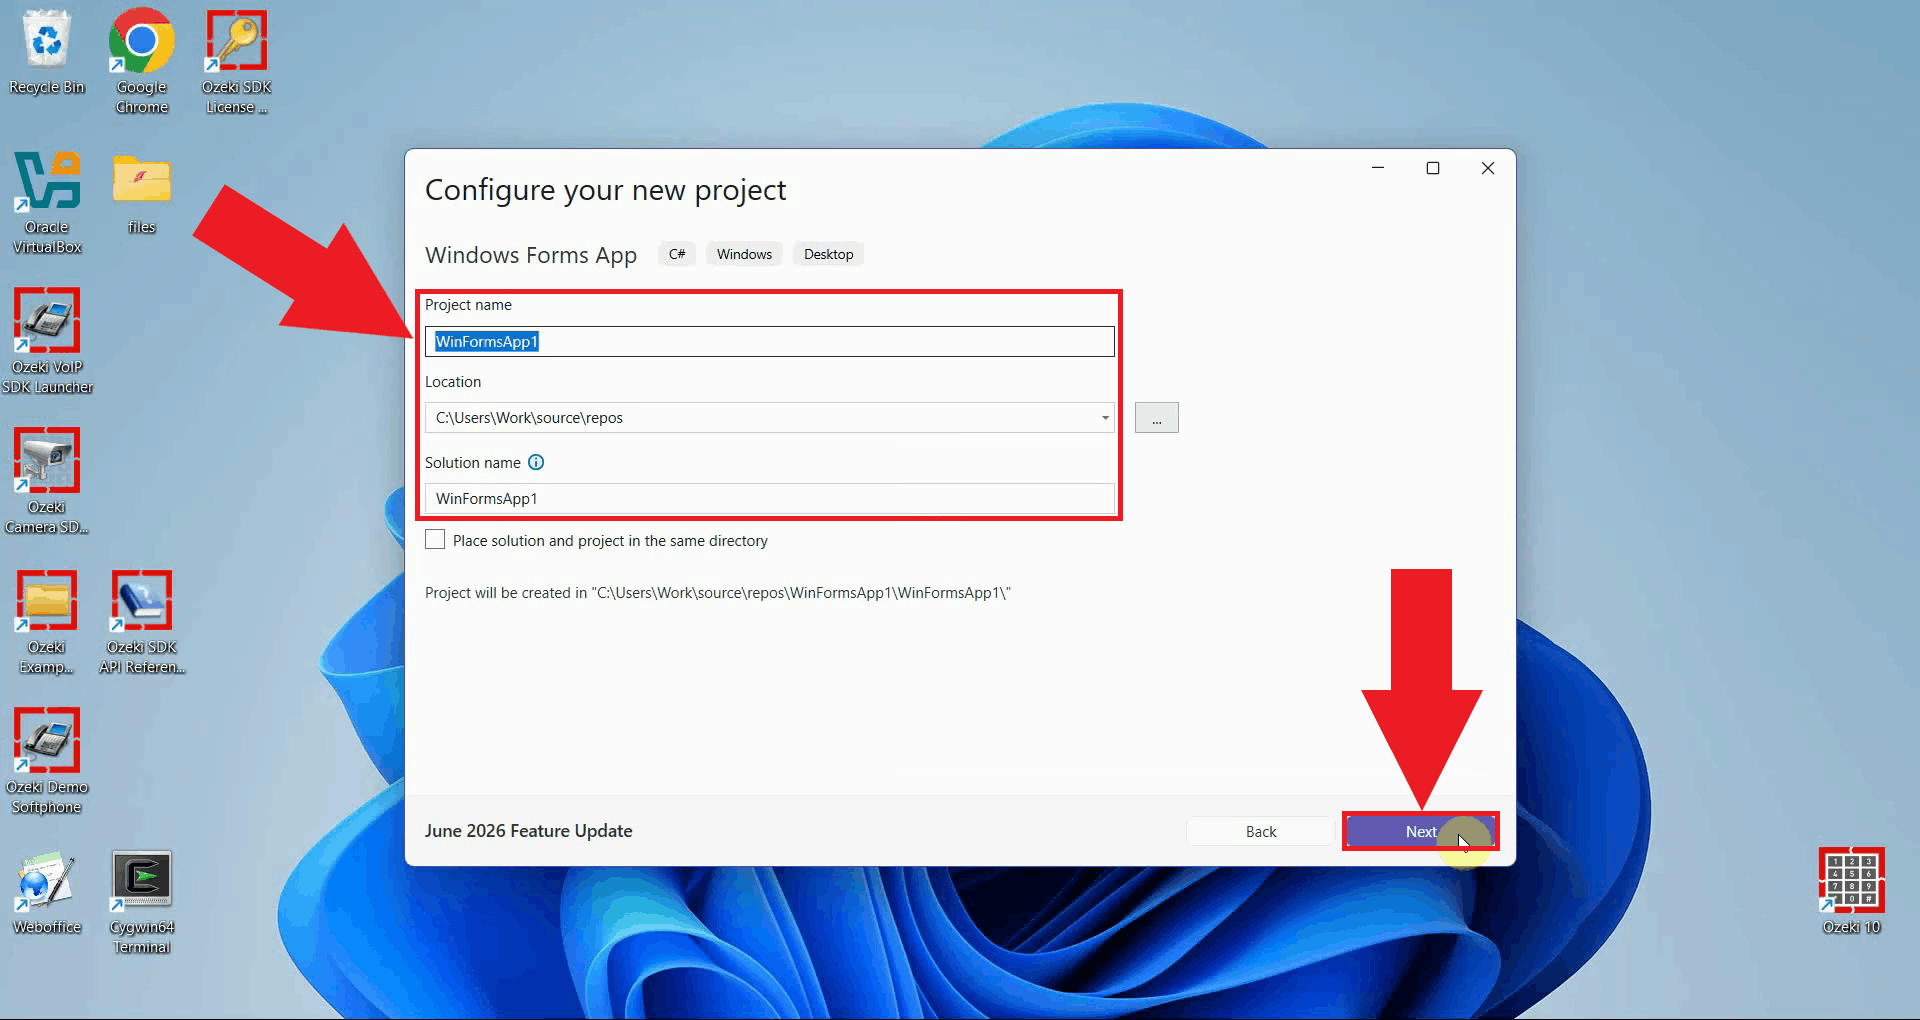
Give your project a name, choose the location where it should be created, and press Next (Figure 3).
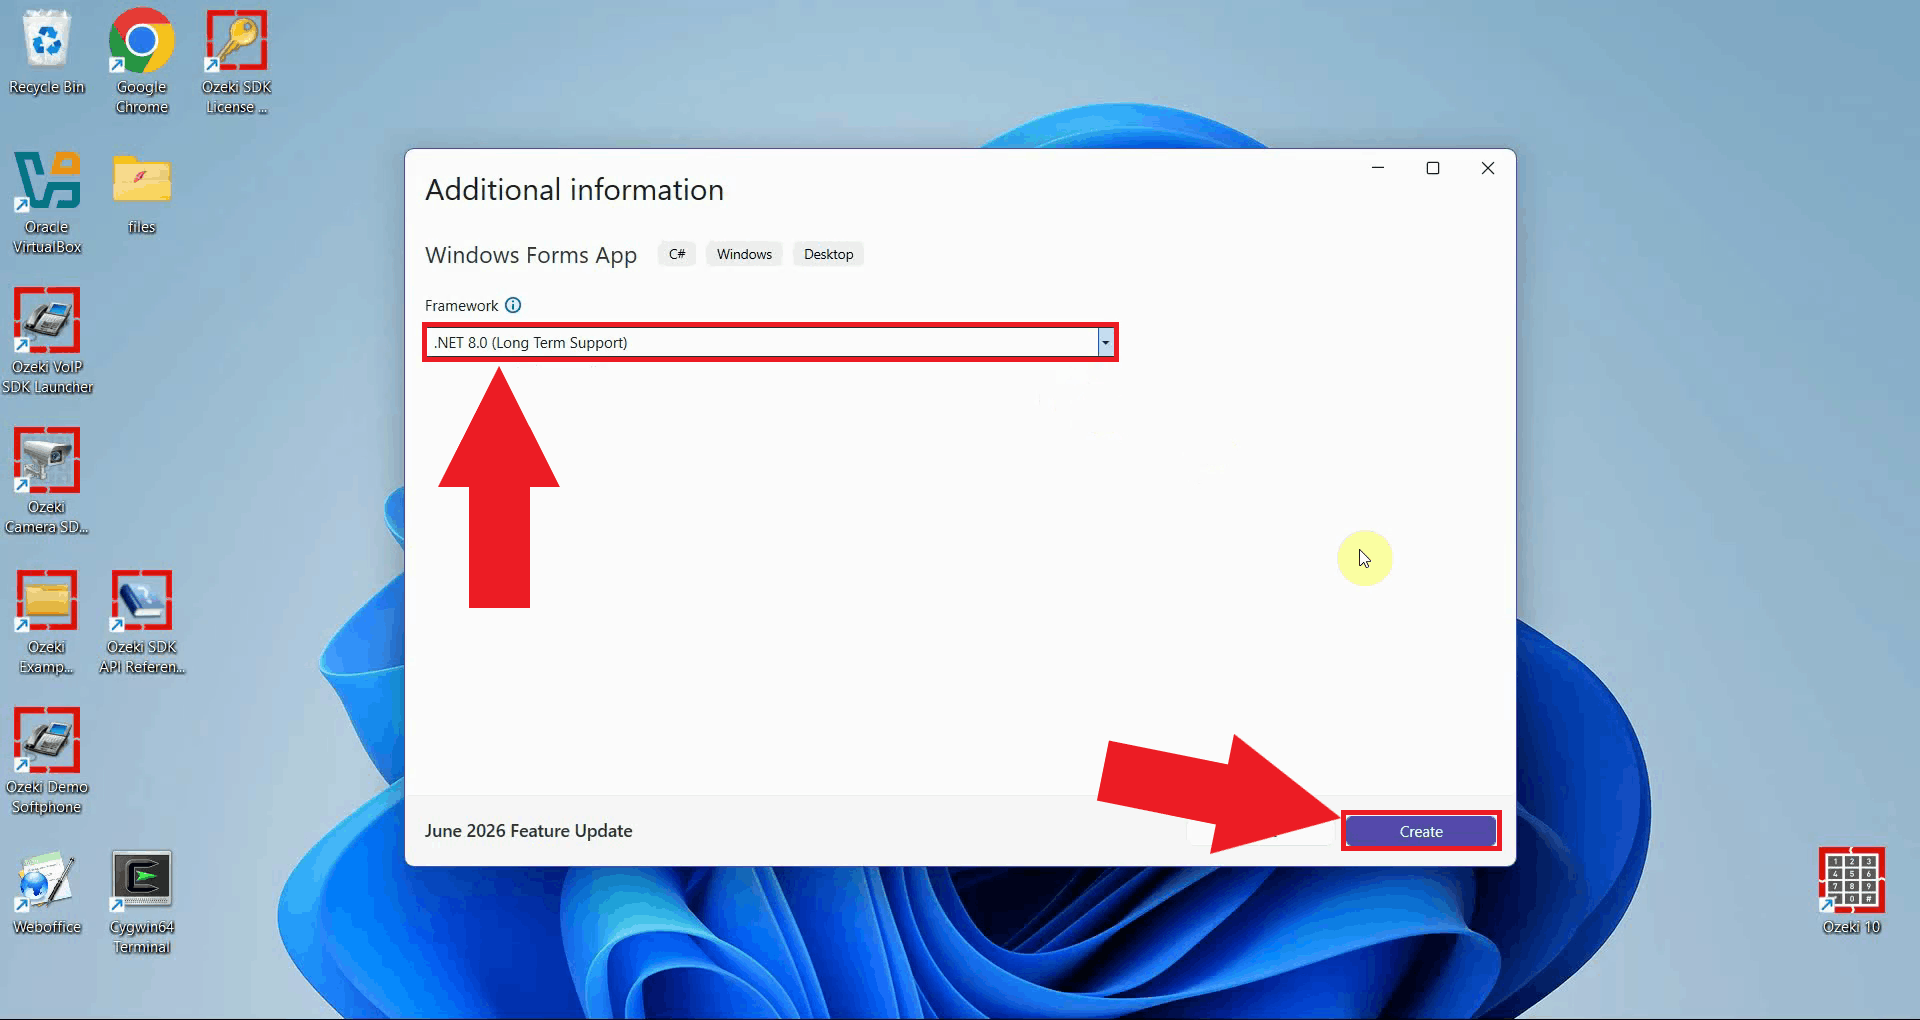
Set the framework to .NET 8.0 and press Create (Figure 4). Ozeki VoIP SIP SDK targets .NET 8.0, so this is the framework you should use for a new project.
Add Ozeki VoIP SIP SDK to your project via NuGet
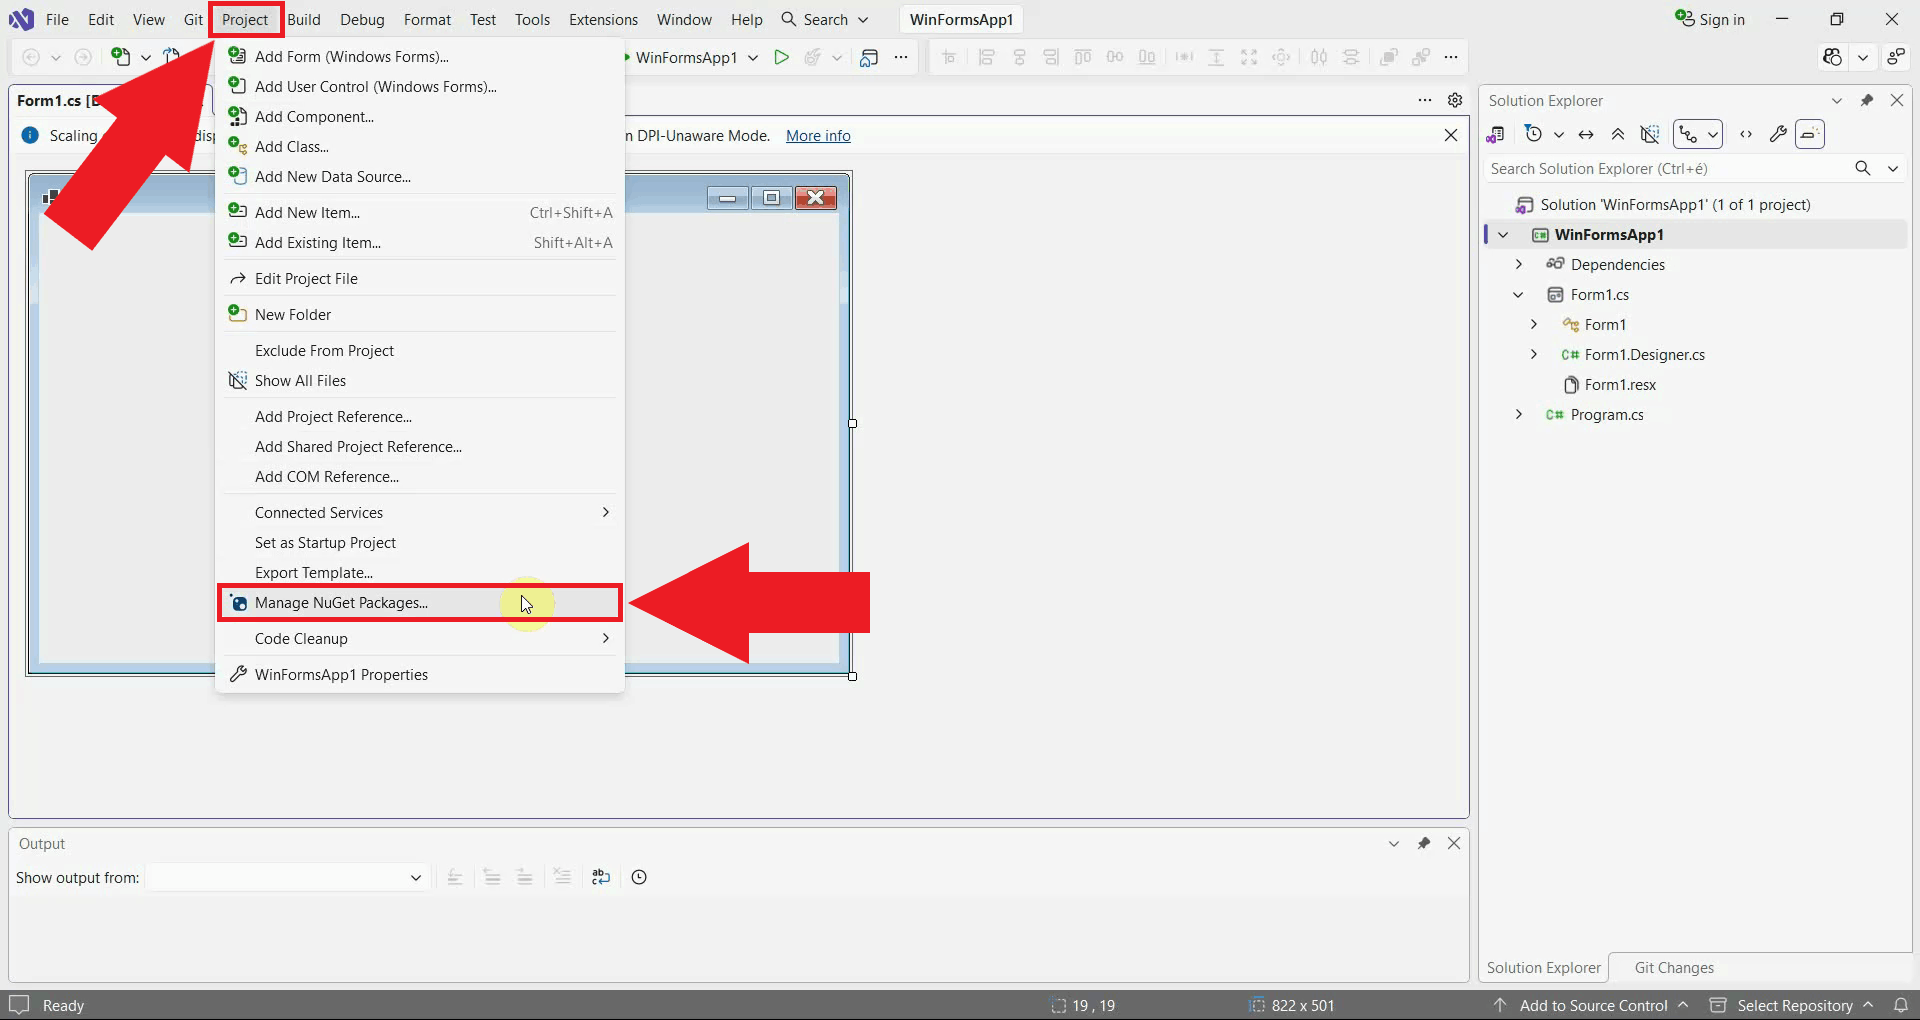
With the project created, the next step is to add the Ozeki VoIP SIP SDK. Right click on the project in the Solution Explorer, or use the Project menu, and select Manage NuGet Packages... (Figure 5).
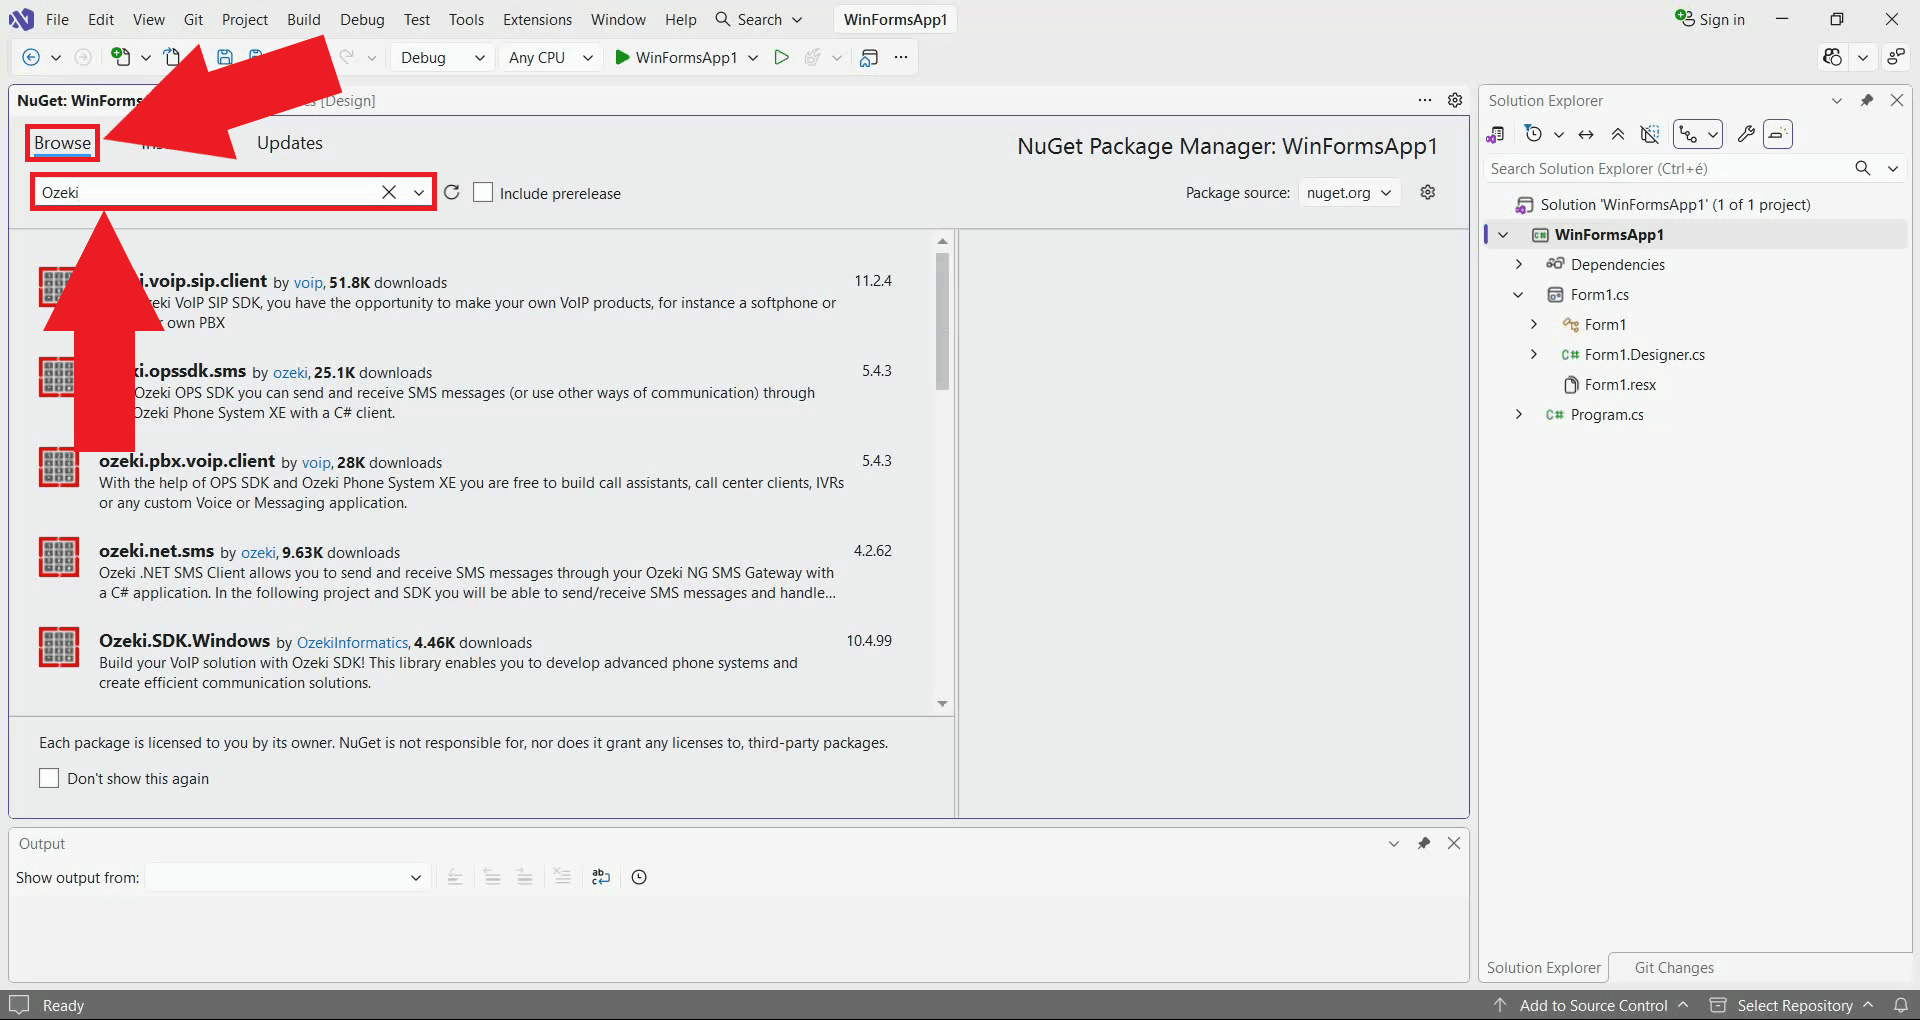
On the Browse tab, type Ozeki into the search box. Several Ozeki
packages will appear; the one you need for the VoIP SIP SDK is Ozeki.SDK.Windows
(Figure 6).
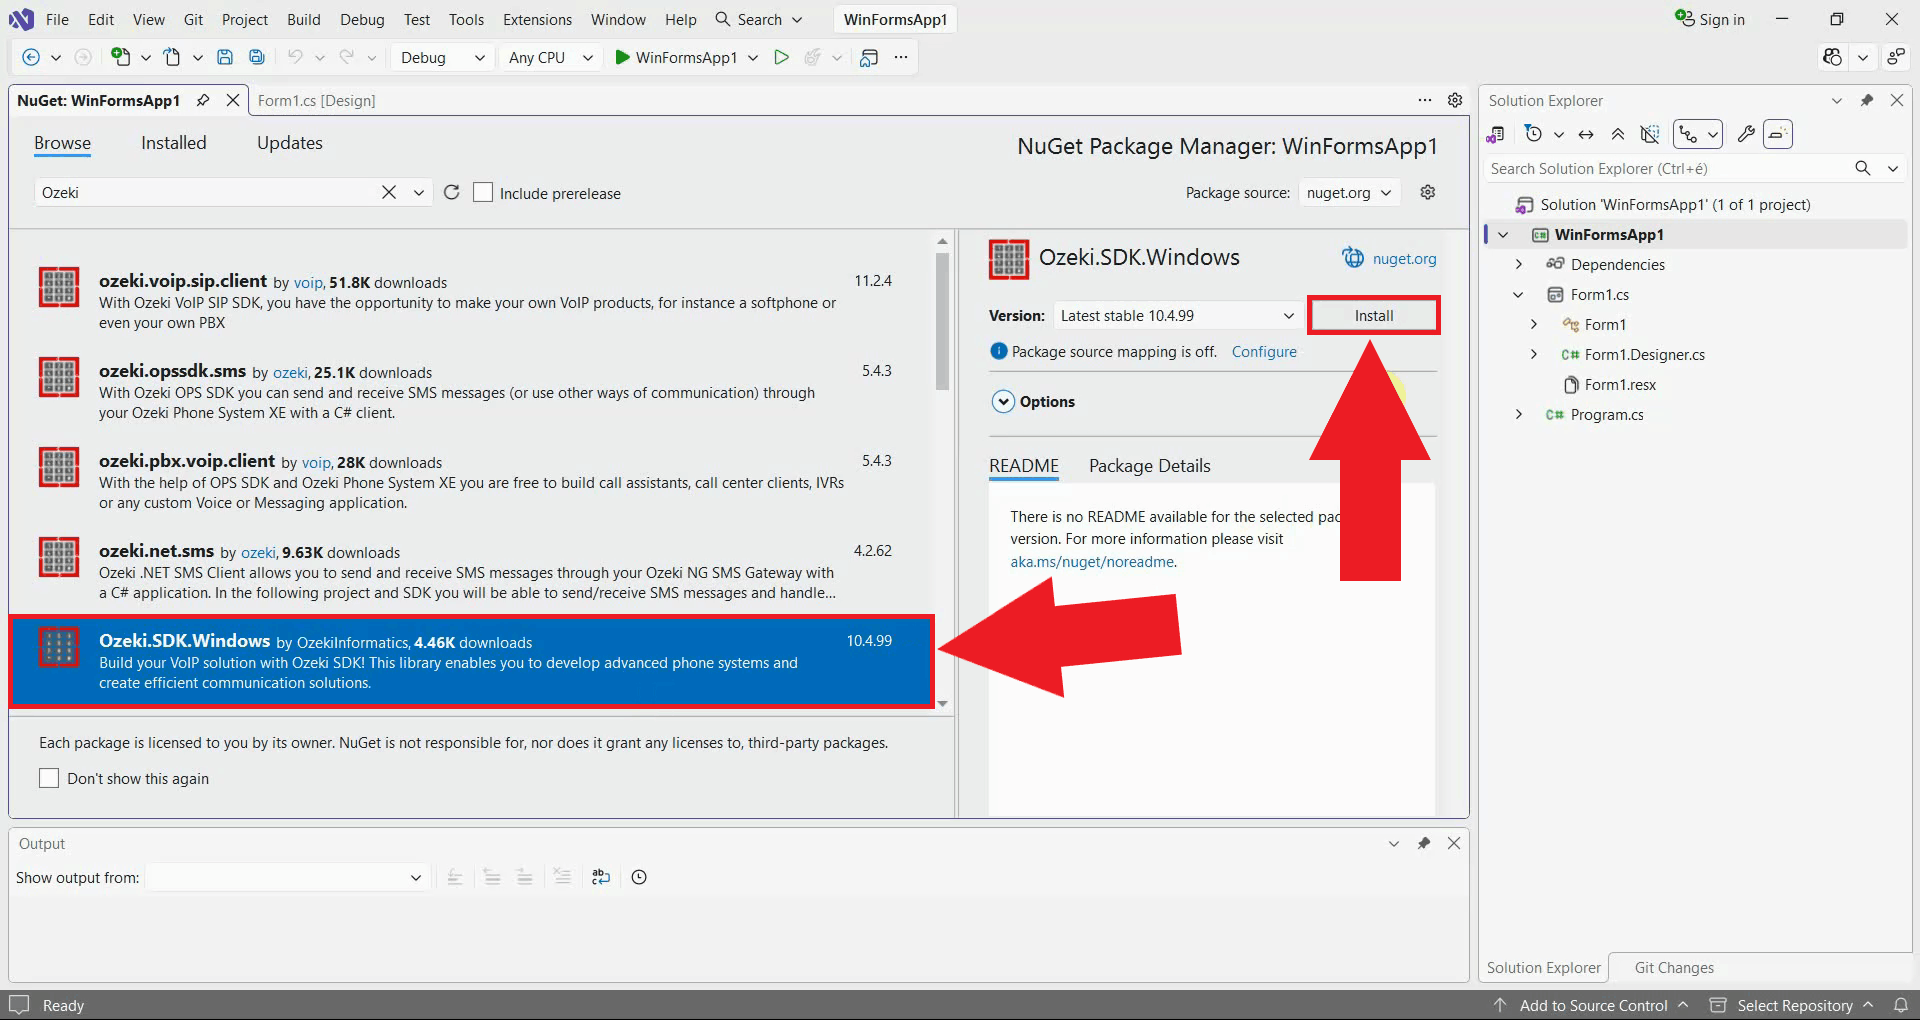
Select Ozeki.SDK.Windows from the list, choose the latest stable version, and press Install (Figure 7). Visual Studio will download the package and add it to your project.
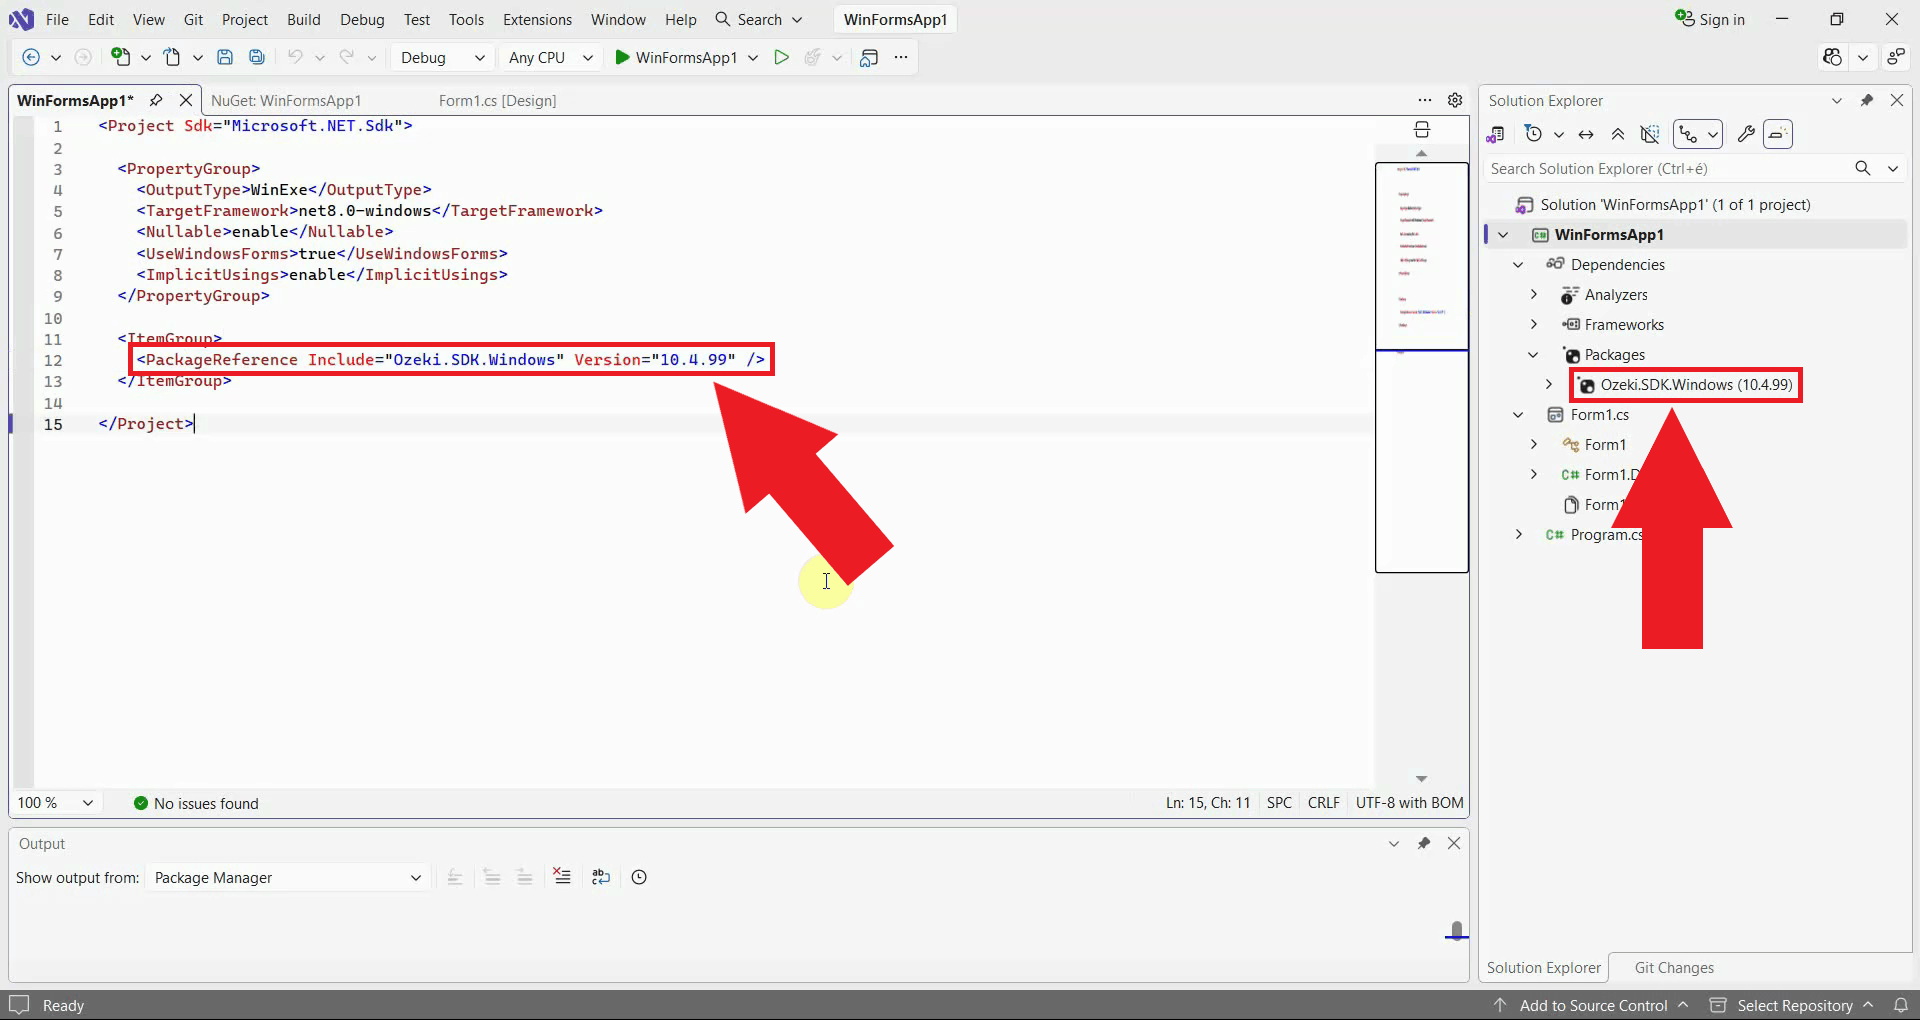
Once the installation finishes, the package appears under Dependencies > Packages
in the Solution Explorer, and a PackageReference entry is added to your
project file automatically (Figure 8).
With the package installed, you can start programming and use the SDK tools in your project.
This article introduced you to the basic knowledge about how to create your first Visual Studio project and showed how Ozeki VoIP SIP SDK can help you to fulfill your wishes about this topic.
As you are now familiar with all the terms concerning this topic, now it is time to take a step further and explore what other extraordinary solutions Ozeki VoIP SIP SDK can provide to you.
If you have any questions or need assistance, please contact us at info@voip-sip-sdk.com
You can select a suitable Ozeki VoIP SIP SDK license for your project on Pricing and licensing information page.