How to setup Ozeki VoIP SIP SDK with Elastix
Elastix is an open-source PBX application based on Asterisk and it becomes more popular every day because of its flexibility. Now you can build your own application with VoIP support using Elastix PBX. In this guide you can read about how to setup Ozeki VoIP SIP SDK with Elastix.
The term, Voice over Internet Protocol (VoIP), refers to a collection of transmission technologies, which make voice communications possible over the Internet. It is also known as Internet telephony and helps the conversion of voice into a digital signal that can be sent over the Internet. These signals are then compressed and translated into IP (Internet Protocol) packets for transmission.
They are converted to a regular telephone signal, if the user is calling on a normal phone. VoIP gives the provision of making calls directly from a desktop computer and uses a special VoIP phone for the purpose. The services and benefits offered by Internet telephony feature the ones which are not available with a traditional phone.
With Ozeki VoIP SIP SDK you can enjoy all the benefits of VoIP technology. You can easily setup Ozeki VoIP SIP SDK and use it in your own application.
On this page you can learn how to setup Elastix PBX and Ozeki VoIP SIP SDK for your application.
Overview
If you follow the steps of this guide, you will have a system which is
connected to Elastix PBX and works as follows:
First, you need to install your Elastix server. After the
installation, you need to create an extension that can be used by Ozeki VoIP SIP SDK
to connect to it. After the registration you can start to place your phone calls
via Elastix PBX. Figure 1 demonstrates the process:

- Install Elastix in your network environment.
- Login to Elastix and create an extension for Ozeki VoIP SIP SDK.
- Ozeki VoIP SIP SDK will register to Elastix using this extension.
- You can start calling your contacts.
- Ozeki VoIP SIP SDK will call your contacts via Elastix PBX.
Configuration
Before you begin the configuration of Elastix, it is assumed that you have already installed Elastix PBX on your server.
Step 1.) Configure Elastix
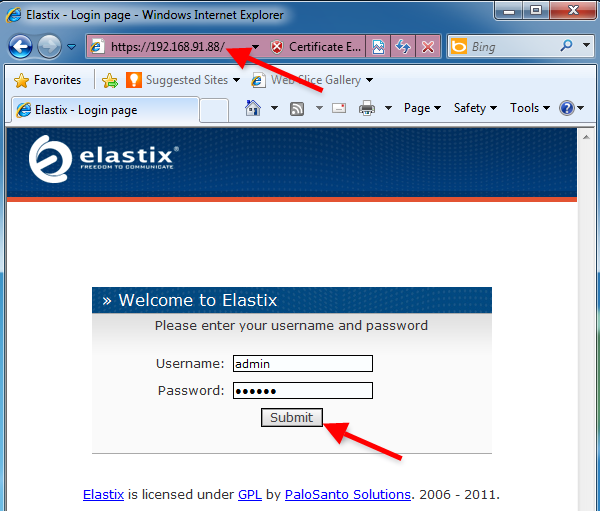
First, open your browser and navigate to the IP address of the computer where
Elastix PBX is installed. I installed Elastix on a computer which IP address is
192.168.91.88. Open your browser and navigate to its IP address. In this
guide it will be
https://192.168.91.88/
Enter the Administrator username and password, and click on Submit
(Figure 2).
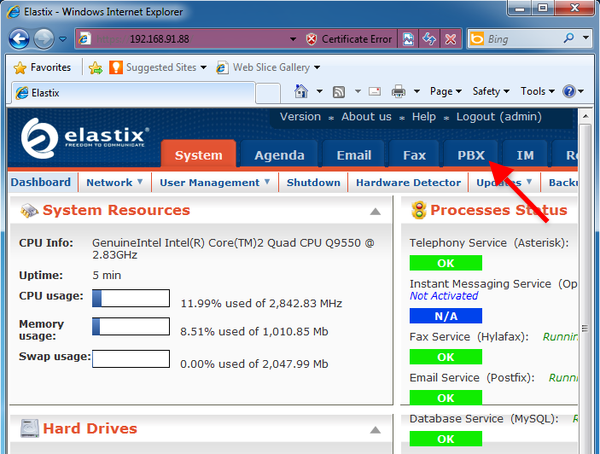
Once you logged in, click on PBX tab at the top of the page (Figure 3).
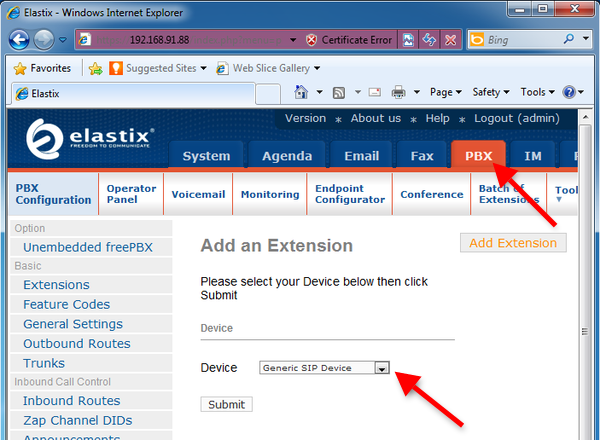
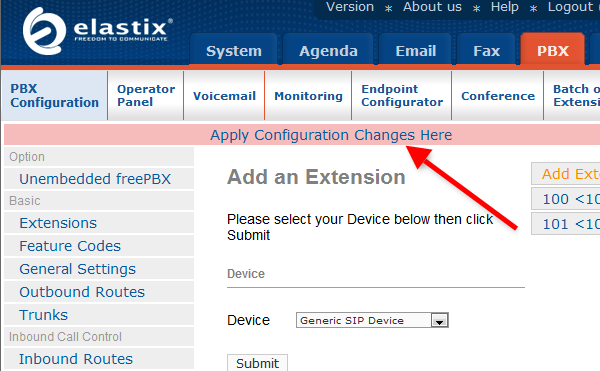
This will take you to the Extension page. On this page you can add extensions to your Elastix PBX. Select Generic SIP Device from the Device drop-down menu (Figure 4) and click on Submit.
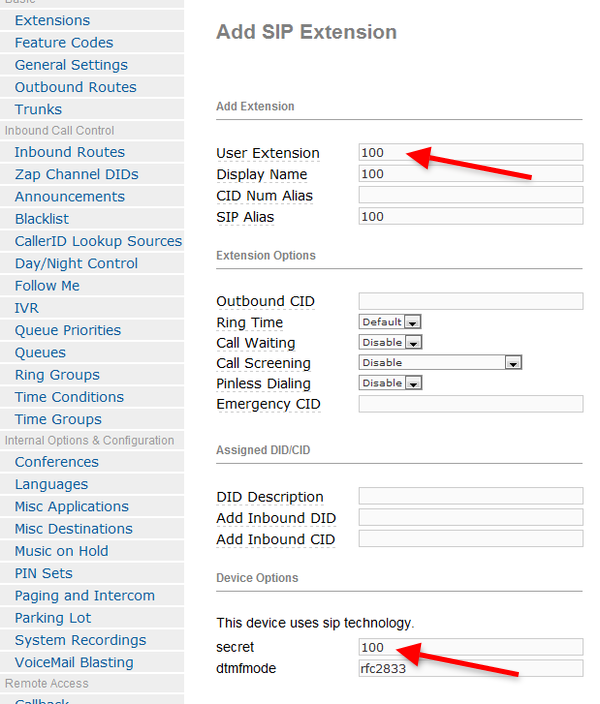
Provide the details of the extension to the User Extension field and its password to the Secret field (Figure 5). Once it is done, click on Submit.
I created two extensions. Extension 100 and 101. Extension 101 will be used by a desktop phone; and extension 100 will be used by Ozeki VoIP SIP SDK. To apply your configuration, click on Apply Configuration Changes Here at the top of the page (Figure 6).
By applying the changes, the configuration of Elastix is done and now you can configure Ozeki VoIP SIP SDK.
Configure Ozeki VoIP SIP SDK
Before you configure Ozeki VoIP SIP SDK it is assumed that you have already downloaded Ozeki VoIP SIP SDK from the download page and installed it into your computer.
By installing Ozeki VoIP SIP SDK, the Demo Application will also be installed into your computer. Open the Demo Application and provide the extension details into the SIP Account Settings tab. Once it is done, click on Register (Figure 7).

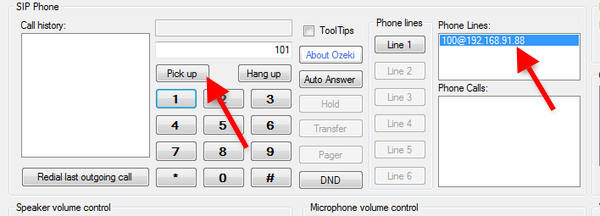
You can see the registered phone line in the Phone Lines section. Dial an extension (e.g. 101) and click on Pick up (Figure 8).
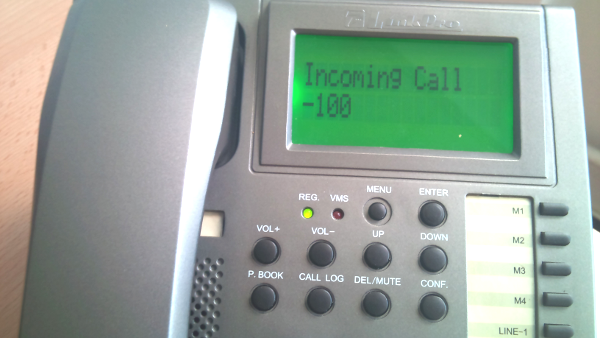
At the destination phone you can see an incoming call from Ozeki VoIP SIP SDK (Figure 9) via Elastix PBX.
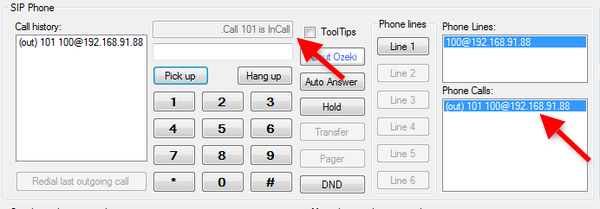
After the phone is picked up, the call state is changed to InCall. You can see the active phone call at the Phone Calls section (Figure 10).
Conclusion
If you followed the steps of this guide you have a working system which is connected to Elastix PBX.
If you have any questions, do not hesitate to contact us at info@voip-sip-sdk.com
More information
- How to setup Ozeki VoIP SIP SDK with Ozeki Phone System XE
- Cisco Unified Communications Manager
- How to setup Ozeki VoIP SIP SDK with Cisco Call Manager Express
- Asterisk pbx setup
- 3CX pbx setup
- AsteriskNow pbx setup
- Kamailio pbx setup
- FreeSwitch pbx setup
- OpenSIPS pbx setup
- Trixbox pbx setup
- OpenSER pbx setup
- PBXnSIP pbx setup
- How to setup Ozeki VoIP SIP SDK with PBXpress
- SipX ECS pbx setup
- Elastix pbx setup
- FreePBX pbx setup
- SwyxWare pbx setup
- Aastra MX-One pbx setup
