How to setup Ozeki VoIP SIP SDK with OpenSIPS
This guide demonstrates how you can connect Ozeki VoIP SIP SDK to your OpenSIPS PBX. You can also read about how to test Ozeki VoIP SIP SDK in order to build your own applications.
VoIP technology is one of the fastest growing technology today. With VoIP technology you can use your existing network architecture to place phone calls over the internet. Ozeki VoIP SIP SDK uses VoIP technology to enable voice messaging in your application.
In order to build your own application and start calling your contacts, you can connect Ozeki VoIP SIP SDK to your OpenSIPS PBX. You can read about the configuration steps in this guide.
System architecture
If you follow the configuration steps of this guide, you will have a telephone
system that works as follows:
As a first step, you need to create an extension in OpenSIPS PBX. Ozeki VoIP SIP SDK
will connect to OpenSIPS through this extension. Once Ozeki VoIP SIP SDK
is connected, you can start calling your contacts. The destination phone could be a VoIP-based phone, a regular
phone or a mobile phone. Figure 1 demonstrates the process.

The configuration steps will be the follows:
- Ozeki VoIP SIP SDK registers to OpenSIPS PBX.
- Once you start your call, it will be forwarded to OpenSIPS PBX using the created extension.
- The destination phone will be ringing.
Configuration
Before you start to configure this solution, it is assumed that you have already installed your OpenSIPS PBX on your Linux server, and downloaded Ozeki VoIP SIP SDK from the download page.
1.) Configure OpenSIPS
As a first step, you need to configure your OpenSIPS PBX and create an extension for Ozeki VoIP SIP SDK.
I have already installed OpenSIPS PBX in a Linux distribution which IP address is
192.168.91.227. Open a browser and navigate to OpenSIPS web interface.
In this example it will be:
http://192.168.91.227/opensips-cp/web/index.php
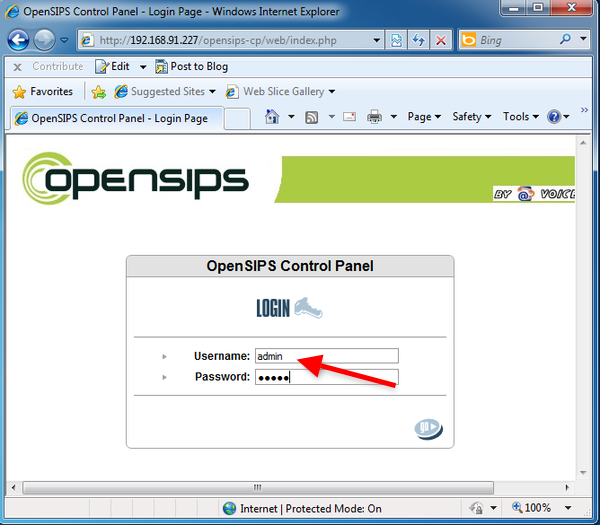
Once you are at the login page, login as administrator (Figure 2).
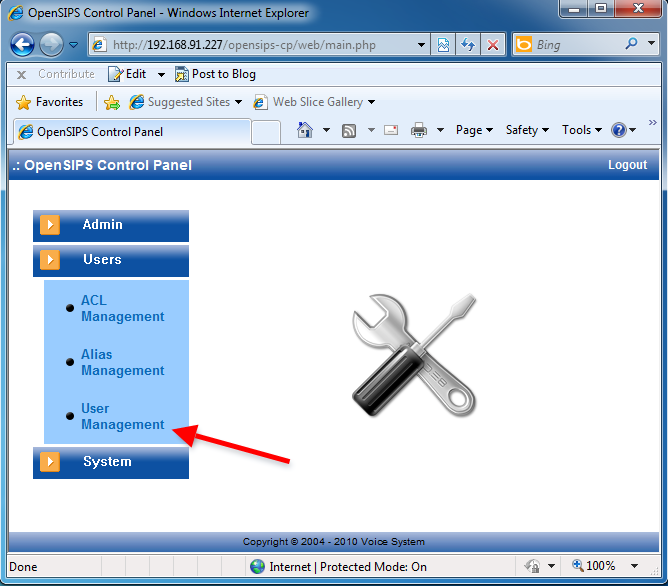
After you logged in, open the Users dropdown menu and click on User Management (Figure 3).
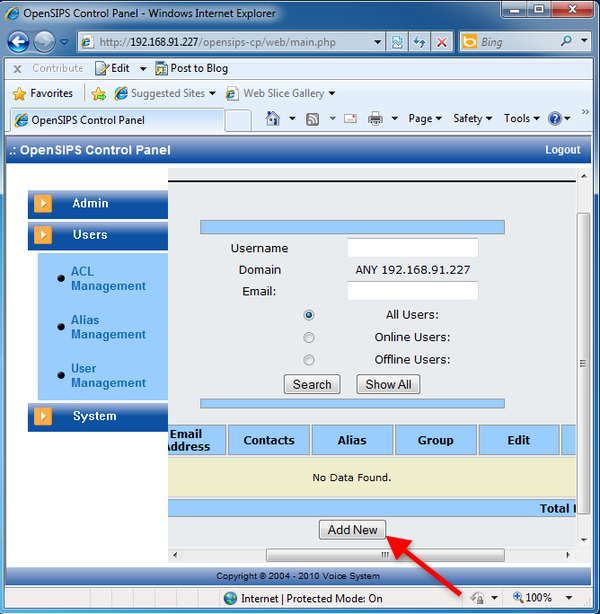
This will lead you to the Users page. Click on Add New to add a new user to your OpenSIPS PBX (Figure 4).
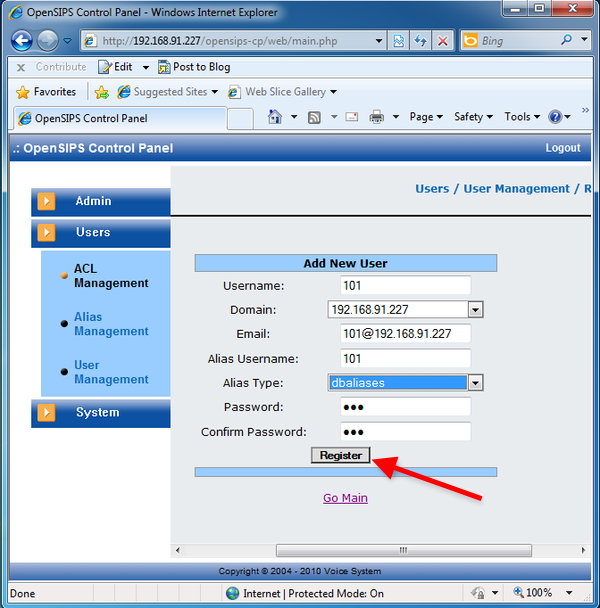
Provide the username, the e-mail address, and a password in the respective fields, and click on Register (Figure 5).
I have created two users in OpenSIPS PBX: user 100 and user 101. Ozeki VoIP SIP SDK will register as user 101, and a VoIP phone will be registered as user 100. You can see the created users in Figure 6.
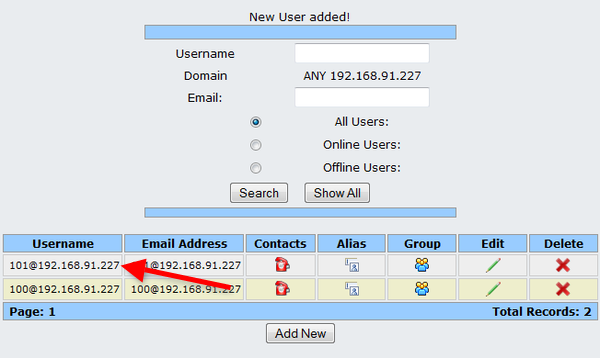
Now the configuration of OpenSIPS PBX is done and you can start to configure Ozeki VoIP SIP SDK.
2.) Configure Ozeki VoIP SIP SDK
In this demonstration, I have already downloaded Ozeki VoIP SIP SDK into my computer. Open the downloaded package and execute the installer. Accept the license agreement and click on Next (Figure 7).
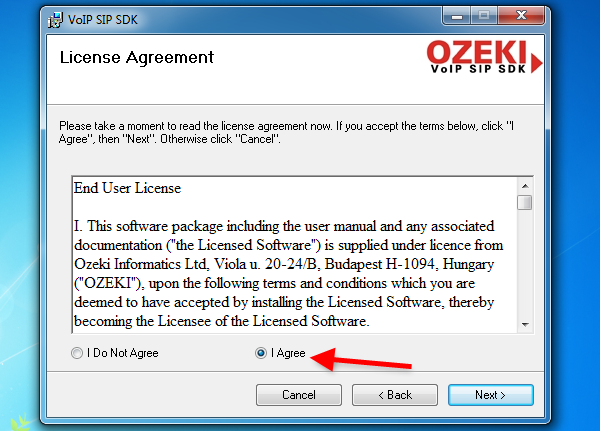
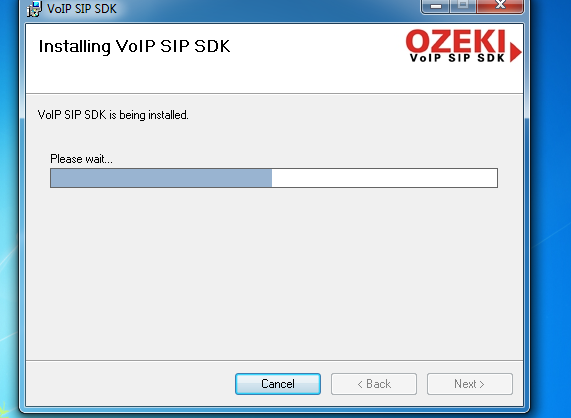
Wait until Ozeki VoIP SIP SDK is installed (Figure 8).
Once it is installed, the Ozeki VoIP SIP SDK demo Application will start automatically. Provide the extension details to the SIP Account Settings tab, enter the IP address of the OpenSIPS PBX, and click on Register (Figure 9).
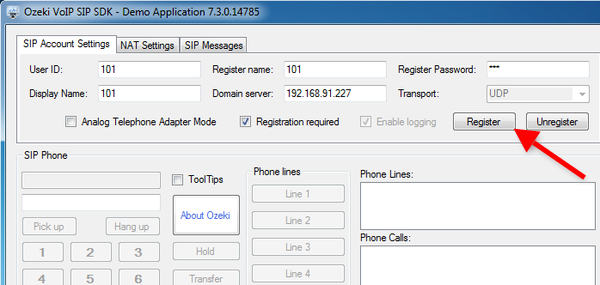
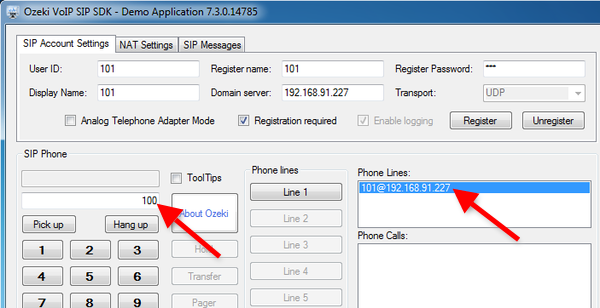
At the Phone Lines section you can see the registered phone line. To dial an extension, enter the phone number using the softphone's keyboard, and click on Pick up (Figure 10).
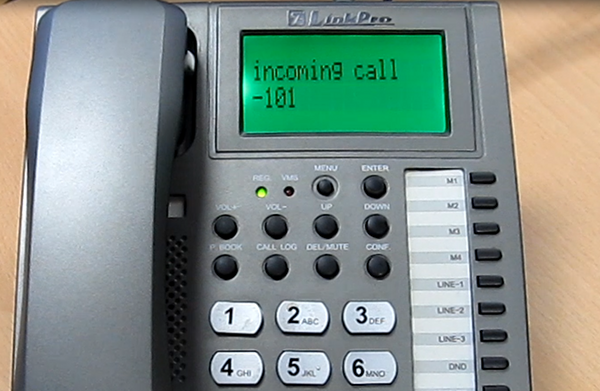
As you can see there is an incoming call at the destination phone from Ozeki VoIP SIP SDK (Figure 11).
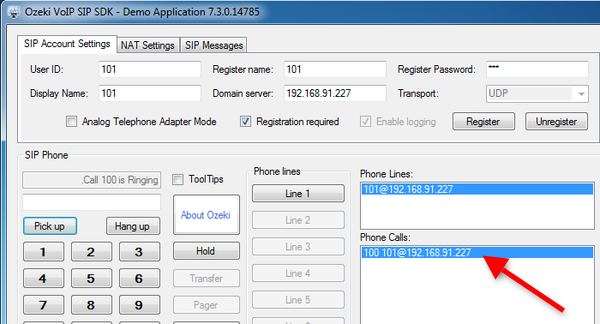
In the demo application the active phone call is visible in the Phone Calls section (Figure 12).
Conclusion
Now the configuration is complete, and the testing is successful and you can start to build your application with VoIP support. You can reach in a more efficient way using a VoIP system.
If you have any questions, do not hesitate to contact us: info@voip-sip-sdk.com
More information
- How to setup Ozeki VoIP SIP SDK with Ozeki Phone System XE
- Cisco Unified Communications Manager
- How to setup Ozeki VoIP SIP SDK with Cisco Call Manager Express
- Asterisk pbx setup
- 3CX pbx setup
- AsteriskNow pbx setup
- Kamailio pbx setup
- FreeSwitch pbx setup
- OpenSIPS pbx setup
- Trixbox pbx setup
- OpenSER pbx setup
- PBXnSIP pbx setup
- How to setup Ozeki VoIP SIP SDK with PBXpress
- SipX ECS pbx setup
- Elastix pbx setup
- FreePBX pbx setup
- SwyxWare pbx setup
- Aastra MX-One pbx setup


