Contact ID protocol introduction
Ademco Contact ID is the most popular protocol that allows alarm systems to be able to communicate with Central Stations. The following guide is meant to be a brief introduction to the Contact ID protocol. After reading this article you can also find out how to use Contact ID with Ozeki VoIP SIP SDK.
Contact ID protocol - How it works
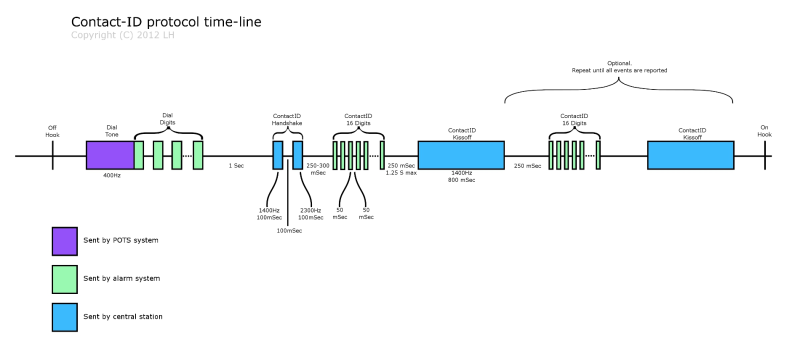
- When an alarm event is triggered, the alarm system picks up the phone and waits for a dial tone.
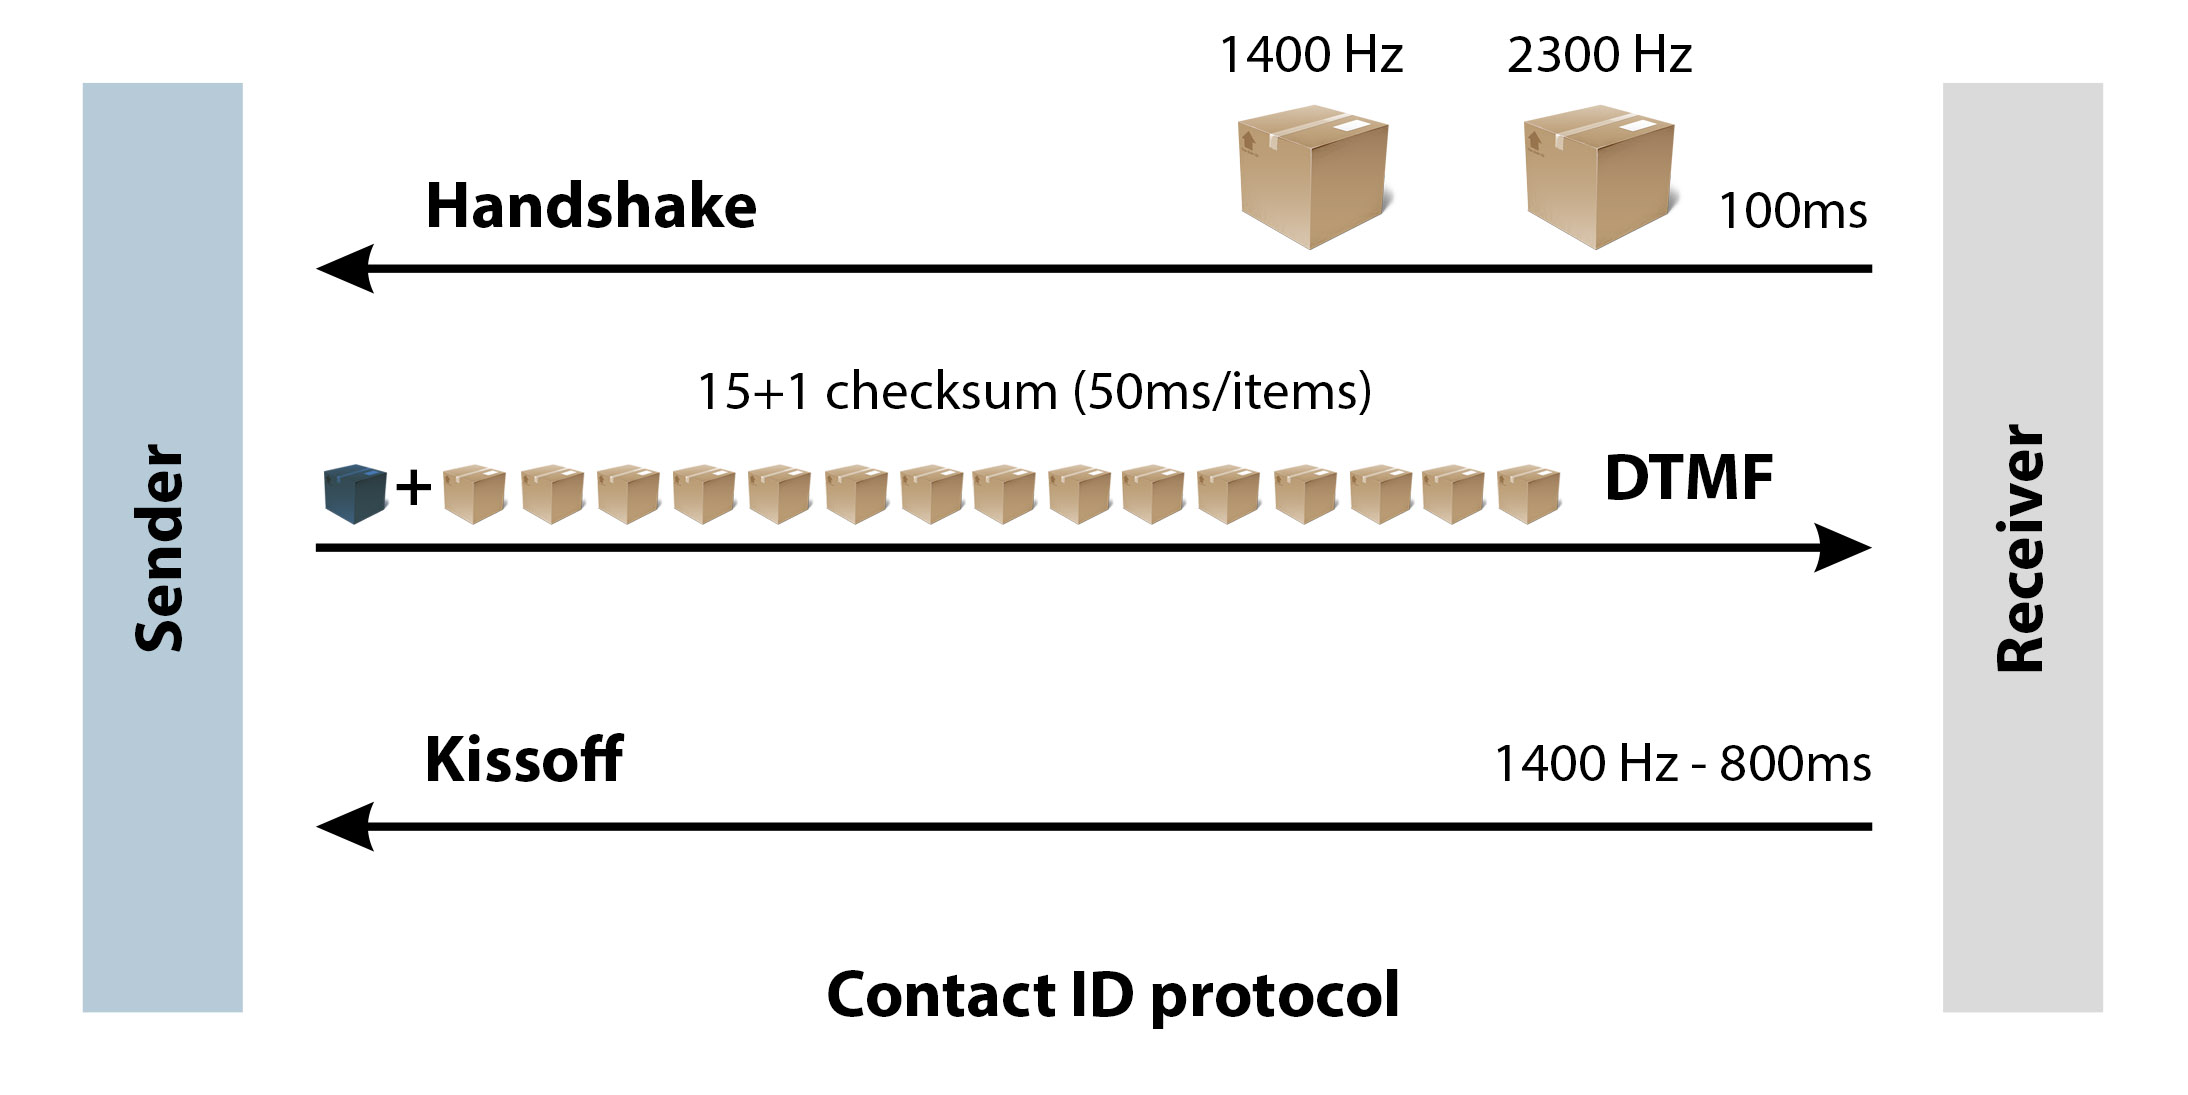
- When a dial tone is received, the alarm dials the number of the Central Station. Up until now, we were not dealing with the Contact ID protocol, but simply with the necessities of using a phone line to communicate. The Central Station then receives the call, and waits for one second, after which it sends the Contact ID handshake. The handshake is made of 100 mSec of 1400Hz pure-tone, then 100 mSec of silence, and then 100 mSec of 2300Hz pure-tone.
- 250 mSec after that, the alarm sends the Contact ID message. This message comprises 16 DTMF digits. Each digit is 50 mSec long, and they are separated with 50 mSec silence. The last digit is a check-sum digit that enables the central station to verify the integrity of the received message.
- After a successful reception of a message, the Central Station sends a kissoff signal. This is 800 mSec of 1400Hz pure-tone. If the alarm system does not receive the kissoff tone in time, it retransmits the message.
The communication process of Contact ID protocol is shown below:


Contact ID Message
The Contact ID message contains 16 digits as follows:
| 0-3 | Account number. (These four digits identify the specific alarm system or customer to the Central Station. When a Central Station with thousands of customers receives a call from an alarm system, it must be able to tell which one of the customers is calling. These four digits enable this.) |
| 4-5 | Message Type. (Basically this field should always be 18.) |
| 6 | Event Qualifier. (It refers to the type of the event: new event, new restore, status report.) |
| 7-9 | Event Code. (What kind of events have triggered the event: fire, burglary. etc.) |
| 10-11 | Group/Partition Number |
| 12-14 | Zone Number. (This is the number of the zone that triggered the alarm.) |
| 15 | Checksum. (Control value that helps in determining whether the received values are correct or not.) |
How to use the Contact ID protocol with Ozeki VoIP SIP SDK
You can send and receive alarm notifications easily with any C# application by using Ozeki VoIP SIP SDK.
When you send an alarm message, you can provide the exact message you want to send. This can be completed successfully or with an error (for example with timeout).
After the starting, in the receiving side you can see the received alarm message when everything went right. In case of any failure the system notifies you about the error (e.g. timeout, communication error), then continues to wait for the alarm message.
The detailed guides about both of the sides can be found below:
More information
- VoIP service providers
- How to capture network traffic with Wireshark
- SDK exception codes
- Ademco Contact ID protocol introduction

