How to build an Android VoIP client
 |
Download: | mobile-web-voice.zip |
 |
Download: | mobile-web-video.zip |
 |
Download: | softphone-mobile-sip-calls.zip |
Ozeki VoIP SIP SDK provides all the background for mobile platform and VoIP integration. This article is a brief introduction about creating an Android VoIP client using the remarkable support of Ozeki VoIP SIP SDK. After reading through this page you will be fully familiar with all the essential terms concerning Android VoIP SIP tecnology and what you will need for creating your own Android VoIP client using Ozeki VoIP SIP SDK.
Android VoIP client
Google Android is today one of the most widespread mobile operating systems among users. It can be found on cell phones and tablet PC devices, too. These mobile devices are used not only for the traditional telephoning purposes nowadays but all are capable of Internet connection and some of them also have mobile Internet subscription.

When the Internet connection is an option, VoIP technology comes in quickly as an alternative for communication purposes. VoIP is reliable, more flexible, serves more purposes and at last but not least it is cheaper than using the mobile or PSTN network for telephoning.
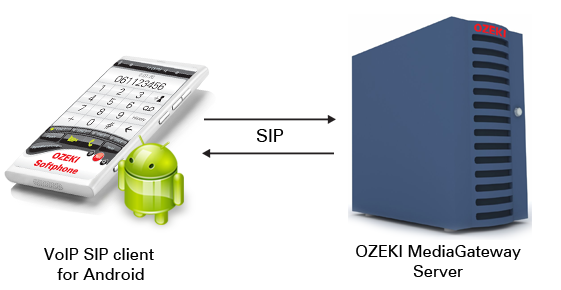
Android mobile devices have support for the Adobe Air environment that can be used for building VoIP client applications with Ozeki VoIP SIP SDK (Figure 1). These solutions can be made as easily as any other desktop applications, you only need to use a slightly different programming environment and tools.
With Ozeki VoIP SIP SDK and Adobe Flash Builder you can create your own VoIP SIP Android application with standard programming techniques. You can upload these applications onto your smart phone or tablet and use them for communication.
The following code explanation covers the basic changes in the Flash webphone program codes. You will notice that the source code is very similar to the Flash webphone solutions. Therefore if you have studied those codes, this will be easy to understand and the other parts of the example programs will be familiar.
The server code of the VoIP SIP Android mobile examples is the very same as in the case of the webphone examples, therefore this article does not contain explanation for those. If you want to check the server code, please visit the following pages:
The above mentioned pages also cover a detailed explanation of the client-side implementations. The following section will introduce the code snippets that are new in the Android VoIP client applications. These are basically the ones that handle the physical buttons and the rotation features of the mobile devices.
When creating a mobile application, you need to use the File->New->Flex Mobile Project option and set the project name, the target platform (Android, iPhone or BlackBerry)
The following program code (Code 1) shows how you can handle the physical buttons of a mobile device. These instructions should be placed in the creationComplete handler of the application.
if(Capabilities.cpuArchitecture=="ARM")
{
        NativeApplication.nativeApplication.addEventListener(Event.ACTIVATE, handleActivate, false, 0, true);
        NativeApplication.nativeApplication.addEventListener(Event.DEACTIVATE, handleDeactivate, false, 0, true);
        NativeApplication.nativeApplication.addEventListener(KeyboardEvent.KEY_DOWN, handleKeys, false, 0, true);
}
In Code 2 the event handler functions for handling buttons are listed. You can see that there is no difficulty to handle these buttons within the Adobe Flash code.
private function handleActivate(event:Event):void
{
        NativeApplication.nativeApplication.systemIdleMode = SystemIdleMode.KEEP_AWAKE;
}

private function handleDeactivate(event:Event):void
{
        NativeApplication.nativeApplication.exit();
}

private function handleKeys(event:KeyboardEvent):void
{
        if(event.keyCode == Keyboard.BACK)
                NativeApplication.nativeApplication.exit();
}
You can distinguish between the horizontal and vertical layout of the mobile devices, too. If the layout needs to be rearranged when the device is rotated, you can do that by defining states in your application and change these states when the device is rotated (Code 3).
private function StageOrientationChange(soce:StageOrientationEvent):void
{
        if(soce.afterOrientation=="default" || soce.afterOrientation=="upsideDown")
        {
                this.currentState="Vertical";
        } else
        {
                this.currentState="Horizontal";
        }
}
You need to subscribe for the orientation change event in the creationComplete event handler, too. Code 4 shows how you can do this.
this.currentState="Vertical";
systemManager.stage.addEventListener(StageOrientationEvent.ORIENTATION_CHANGE,StageOrientationChange);
Basically these were the functions and instructions that are needed to add in the mobile code but above these the program is the same as the web solutions.
When the programming state is over, you can easily save the code in the proper file format by using the File->Export menu option where you can specify target platform and for example get an .apk file for the Android devices.
Summary
This article introduced you how to make Android VoIP client solutions and showed how Ozeki VoIP SIP SDK can help you to fulfill your goals. If you have read through this page carefully, you already have all the knowledge you need to start your own solution.
As you are now familiar with all the terms concerning this topic, now it is time to take a step further and explore what other extraordinary solution Ozeki VoIP SIP SDK can provide to you.
